Echo360 Browser Capture
Browser Capture can be used to record and edit video content from your computer in a browser window. These screen capture videos can then be made available to students easily in the LMS.
Chrome is the recommended browser for Echo360 Browser Capture. Some features may not be available with other browsers.
Log in to Echo360
First, go to the Echo360 homepage and log in with your University of Melbourne credentials. Important: Use your username@unimelb.edu.au email address when logging into Echo360

Click on Create to see a drop-down menu showing the options for creating or uploading new videos.
Clicking on New Browser Capture opens a new tab where you’ll be asked to allow Echo360 to use your camera and microphone. Click Allow.

The Browser Capture interface

A preview of the camera view sits next to a menu with your recording options and controls.
Step 1: Prepare your recording
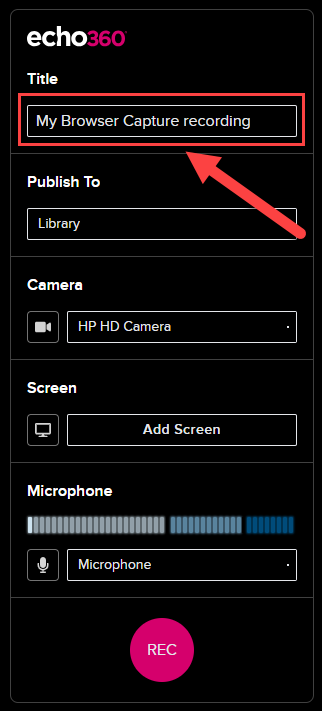
- The title of the video will default to the start date and time of the recording. To rename this to something more meaningful to you and your students, simply type your preferred title into the Title textbox.
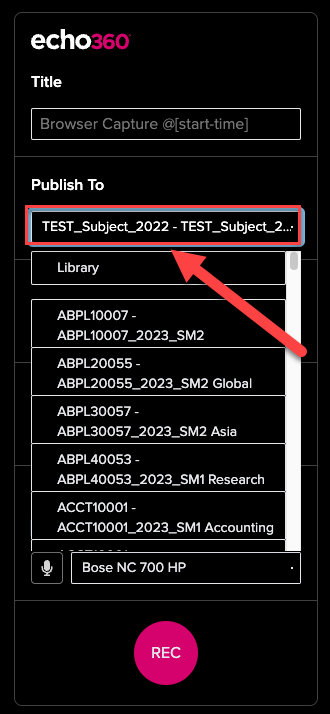
- If you want your video to appear on the Lecture Capture page of your subject, click on the Publish To option and choose the subject you want to share to from the drop-down menu that appears. Your options will be subjects in which you are an instructor or subject coordinator.
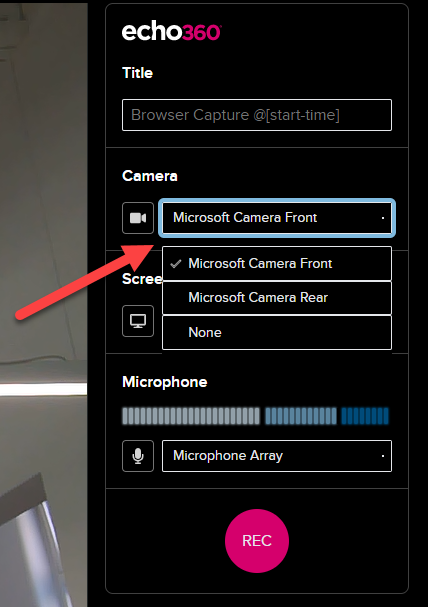
- If you have more than one camera, clicking on the camera name will reveal a drop-down menu with all your camera options for recording.
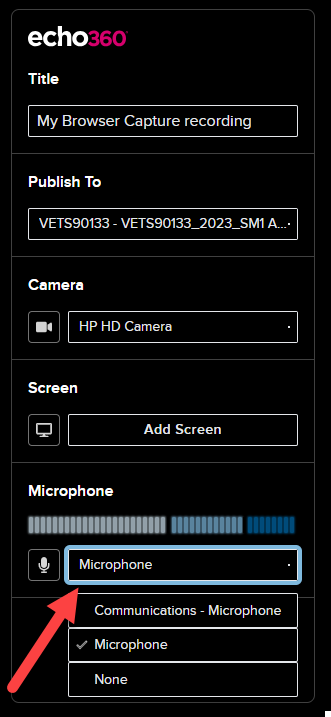
- Similarly, you can choose your microphone from a drop-down menu by clicking on Microphone Array.
- If you want to record your screen as well as your camera, click on Add Screen.
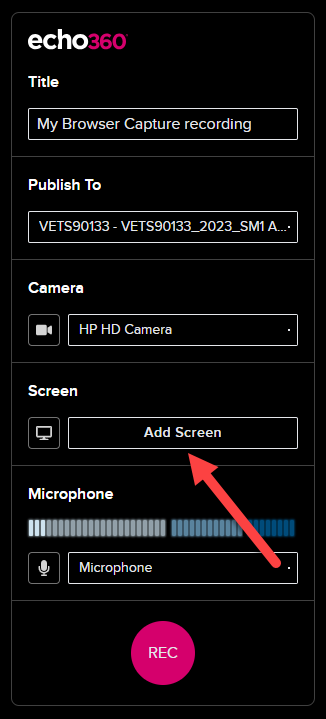
- A pop up will provide a range of options. Tabs across the top give you options to record a whole screen, a window or a browser tab.

- Clicking on the one you want to record will create a new view in your preview window, with the chosen screen next to your camera view.

Step 2: Start the recording
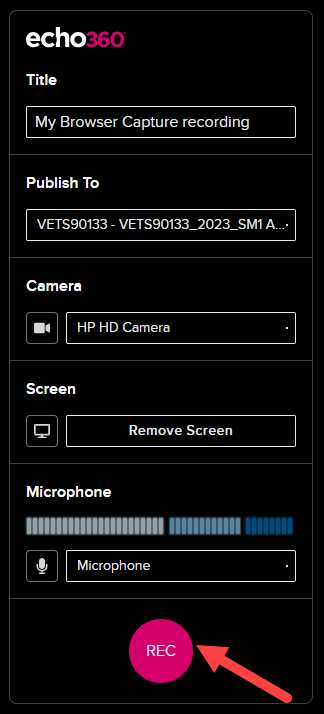
- Click on the red REC button. A three-second countdown timer will display, and then the recording will begin.
Step 3: Control the recording
Once the recording has begun, the right-hand menu will be replaced with options to Stop, Pause or Cancel the recording.
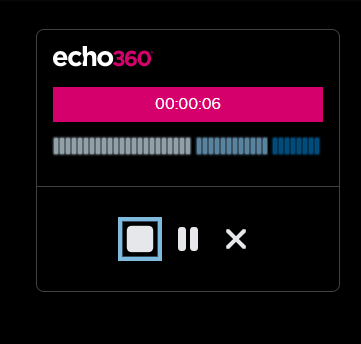
- Clicking Stop will finish the recording and begin processing it and uploading it to your Echo360 library
- Clicking Cancel will stop the recording and permanently discard anything recorded to that point
Step 4: Reviewing, editing and downloading the recording
Once the recording has stopped, you will see a preview of the recording with a blue play button for you to view it.

- Click on the blue play button to watch your recording
- Click Start Another Recording to go back to the recording interface
- Click Download to see your download options. At this stage, you can download the recording as separate .webm files for the screen and the camera captures

Once the recording has finished uploading, you will be able to see it in your Echo360 library.

From here recordings can be edited, shared and added to subjects. See our Lecture Capture staff guides for more information.
This guide was last updated 29 Feb 2024.
Please report any errors or omissions in this guide by submitting an LMS support request.