Getting started with Stackle
Stackle is a journalling tool that enables structured reflective writing tasks in the LMS. This guide shows how to connect your LMS subject to Stackle for the first time, create an activity, and add it to a Canvas LMS page.
Stackle activities can be created in any subject or community in the LMS. To use Stackle you will need to:
- Link your subject to Stackle
- Create activities
- Link or embed the Stackle activities into a Canvas Page, Module, or Assignment.
Link your LMS subject to Stackle
To link your subject follow the following steps:
- Open a Canvas page and click the Edit button.
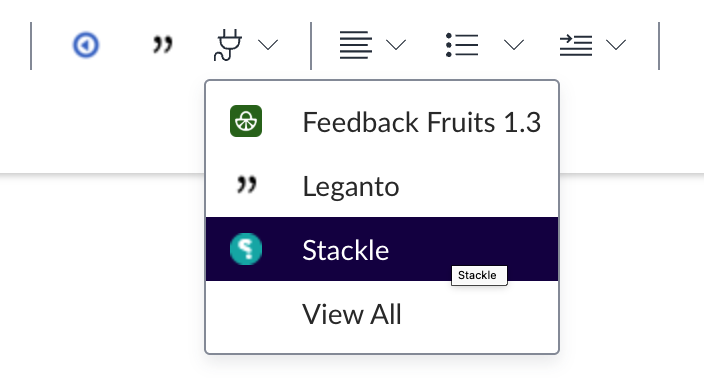
- Click the apps button in the rich content editor and select Stackle.
- You will be prompted to connect your subject to a course in Stackle, either by creating a new one, or searching for an existing course.
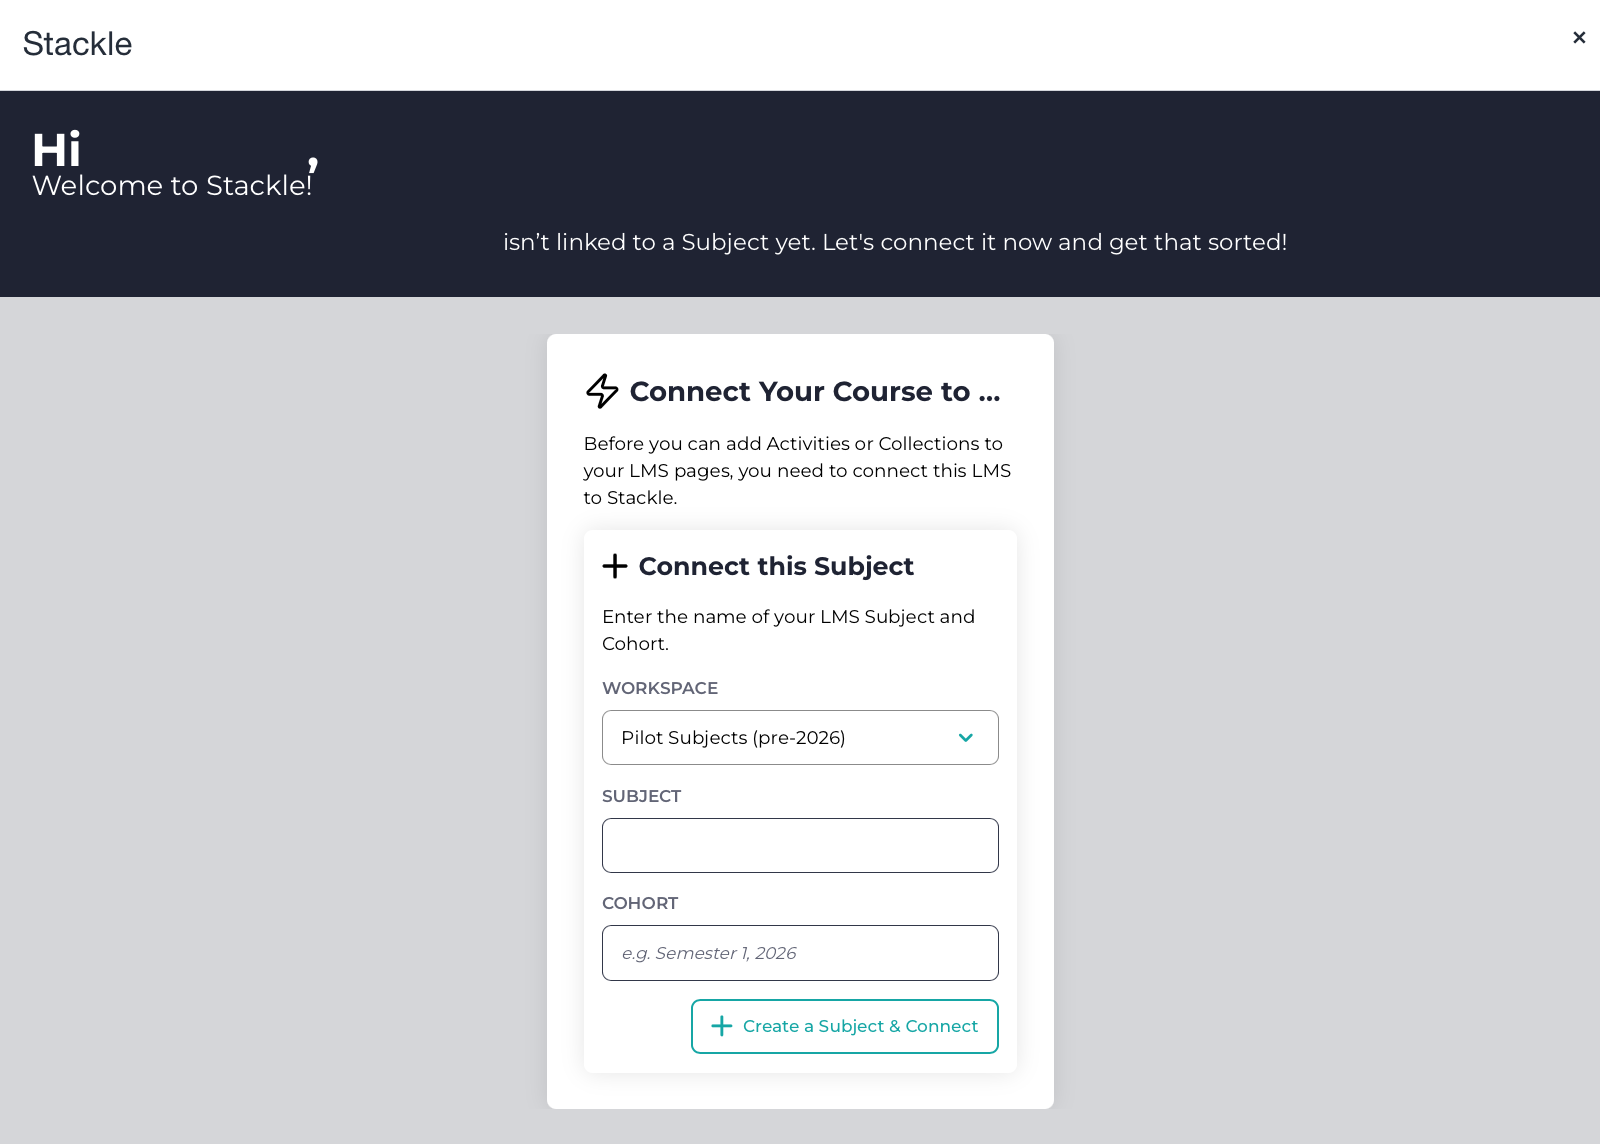
- To create, and connect to, a new course:
- Leave the Workspace option as the default: University of Melbourne Stackle
- The name of your Canvas subject will pre-populate in the Subject text box. You may wish to edit this, or leave it as it is.
- For the Cohort, add a descriptor that will differentiate this subject offering from others, for example, Semester 1, 2026.
- Click on the button Create a Subject & Connect. This will create a new subject shell in Stackle linked to your LMS subject. You can create a Stackle subject for multiple cohorts.
Creating an activity in Stackle
- After creating your new subject in Stackle, you will be taken to the subject homepage. This page allows you to create activities to embed in the LMS.
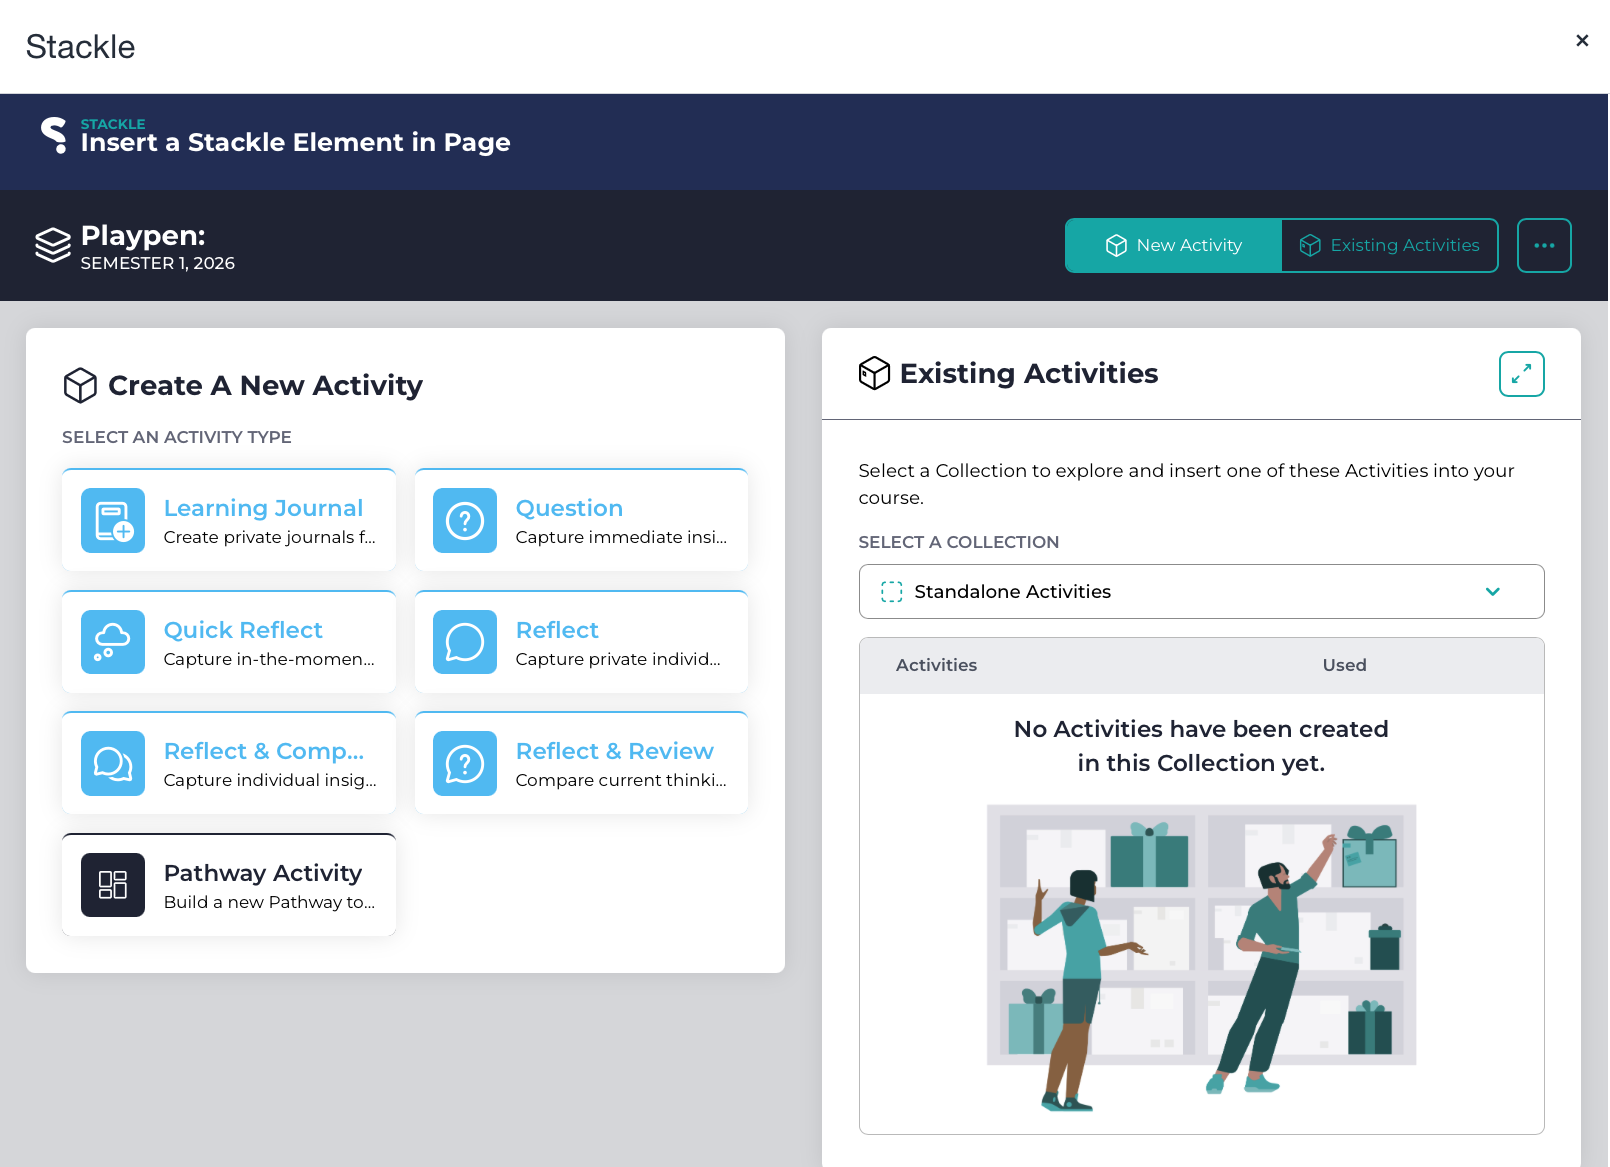
- To start, click on one of the activity types under Create A New Activity. A pop up window will appear with a description about the activity and offer two options, to create a single activity or multiple activities.
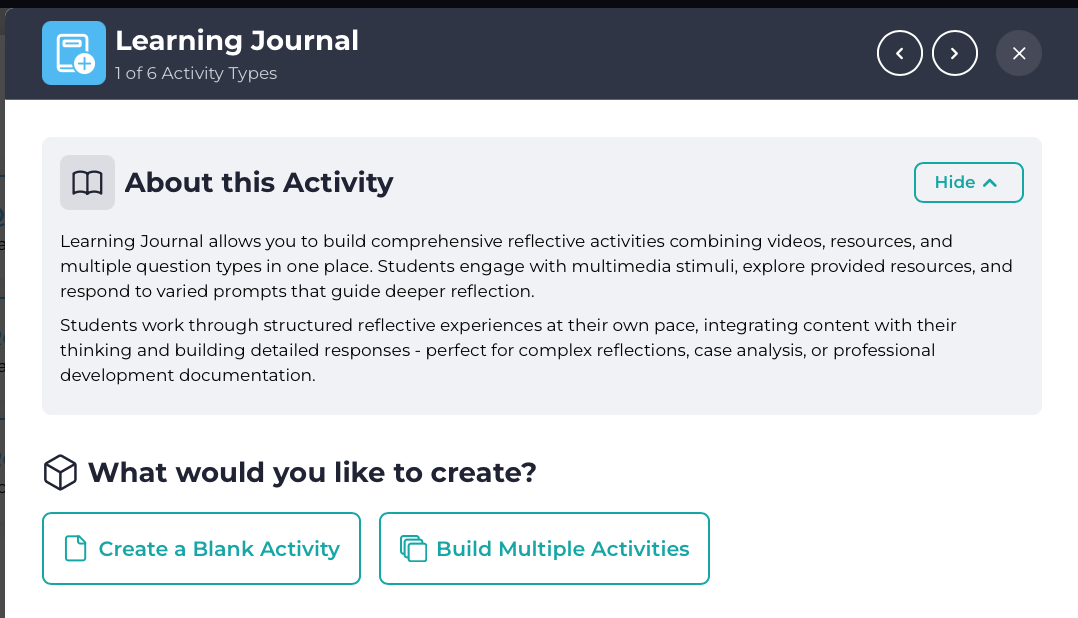
- To create a one-off activity, click on Create a Blank Activity. You’ll be prompted to give the activity a title, then click on + Create. For guidance on the process of creating multiple activities see creating a Learning Journal with Stackle.
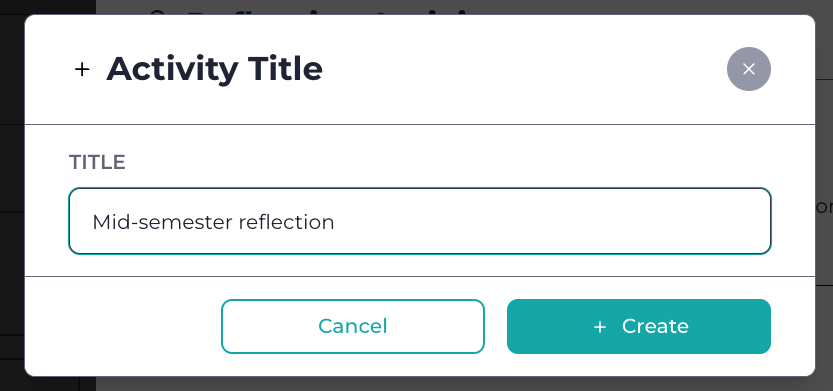
- The pop up window will disappear and the blank activity you just created will now be sitting in the Existing Activities section on the Stackle subject home page.
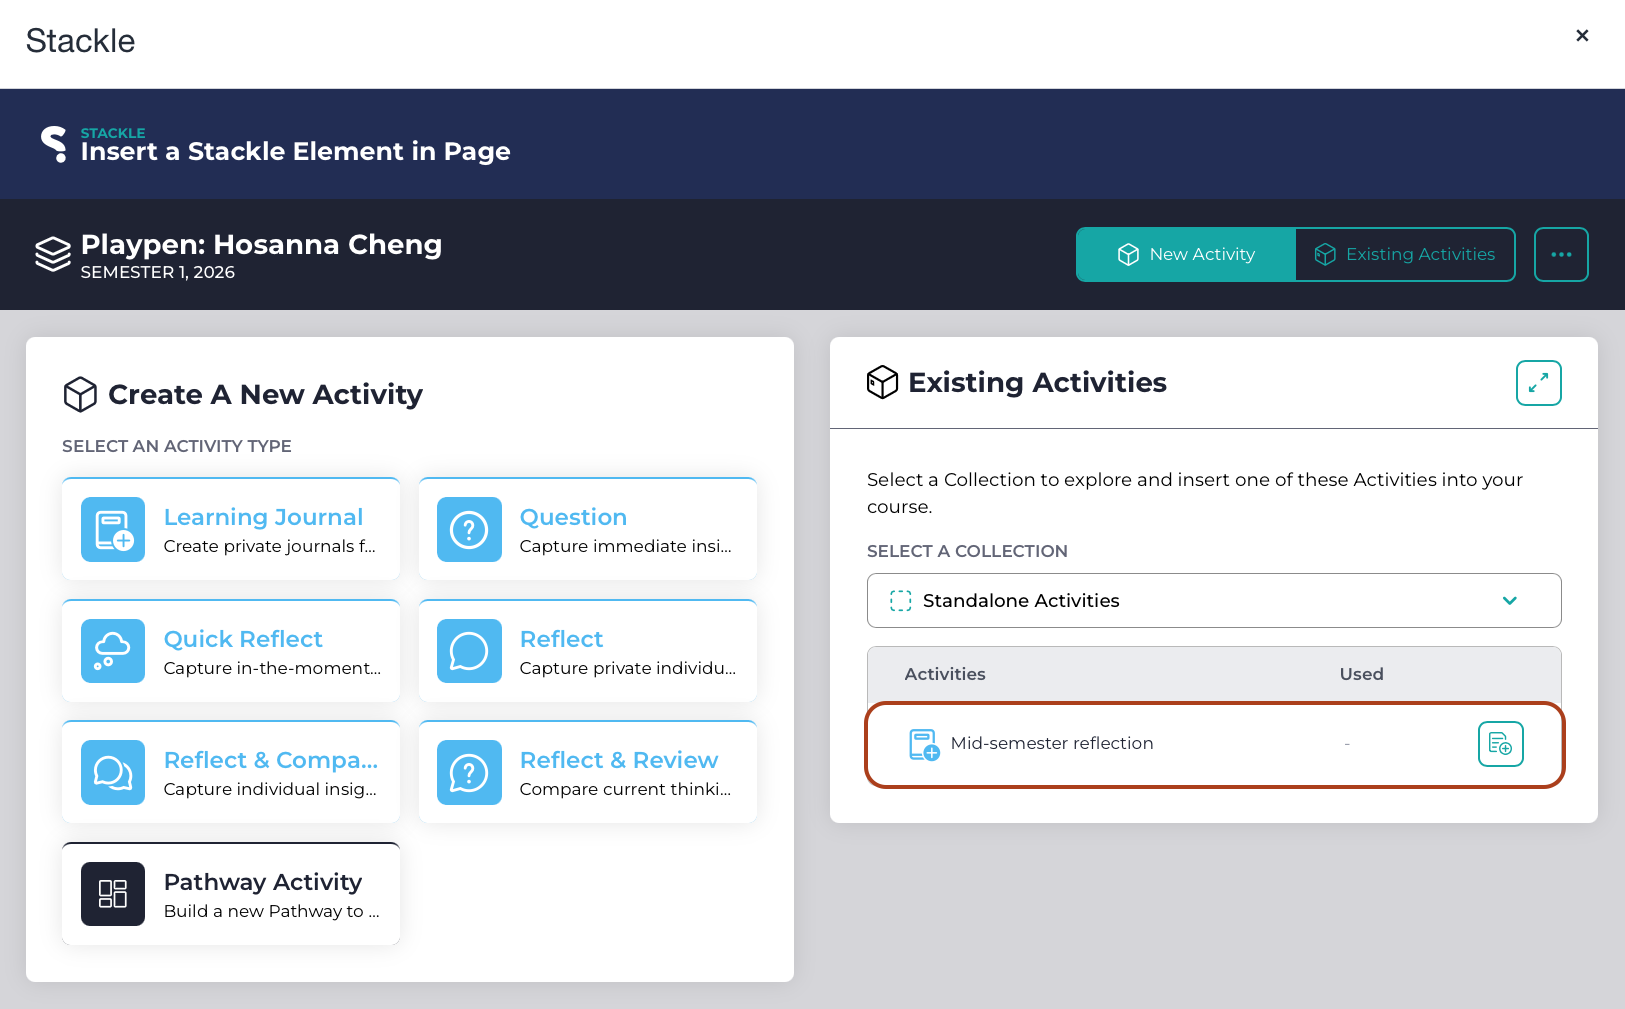
- Use the button on this row to add the activity to your Page. At this stage, the activity will be added as a blank placeholder. Click Save.
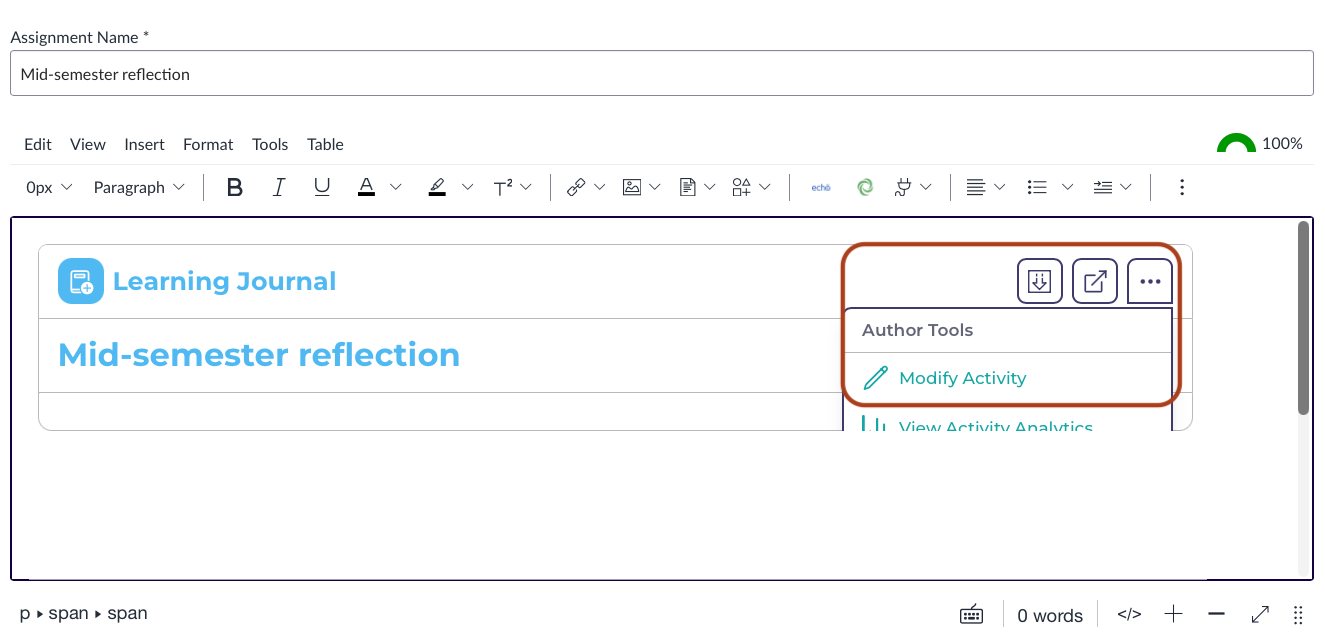
- In the LMS page, click on the three-dot menu in the top right-hand corner of the Stackle activity, then choose Modify Activity.
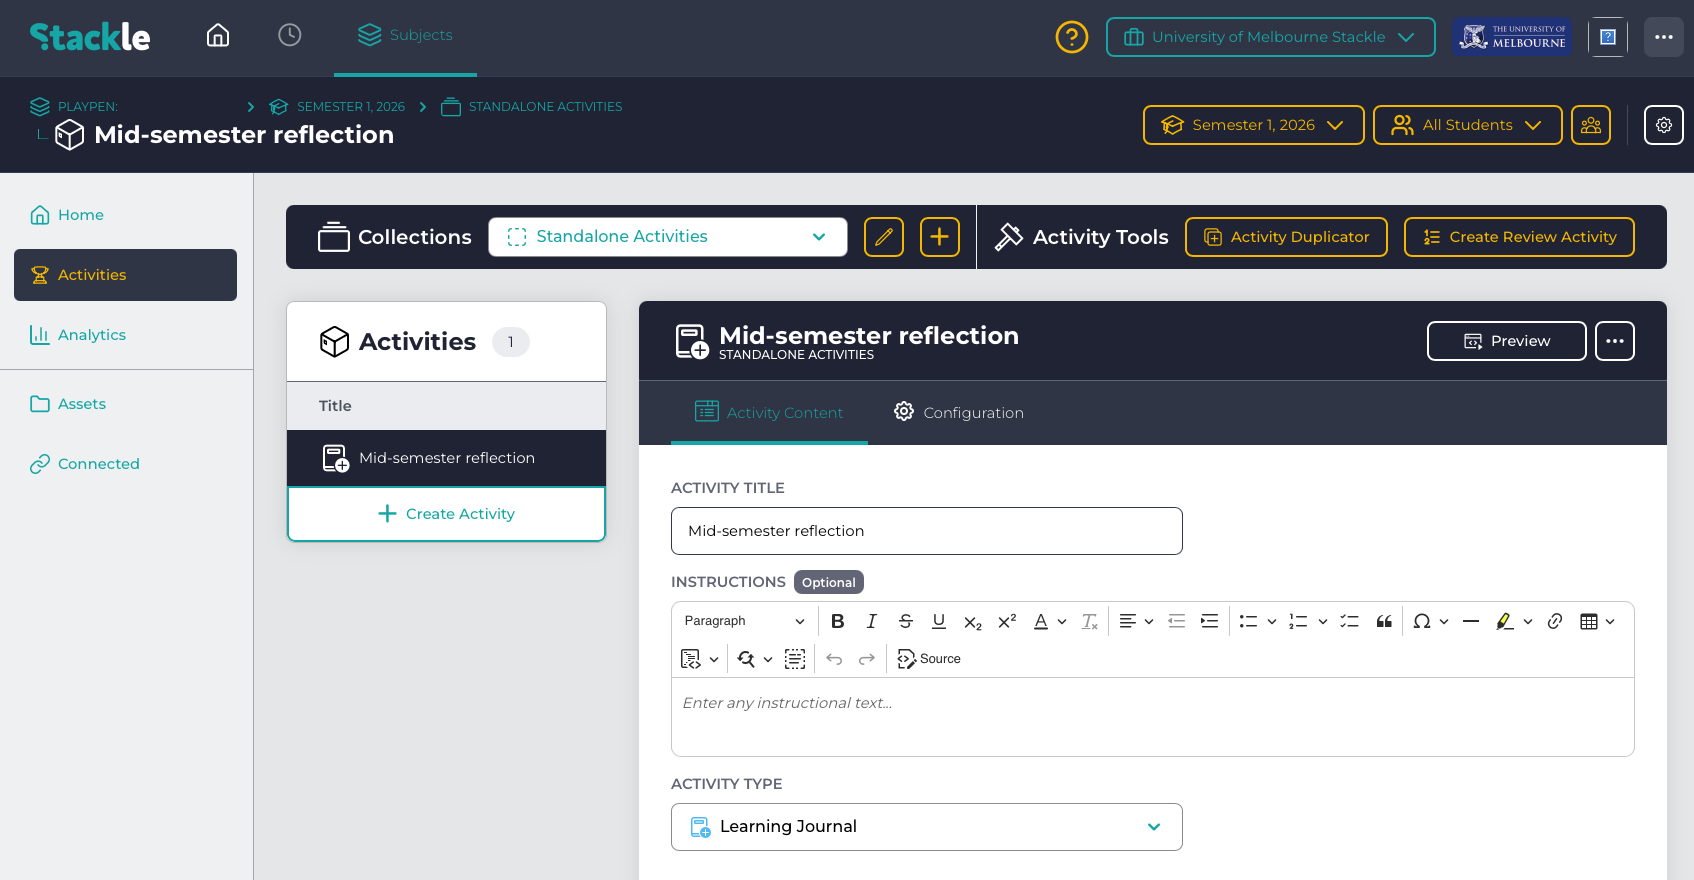
- A new browser tab will open to the Stackle Activity Editor page for this activity. This is where you can edit the title and add instructions for students.
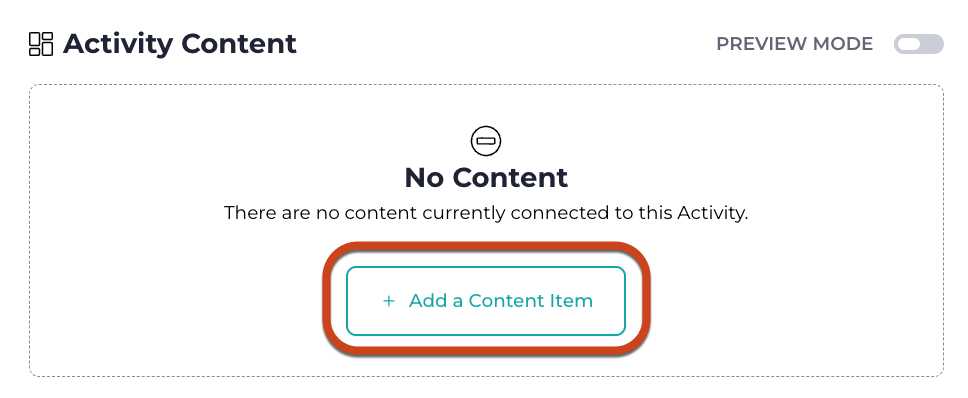
- Scrolling down the page, you’ll find the Activity Content section. Click on + Add a Content Item.
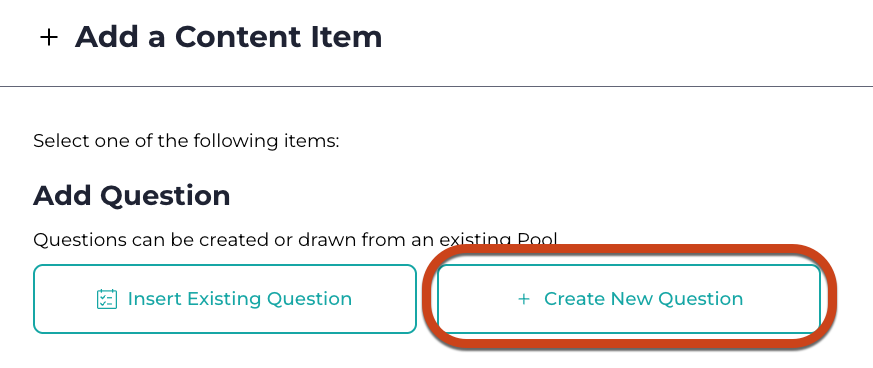
- A pop up window will give you options for adding content, including questions, images, and media embeds. For this example, I’ll choose + Create a New Question.
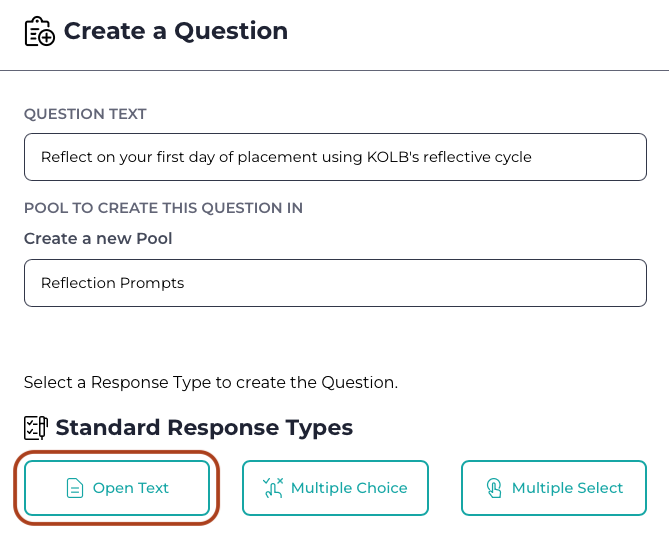
- Another window will pop up. Enter your question or reflection prompt in the Question Text box.
- Stackle will put the question into a question pool so that you can use them again in future. Give your new question pool a name that is meaningful for you. In this example, I’ve used ‘Reflection Prompts’. If you have pre-existing question pools in Stackle, you can choose which one to use from the drop-down list.
- Next, choose a response type. For this example we’ll use Open Text.
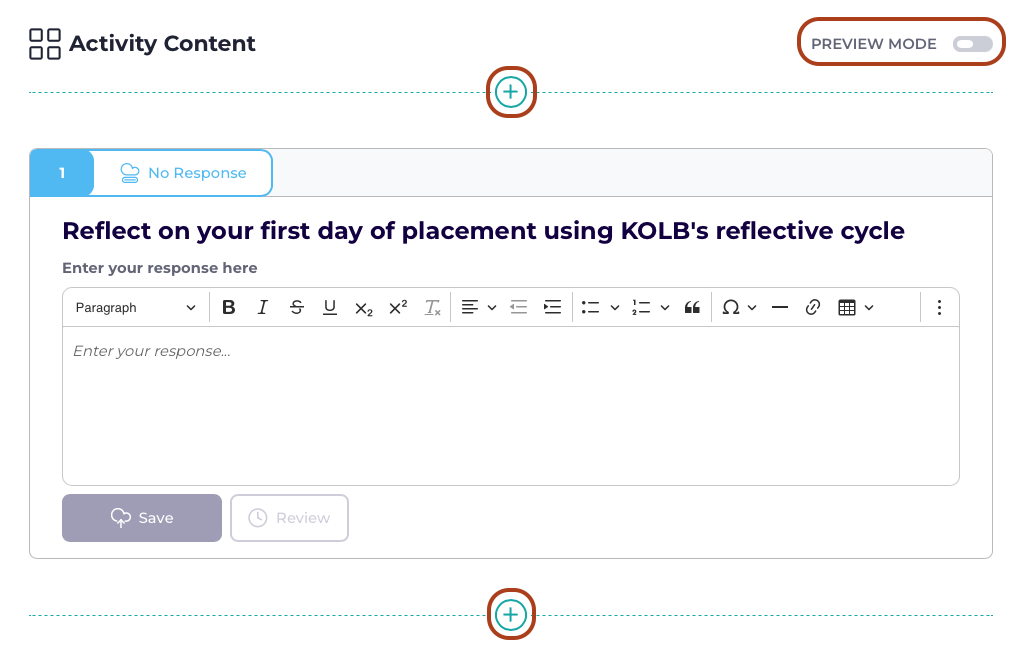
- The modal will close, showing you the question in the Activity editing page. If you wish to add additional text, images or embedded video, click one of the + buttons above or below your question.
- Also note that there is a toggle button at the top right called Preview Mode that allows you to view the activity as the students will see it.
Note: Your changes save automatically when you click into a different area on the page.
- Once you’re happy with your activity, go back to the LMS tab in your browser and refresh the page. You’ll see an updated version of the Stackle activity with your question and any other elements you’ve added.
Note: While logged into the LMS you will see the teacher view of the activity. You need to use Preview Mode to see the activity as the student will see it.
- If you wish to edit your Stackle activity further, click back into the Stackle tab in your browser and continue to modify the activity until it’s to your liking.
Viewing student responses in Stackle
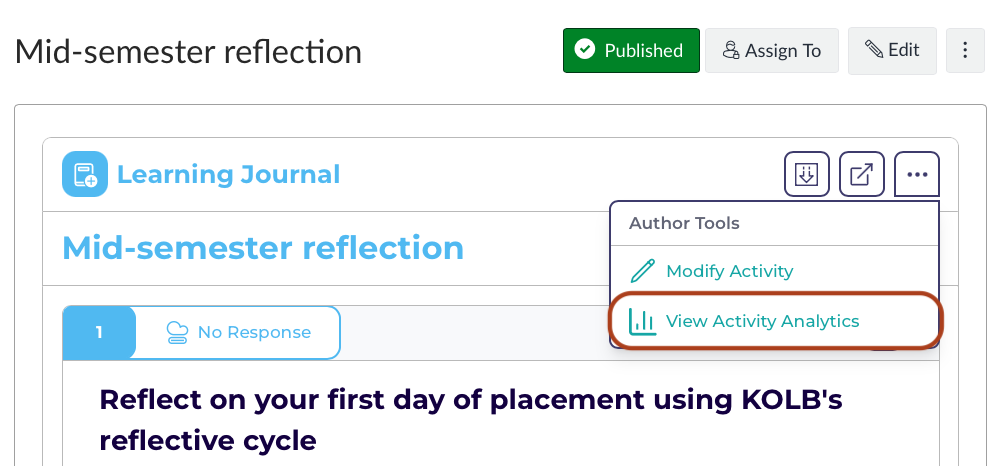
- To view your students' submitted responses, go to the 3-dot menu at the top right of the embedded Stackle activity and click on View Activity Analytics.
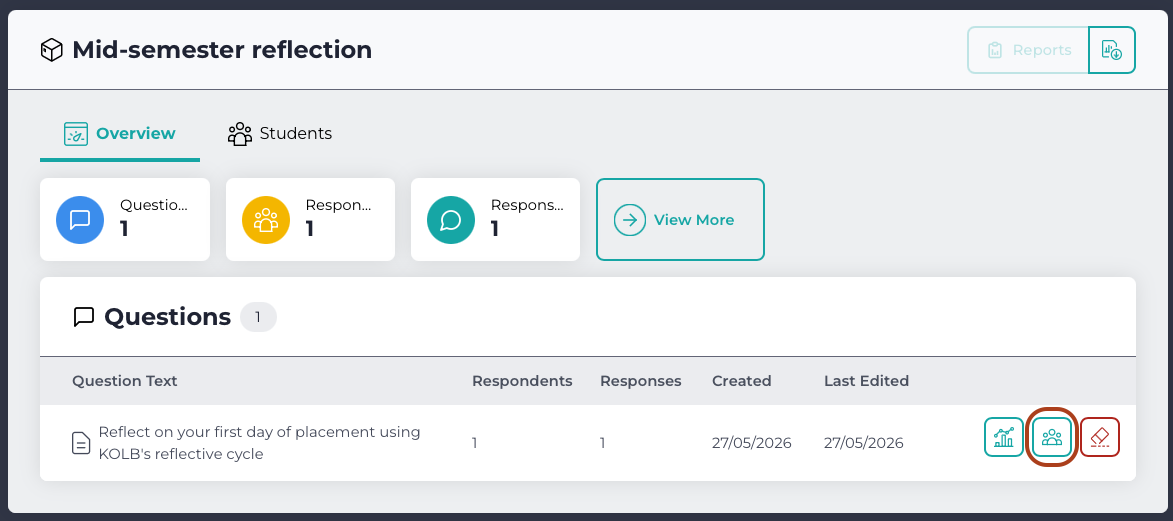
- A new browser tab will open at the Analytics Overview page for the Activity where you can see a summary of responses to the question/s in the activity. Click on the Questions Students button to see the content of the students' responses.
- This will bring you to a table with the full text of students' responses.
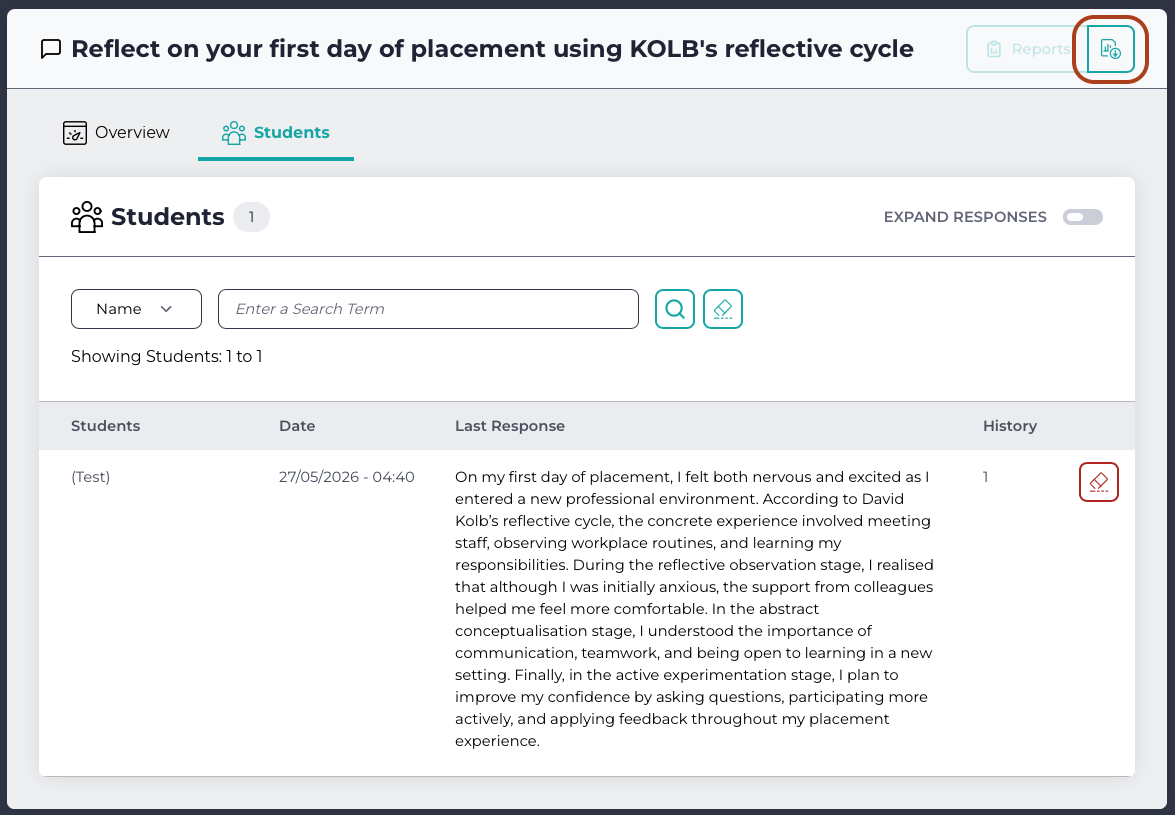
Note: there is a Create Report button in the top right hand corner. Clicking this button will begin the process of generating an Excel file with all the students' responses. When the report is ready it will be downloadable here. You will also receive an email notification that the report is ready with a download link.
Useful links
This guide was last updated 22 Jun 2026.
Submit an LMS support request for further assistance or to report any errors or omissions in this guide.