Creating appointments with the Calendar
The Calendar offers staff the option to create appointments that students in their subject or section can reserve for catch-ups, consultations, or assessments.
Creating an appointment
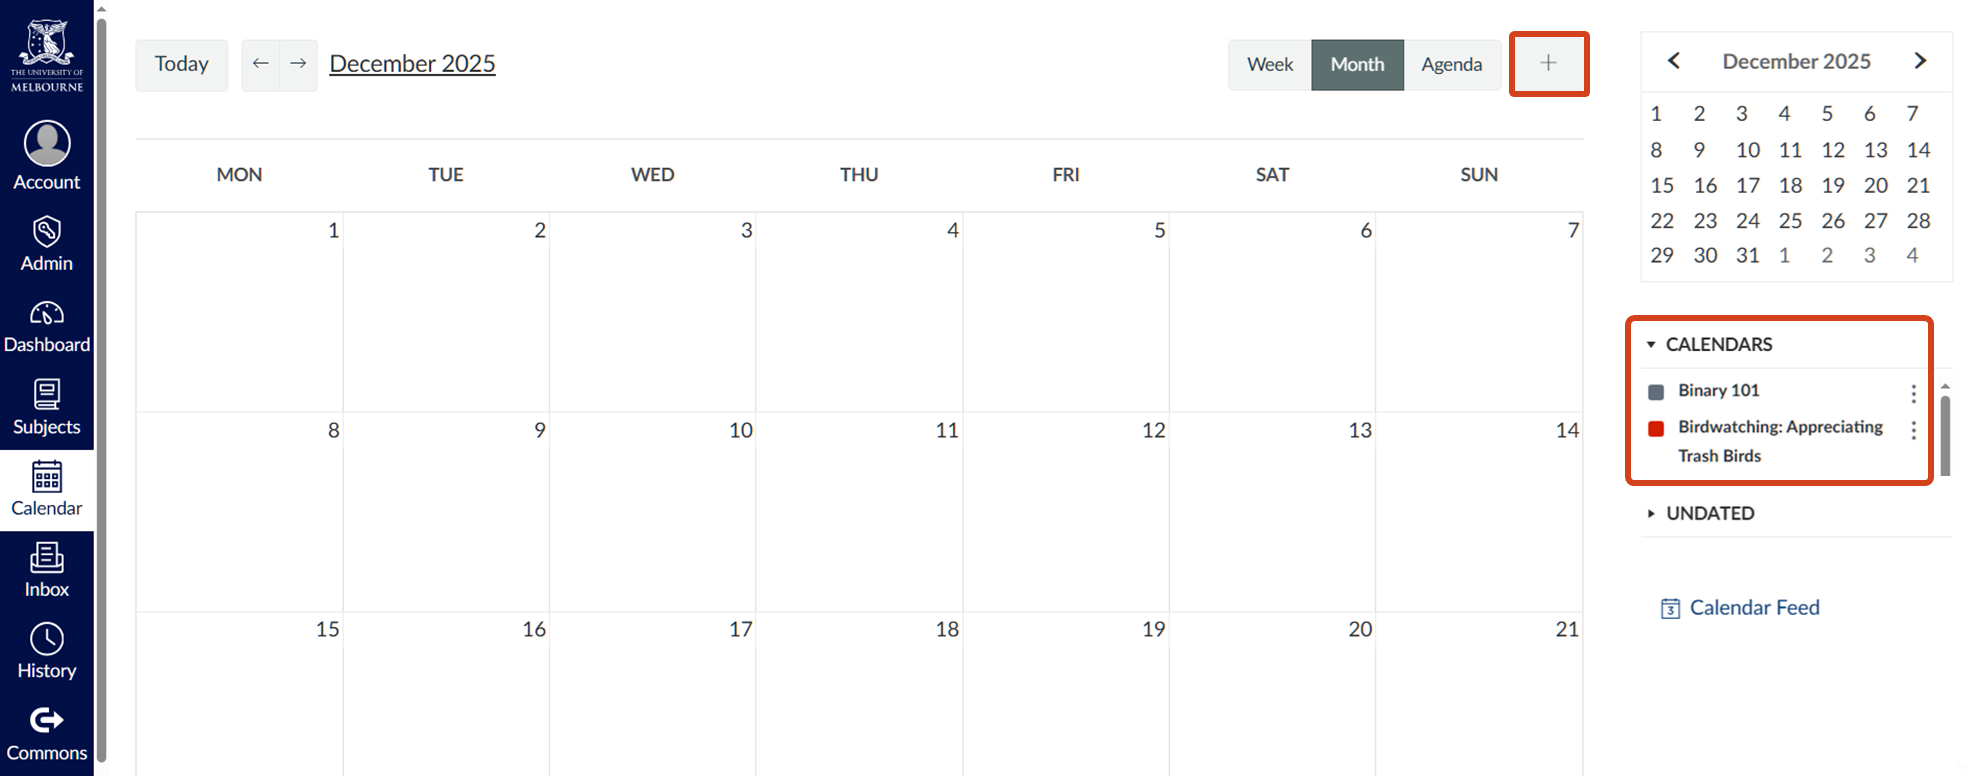
- In the LMS, navigate to the Calendar on the left-hand navigation menu and click on the add icon (+) to Create New Event. Note that only calendars checked on the right will appear when creating appointments.
- In the new pop-up window, select the Appointment Group tab.
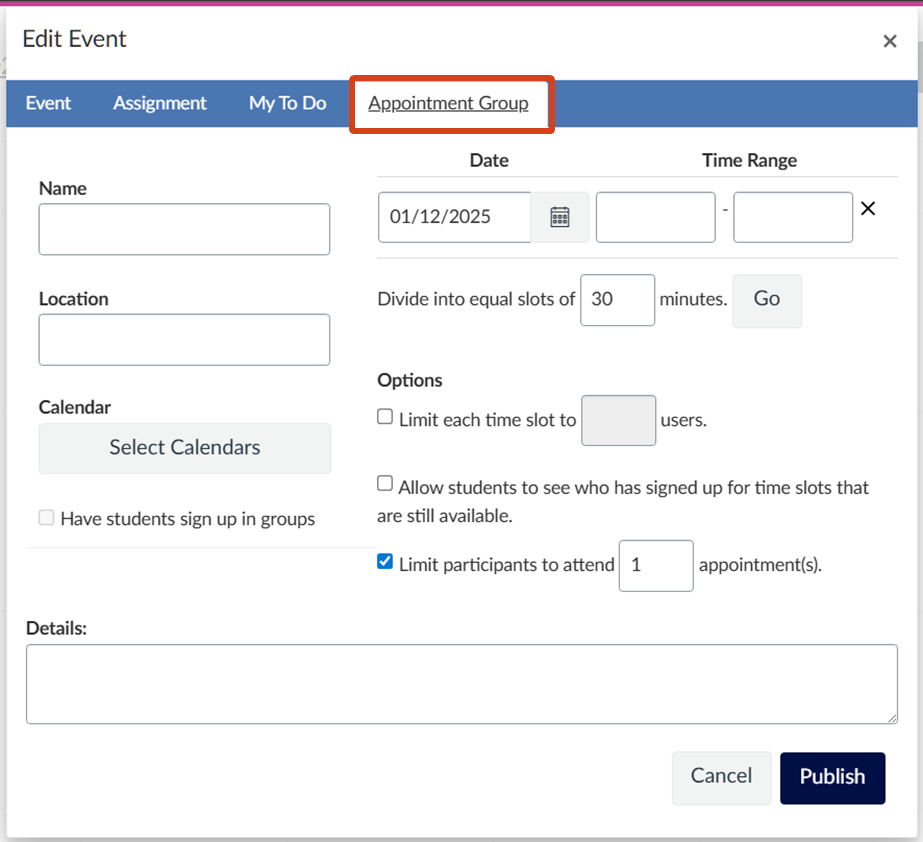
- Enter the name of the appointment series, and a location as applicable.
- Name: We recommend that for required or assessed tasks, you include the subject code at the beginning of the name. This supports students to see these easily within their calendars (as calendar items for all subjects may appear in the one collated view by default).
- Location: The location field only accepts short text-based responses. You will not be able to add long lines of text or web links to this field.
- Under Calendar, select at least one calendar. You can also use the drop-down arrow to select a specific section within the subject. Only students enrolled in the selected subject or section will be able to view and reserve an appointment.

- Next, select a date, designate a time range and configure how long you would like each appointment to run for (e.g. 30 minutes). Click Go to automatically create the appointment slots. Unpublished slots can be manually deleted as needed.
Example: If the selected time-range is 9:00am to 10:00am, and you have selected Divide into equal slots of [15] minutes, clicking Go will auto-create the following appointment times:
- 9:00am-9:15am
- 9:15am-9:30am
- 9:30am-9:45am
- 9:45am-10:00am
- Configure the optional fields:
- Have students sign up in groups: If groups have been set-up in the subject, you can check this box so that one member of the group can select an appointment time on behalf of the group. This setting cannot be changed after the appointments have been published. Note that you will need to select the specific Group Category/Set.
- Limit each time slot to [#] users: Checking and entering a value for this option will disallow more than [#] of students from being able to reserve the same slot. If group sign-up has been enabled, only the set [#] of groups will be able to reserve the same slot.
- Allow students to see who has signed up for time slots that are still available: If more than one student/group can reserve the same appointment, checking this box will allow students to see which students have reserved the appointment.
Note: For virtual office hours/small group sessions, it is recommended to check this option. For assessment appointment slots (e.g. Interactive Oral Assessments), you should leave this box unchecked for student privacy reasons. - Limit participants to attend [#] appointments: Checking and entering a value for this option will disallow students from booking more than the specified number of appointments. Attempting to do so will prompt the student to adjust their existing reservation to the new selected slot.
- Add Details: Further instructions about the appointment can be added to this field. We encourage you to include a brief description of the purpose and expectations of the appointment. Links to additional resources or meetings can also be added here.
- Review the settings, and click Publish.
Managing appointments
Once published, appointments will appear under the Subject Calendar with the option to modify the Group Details as well as Delete or Edit individual slots.
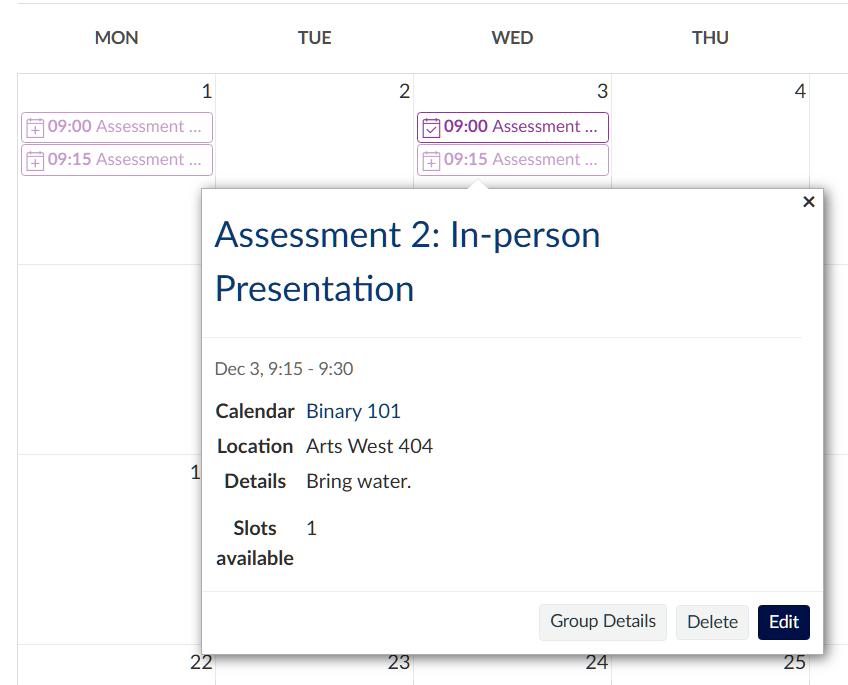
By selecting Group Details, you can add additional appointment slots, adjust details and options, as well as view and message students based on whether they have signed-up for an appointment:
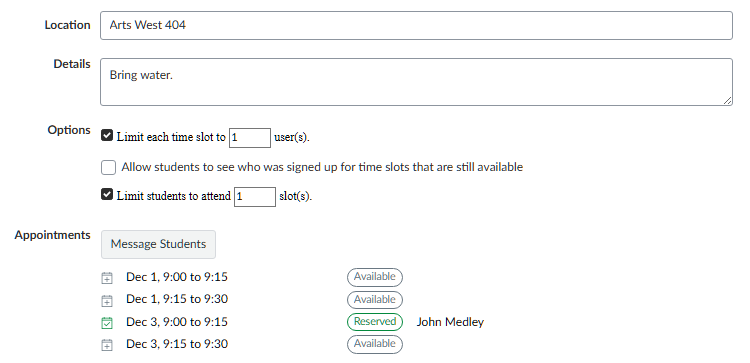
Once an appointment has been reserved by a student/group, it will also appear in the Calendar with the attendee's details and any comments they have made:

Students are not notified when appointments are created, modified, or deleted so it is imperative that you follow up any changes to appointments by directly communicating with the affected students and providing them with instructions on next steps.
Considerations
- Staff can create appointment slots that are only open to students in specific tutorials by selecting a corresponding section when choosing a calendar.
- Staff are currently unable to book appointments, or reschedule reserved appointments, on behalf of students. Reserved appointments, however, can be deleted by instructors.
- Staff should populate the details field with relevant information related to the session (e.g. appointment instructions, meeting invite links). Likewise, when reserving an appointment, students can use the comments field to note their student details, tutorial, or purpose/topic of appointment. Note that staff are not notified when comments are left by students so we encourage that reserved appointments are reviewed prior to the appointment.
How students reserve appointments
Once appointments have been created, students will be able to select Find Appointment in their calendar to view and reserve available slots.

Selecting an open slot will allow students to reserve the appointment as well as leave comments.

Additionally, when students select a reserved appointment they will see their own comments as well as the option to Un-reserve. If group sign-up has been enabled, students will be able to see comments left by the group member who made the reservation.
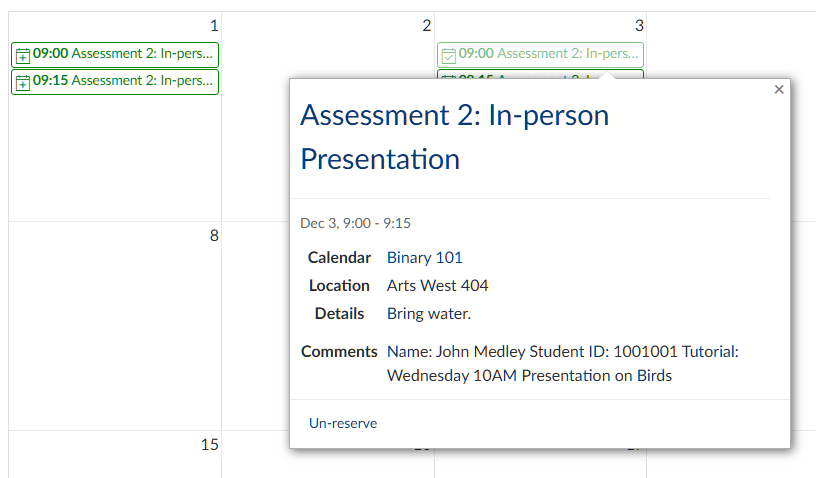
Note: Students who book appointments as part of a group will not see the booking on their subject calendar once it’s confirmed. To view the appointment, scroll down your list of calendars, find your Group name, and tick the checkbox next to it. Once the group calendar is selected, the appointment will appear.
For more information on guiding students, see the vendor guide on reserving appointments.
Support
Submit an LMS support request for further assistance or to report any errors or omissions in this guide.
This guide was last updated 09 Oct 2025.
Submit an LMS support request for further assistance or to report any errors or omissions in this guide.