Getting started with Padlet
Padlet is an online tool that supports virtual brainstorming, collation and collaboration activities. This guide provides you with specific instructions on how to access and use Padlet at the University of Melbourne.
Tips for effective use
- Create separate Padlet walls for each seminar/tutorial Group.
- Consider separate Padlet walls for each table / group within the Seminar/Tutorial Group.
- Remake (clone) existing Padlet walls to save time.
- Make use of folders on your dashboard to organise Padlets.
- Develop consistent naming convention for folders (e.g. SM1 2021) for Padlet wall titles and URLs to make the identification for Padlets easier (e.g. WEEK7_Thurs11am_group1).
Note: As per example, use underscores not spaces for addresses - For use in the entire cohort, customise the address URL to incorporate the focus of the activity / question.
Padlet account set up and access
Padlet is an online tool that can be accessed via a web browser. There is also an app version available for use on mobile/table devices.
The University of Melbourne has a Padlet license (Backpack) for teaching staff. This paid license allows for unlimited Padlet wall creation and posts, compared to the free (Basic) version which only supports creating 3 Padlet walls. The only restriction to our license is a 250MB file upload limit per individual post, with unlimited posts.
Teaching staff who don’t have a University of Melbourne Padlet account yet, please use the Microsoft Single Sign On Login feature to get started.
- Go to unimelb.Padlet.org
- Click Log in with Microsoft
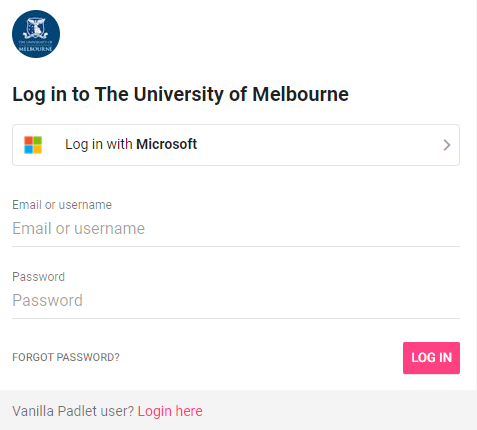
- Enter your University of Melbourne email address. This will take you to the University of Melbourne SSO page.
- Sign in with your University of Melbourne credentials.
- If requested, click Accept to enable permissions.
If you were previously setup manually with a University of Melbourne Padlet account (e.g. Faculty of Arts), you can continue to use your issued credentials to sign in from the main login page, by entering your staff username and Padlet password.
Already have a free Padlet account?
If you already have a free/vanilla (basic) Padlet account with existing Padlets, you can import those to your new University of Melbourne account once set up. For instructions, please refer to how can I import my Padlets from an existing account.
Padlet app
Padlet has an app version that can be used on mobile devices. The functionality between web browser and app versions is the same, but the location of functions slightly differs.
How to log in to the Padlet App
- Open the app on your mobile device.
- Tab Log In, then tab Log in with Microsoft.
- Tab Sign-in options, then tab Sign in to an organization.
- Enter unimelb.edu.au as the Domain name.
- Enter your University of Melbourne email address, tab Next. This will take you to the University’s Single Sign On (SSO) page.
- Sign in with your University credentials.
- If prompted, tab Send Push and confirm Okta Verify.
If you were previously setup manually with a University of Melbourne Padlet account (e.g. Faculty of Arts), you can continue to use your issued Padlet credentials. Please select Log in with email and password instead of Log in with Microsoft, then enter your staff username and Padlet password.
Communication and notification settings
It is recommended to set your preferred notification settings in Padlet for better communication.
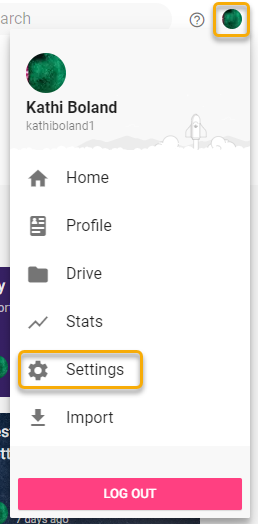
- Click on the Account button on the top right corner, then select Settings.
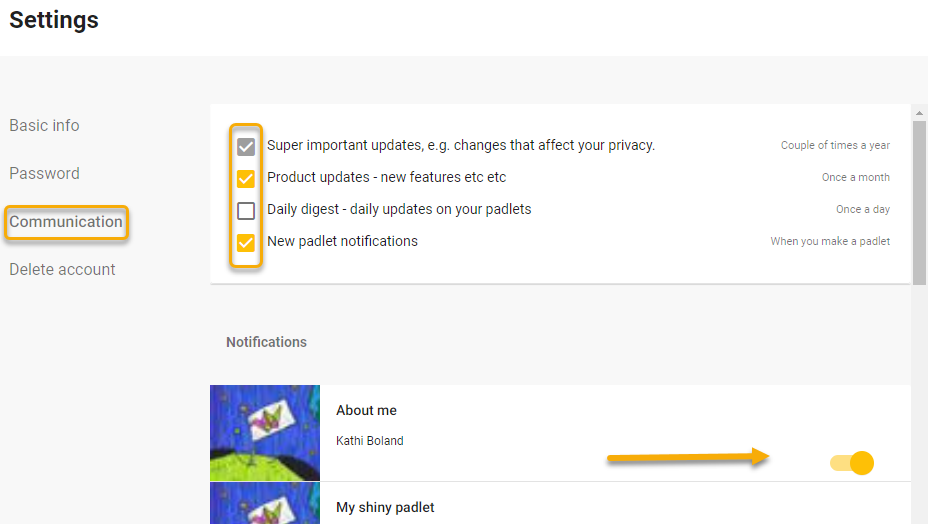
- Click on Communications on the Settings page. Choose how to receive communication from Padlet regarding feature updates and set notifications on individual Padlet walls, if desired.
Storing and deleting Padlets walls
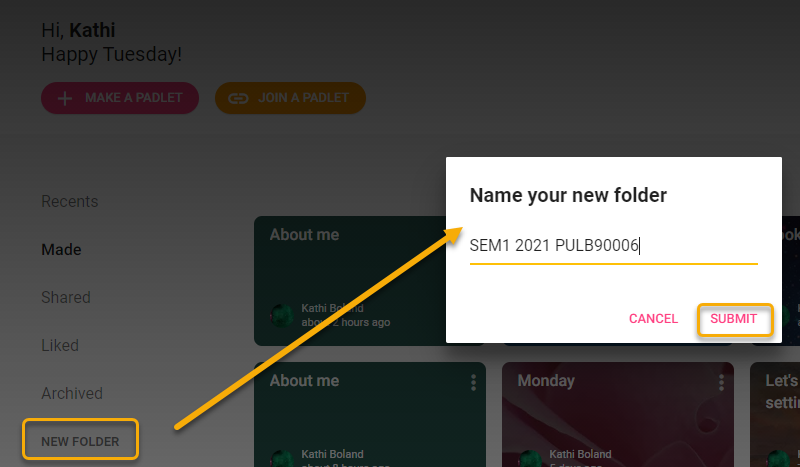
On your Padlet dashboard you can create folders to store and organise your Padlet walls. We recommend using a naming convention if you are going to be using Padlet regularly, across multiple Tutorial Groups and in several subjects in the same semester (e.g. SEM1 2021 PUBL90006).
- Click the New Folder link on the Dashboard.
- Enter a name for the new folder and click Submit.
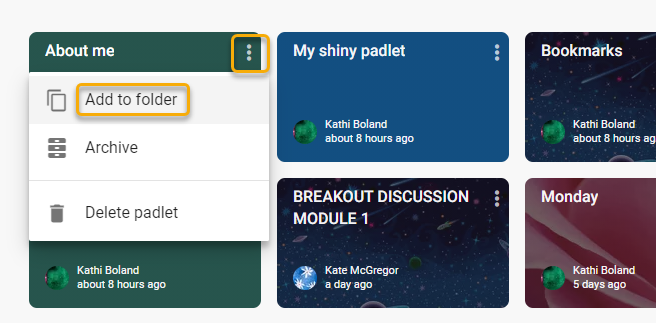
- Identify the Padlet wall(s) you wish to add to a folder.
- Click the vertical ellipsis on the top right.
- Click Add to folder, then select a folder.
Create a Padlet wall
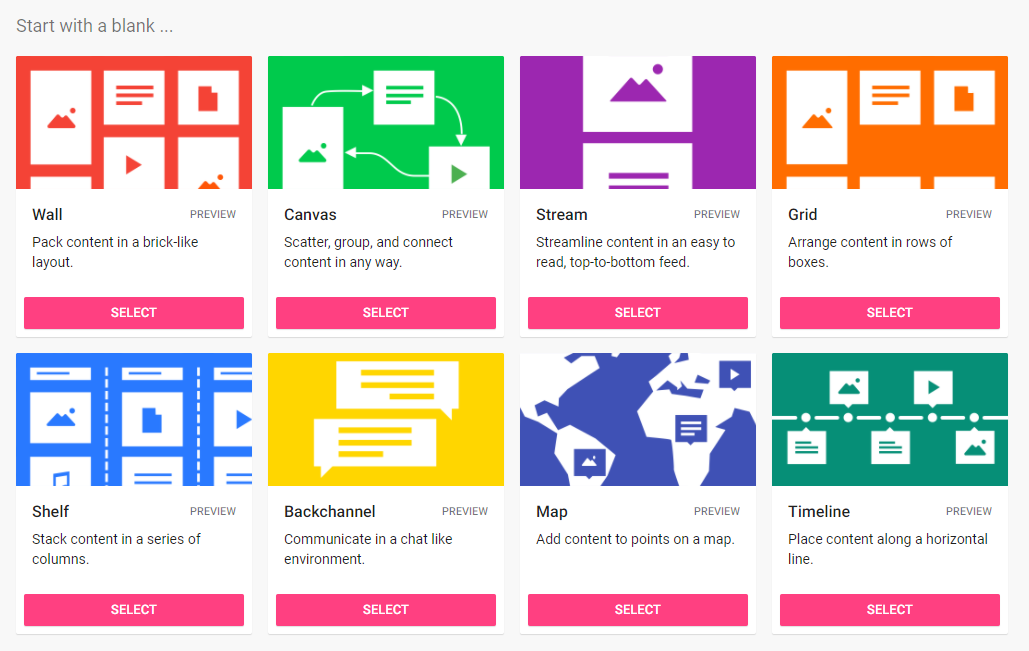
Padlets are template driven. You can choose the layout and format that suits the learning activity or purpose you aim for. You can change the layouts later, if you change your mind and want to use a different format. For inspirations go to Padlet layout options.
- Click Select on the chosen layout.
- On the newly created Padlet wall, click the cog icon on the top right to modify:
- Title and Description to suit the activity
- Add an icon (optional)
- Customise the URL address (must be one word and lowercase)
- Change Background wallpaper to one of the included options (or add your own image), choose the font and colour scheme
- Configure how posts appear
- Turn on comments/ social media interactivity (optional).
- Click Next to move onto the next step to start posting.
Privacy and Visitor Permission settings
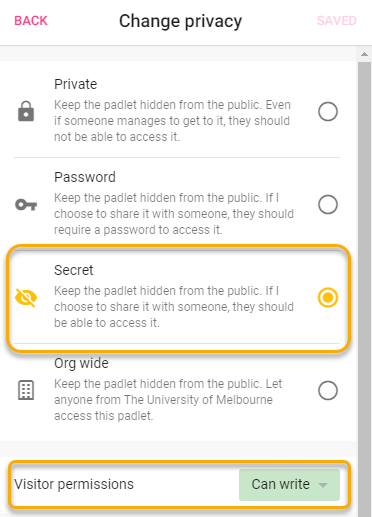
Each Padlet wall has its own URL, so it’s easy to link students to specific walls. Privacy settings are located under the Share menu on each Padlet wall.

By default, Padlet walls are set to ‘Secret’ on the University of Melbourne license. This means that your wall will not be found through a web-engine search or the public areas of Padlet. It ensures your Padlet is only visible to those who have the direct URL to your wall.
Access Privacy settings under Share to also control read/write access to your wall via Visitor Permissions.
Please do not change the default privacy setting to “Org wide” as this means all staff with a Padlet account on the University of Melbourne license will be able to see and access your wall.
Embed a Padlet wall into the LMS
There are several options for how you can share Padlet walls as a resource with your students. This includes linking to walls in Canvas, embedding in Canvas and generating a QR code. To share a completed activity that is text heavy, you can export the content as a PDF and upload to Canvas.
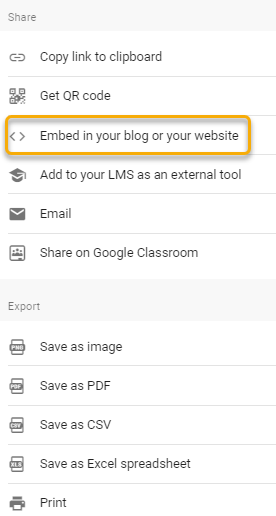
- Click the Share button on the top right on the Padlet wall.
- Select Embed in your blog or your website.
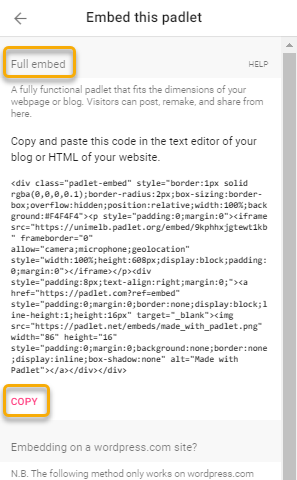
- Click the Copy button underneath the Full embed option
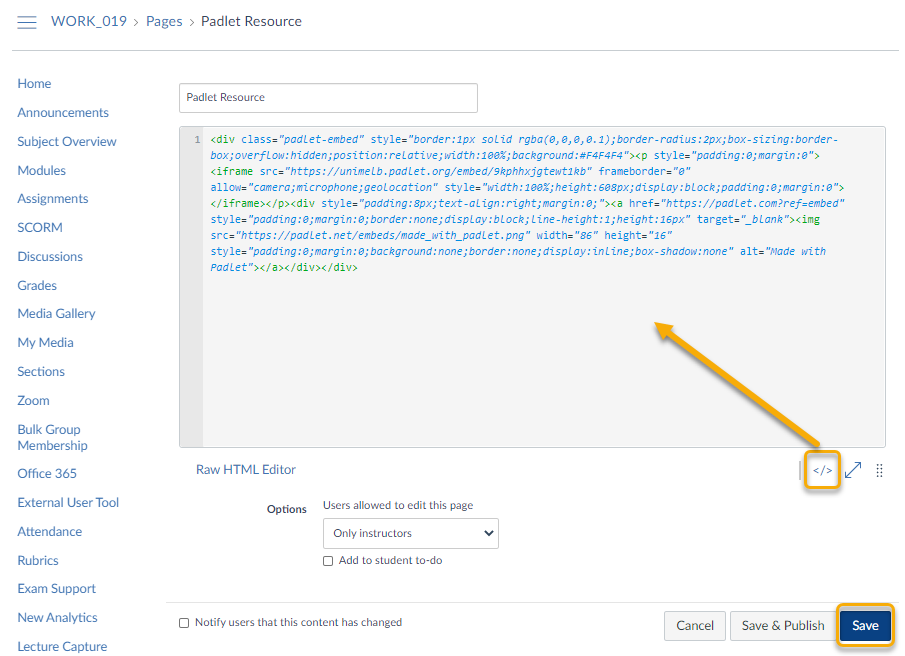
- In your Canvas subject, go to the Page where you want to embed the Padlet wall (or create a new page).
- Click the Edit button to edit the page, then click the </> icon on the bottom right of the editing window.
- Paste the code, then click Save.
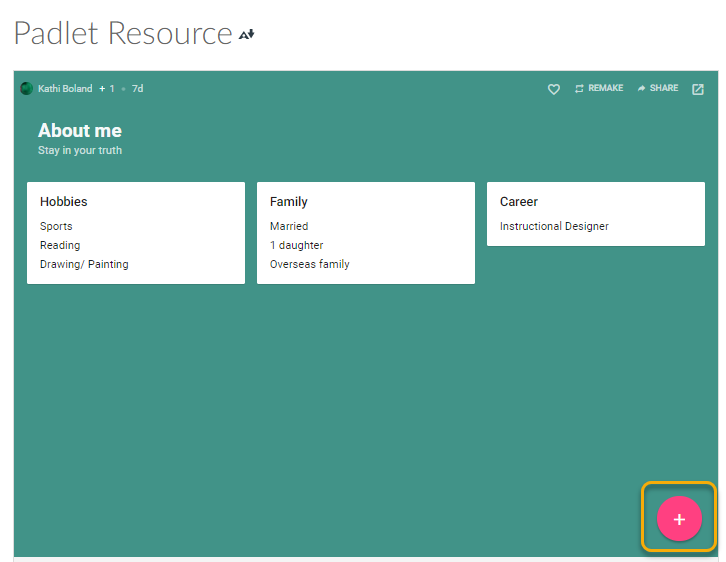
Your Padlet wall content appears neatly embedded. Students can post to the wall directly from the LMS via the + button.
Tips
- We recommend adding a direct link to the Padlet wall along with the embed, as some students may be using a browser or mobile device that does not support the embed option and can open the link instead.
- If your Padlet wall is large and involves scrolling vertically and horizontally, consider adding a link only rather than embedding it. A lot of scrolling on an embedded Padlet within the LMS can be tricky.
- If you plan to run an activity with a seperate Padlet for each group so they can't see each others' work, consider posting the link to a limited area in the LMS, for example, via a group announcement.
- Padlet walls can also be embedded into LMS Discussion Boards (e.g. for students to comment on each other’s individual Padlet wall posts or for example digital presentations).
Remaking an existing Padlet Guide
Once a Padlet wall has been set up for an activity or use for seminar or tutorial group, it is very easy to remake (clone) walls, edit and reuse.
- Open the existing Padlet wall that you want to clone.
- Click on Remake in the top right corner of Padlet.

- Select the relevant options to copy:
- Copy design (layout, wallpaper, activity title and description) and
- Copy posts (text and attachments) and/or
- Copy people and privacy (privacy and read/write settings).
Power tip: Choose the ‘Copy people and privacy’ option so that you copy the same format as the original, including ‘secret’ privacy setting and the visitor read/write permissions. Otherwise default remade walls the Visitor Permissions are set to ‘read’ only and must be manually changed.
- Click the cog icon to modify the title (and description if needed to adjust the context) and edit the URL address option (this determines the wall’s URL link). This is to reflect the activity and repurposed wall, to aid identification of walls. URL addresses must be one word and lowercase, but underscores can be used.
- Check that the Privacy settings under Share are set to the correct write/read permissions. Students will be unable to post if this is not set to ‘write’.
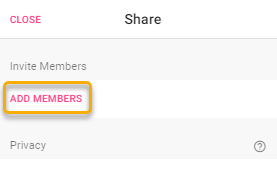
Adding tutors and other teaching staff as Contributors to your Padlet walls
Subject Coordinators can give administrator access to their tutors when sharing Padlet walls, by adding them as members and selecting the desired access. They first must have a University of Melbourne Padlet account for you to add their access as their Padlet account name. Alternatively, tutors can “remake” the walls created by Subject Coordinators.
- Click the Share button on the top right on the Padlet wall.
- Click Add Members.
- Search by name, username or email, then select the correct user.
- Click the Can read dropdown to adjust the permission levels. Choose either ‘Can edit’ or ‘Can administer’ so that added members (e.g. Tutors) have permission to move, edit and delete student posts as needed.

Support and resources
Padlet is supported by Learning Environments. Please submit a support request for assistance. For further instructions, inspirations and help please view the following guides.
University of Melbourne guides
Padlet resources
This guide was last updated 12 Mar 2024.
Please report any errors or omissions in this guide by submitting an LMS support request.