GoReact: Oral assessments in Canvas LMS
Using GoReact for face-to-face, interactive oral assessments.
In this scenario, GoReact is configured for face-to-face, interactive oral assessments. The instructor controls each recording, and students will not be able to review the recording or its comments prior to grade release.
Getting started
The initial configuration takes place in Canvas LMS, with subsequent settings completed with GoReact, which will launch once the initial Canvas settings are saved.
Create assignment
If you are unfamiliar with this process, please refer to the Canvas guide, how do I create an assignment.
Provide a name and description for the assignment. Please provide detailed information on how the assessment will take place, as many students will be unfamiliar with this type of assessment.
When setting the points for the assessment, ensure that the points set will be the same as those set later in GoReact. This is to ensure that scores are reflected in the Canvas Gradebook correctly.
Select External tool (1), then click Find (2) to search and select GoReact. Ensure that Load This Tool In A New Tab (3) is checked before moving on.
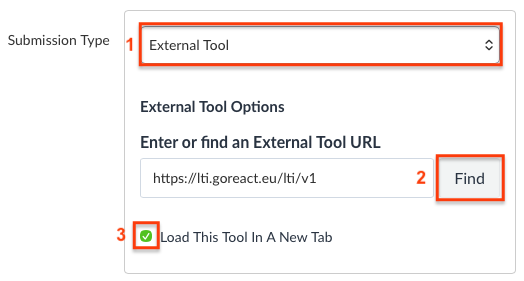
Finally, set the Available from date to control access to the tool. There is no need to set the Due date, as this will be controlled by the GoReact session.
Scroll down and click Save & Publish. Once the save is complete, and the assignment details window has loaded, click the button with the, Load <assignment name> in a new window, button.
Configuring GoReact
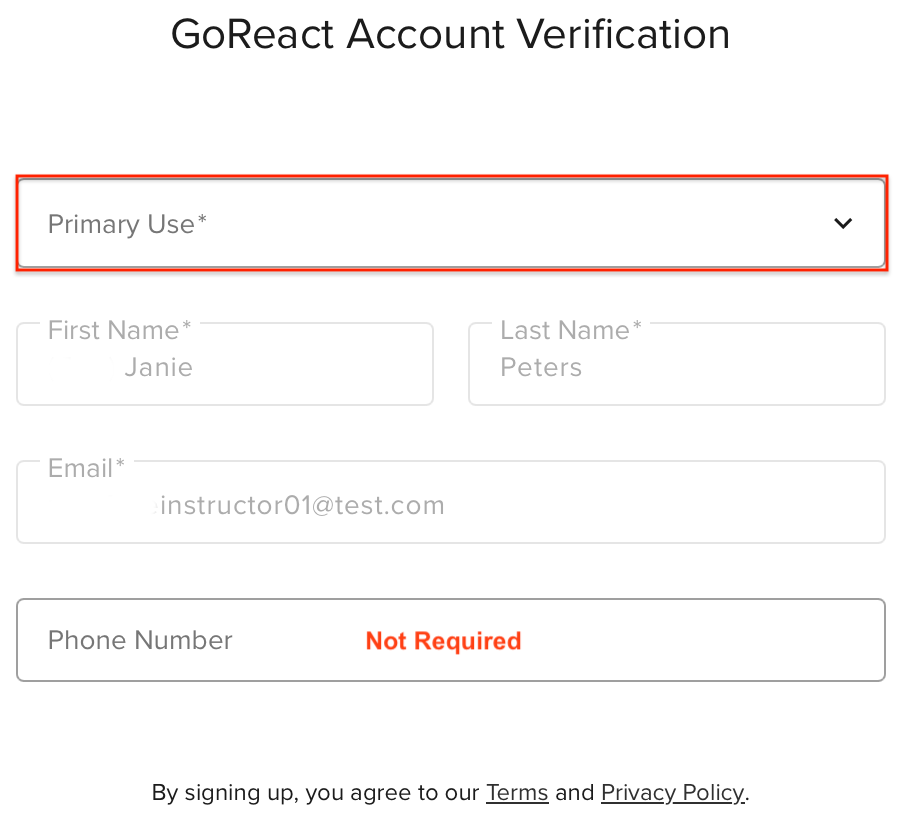
If this is your first attempt at setting up GoReact you will receive a challenge page, similar to the one below. This will only appear the very first time you access GoReact as an Instructor:
- Select a Primary Use type (your choice will not affect the options available to you).
- Phone Number is not required
- Click Done at the bottom of the page.
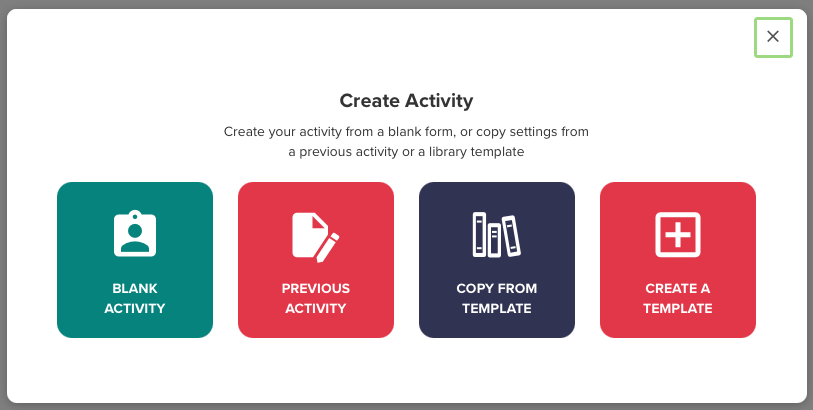
Commence by selecting Blank Activity.
You may use a previous activity if you have previously configured an assignment for interactive oral assessment.
Choose the type of session that you are configuring. Select Standard. In this scenario, participants will record videos with the option for multiple cameras. Whilst this setting can also include live feedback, this will not be enabled.
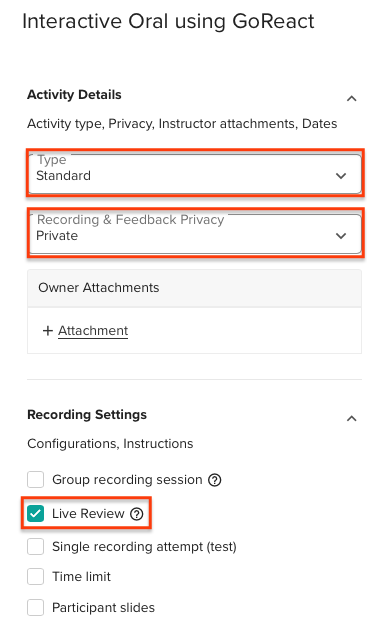
When setting the Privacy level, select Private. Private recording ensures that the recording and feedback are only visible to the Participant, the Instructor and specified reviewers.
Attachments are typically not included for this style of assessment, as the student will not have access to the activity prior to the assessment. If documents are required, it would be more appropriate to include those in your course materials.
Set Recording Settings to Live Review. This allows other specified users to join, watch and comment live during the recording if desired.
Feedback Settings should be set to the following:
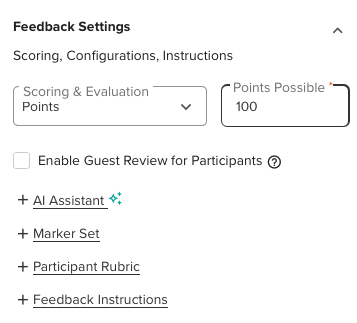
Scoring & Evaluation: Select Points which allows for a single numeric score (if you require a rubric, refer to Rubric Creation below) .
Points Possible: Ensure this is the same value as configured in Canvas.
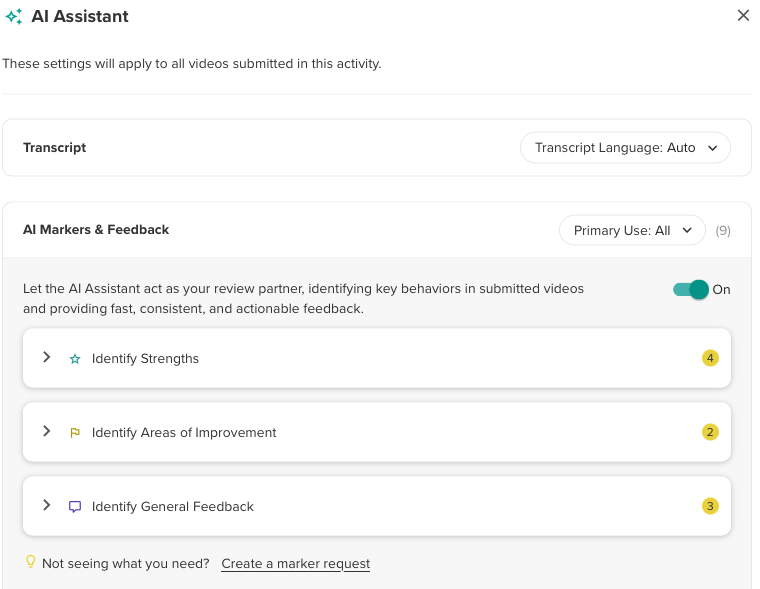
AI Assistant (Optional): This allows for AI generated feedback and requires additional configuration. Enable by clicking the On toggle. Expand each heading using the chevron icon. You may select up to 10 areas in total for the AI to focus on. The number of selected items appears in yellow at the end of each group heading.
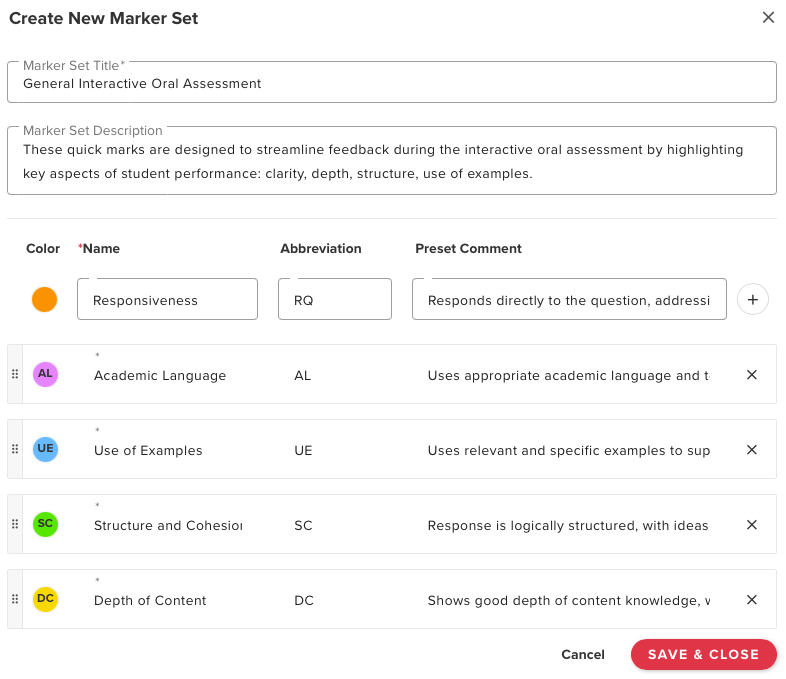
Marker Set (Optional). These function as quick marks which can be added quickly as required during the recording. Below is an example of a marker set. Enter a name for each item you wish to assess, an abbreviation (which is displayed on the timeline), and a preset comment to explain the marker. Markers are added using the green + icon and can be deleted using the red × icon.
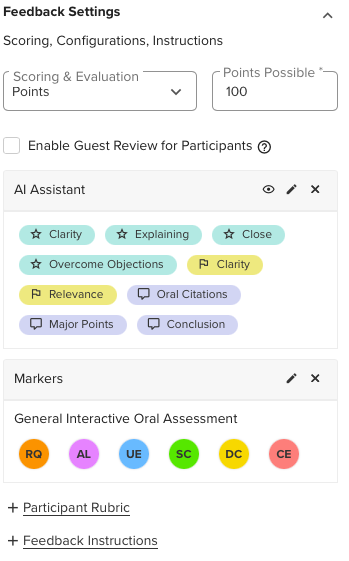
Once configured, an overview is displayed. Review the settings and click Done.
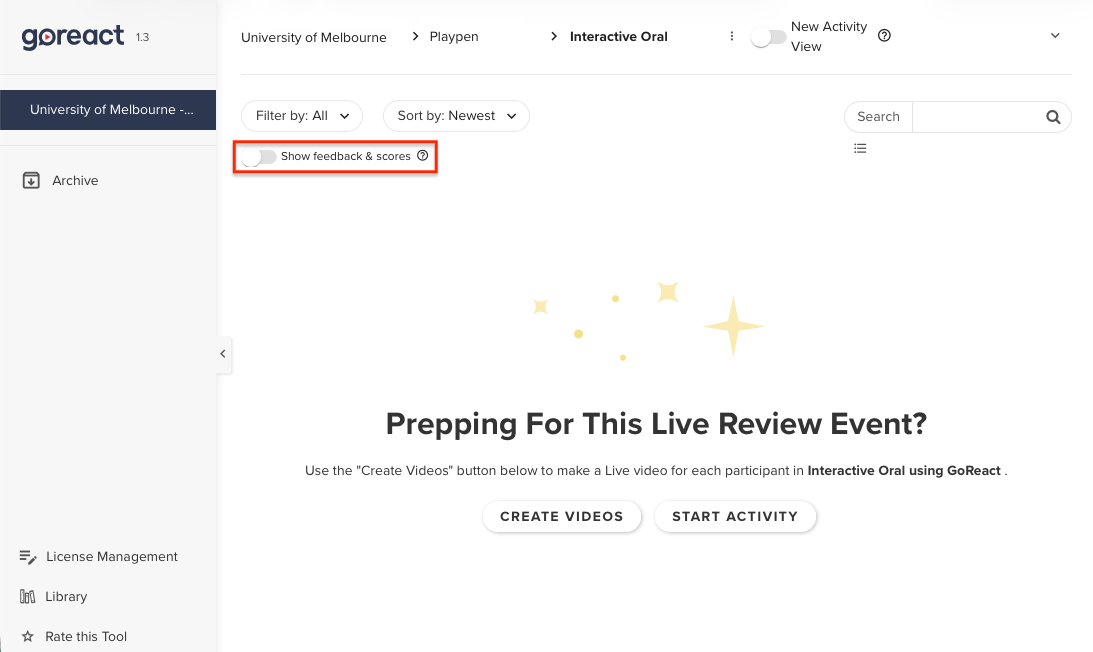
Before recording students, remember to disable the Show feedback & scores toggle.
Editing settings
If you need to edit settings after creation, the setting can be found by clicking the kebab menu after the Activity name at the top of the screen.

From this menu you can edit the initial settings, add and configure rubrics. You can also move the activity to a new folder, and view activity.
Creating Rubrics
During the creation of the activity, or by editing before the commencement of assessment, you can specify to use a Rubric for evaluation.
When selecting Rubric, you will then be prompted to choose either an existing Rubric, or create a new rubric by clicking +Rubric.
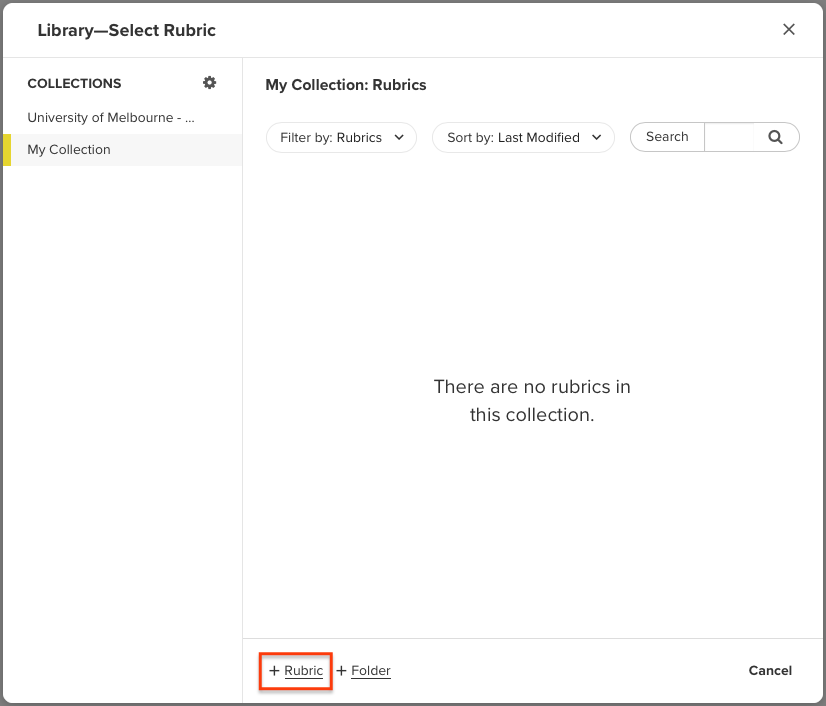
Choose the location to save your new rubric, then click NEXT to edit the new rubric.
The rubric builder can accept different combinations of elements including a traditional numeric scale, points, checkboxes and free text. Simply drag the required element to the rubric workspace then customise each by clicking on the element and entering descriptions and points as required.
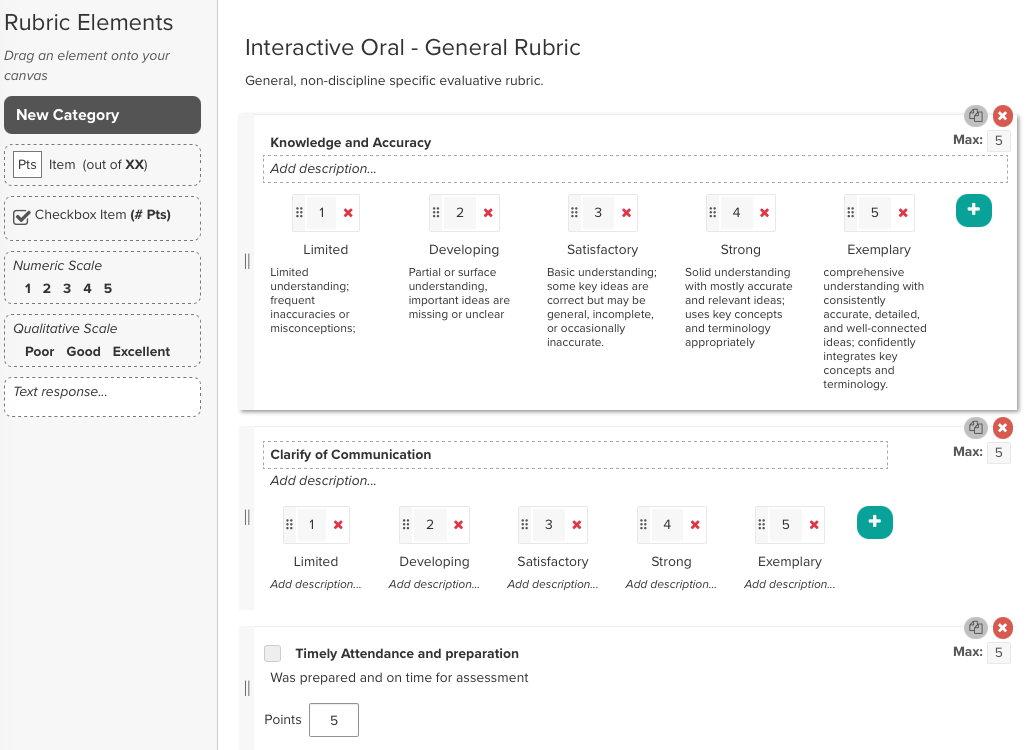
Ensure that the Grand Total matches the value allocated in Canvas during the initial setup
It is strongly recommended that you preview the Rubric (Use the link at the top of the page) before saving and closing.
Ensure Allow reviewer access for the rubric is selected.
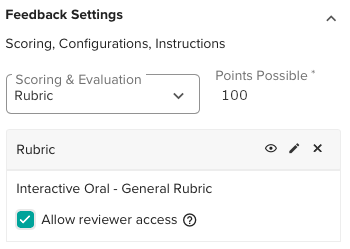
Click Save and Close.
Conducting interactive oral assessments.
Click on the Assignment in Canvas. Once the information page opens, click on the Open new tab button to access the GoReact assignment page.
Click on Start Activity.
A pop-up window will appear. Enter the Title of the video to be recorded. Suggestion is to include the name of the student and the activity.
Tip: Keep the basic title on a text note or word document, and copy and paste in.
In the participants field, remove the staff member name, and commence typing either they the student’s email, or name. Select the appropriate student from the list provided. Failure to remove the staff name will prevent grades from synchronising.
In the participants field, remove the staff member name, and commence typing either they student’s email, or name. Select the appropriate student from the list provided.
WARNING! If an assessment is created BEFORE a student is enrolled in the subject they will not be searchable in GoReact. To resolve this, the student must log in to Canvas and navigate to GoReact via the assignment link.
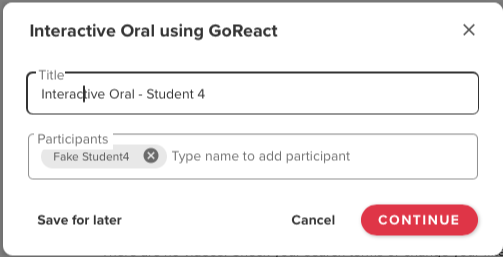
If preparing in advance, click Save for later, else click CONTINUE to immediately launch the recorder. Click CONTINUE TO RECORDER to commence the session
The recorder will now launch and complete an equipment check. (If the system asks for permission to use the camera and audio, click enable/yes). Once the tests are complete you can adjust the microphone and camera settings via the gear wheel in the device controller area at the bottom of the screen. Choose the appropriate camera and microphone from the list. Click CONTINUE when done.
You should test your devices prior to your scheduled appointments to allow time for correcting any issues. Be mindful of what is being recorded. Background blurring is not available.
A larger recording window will now show. Click RECORD to commence.
Whilst recording, the instructor should open the side panel, by clicking the comments tab. As the recording continues, the instructor can make comments and add markers. Each comment is time stamped and added to the session window.
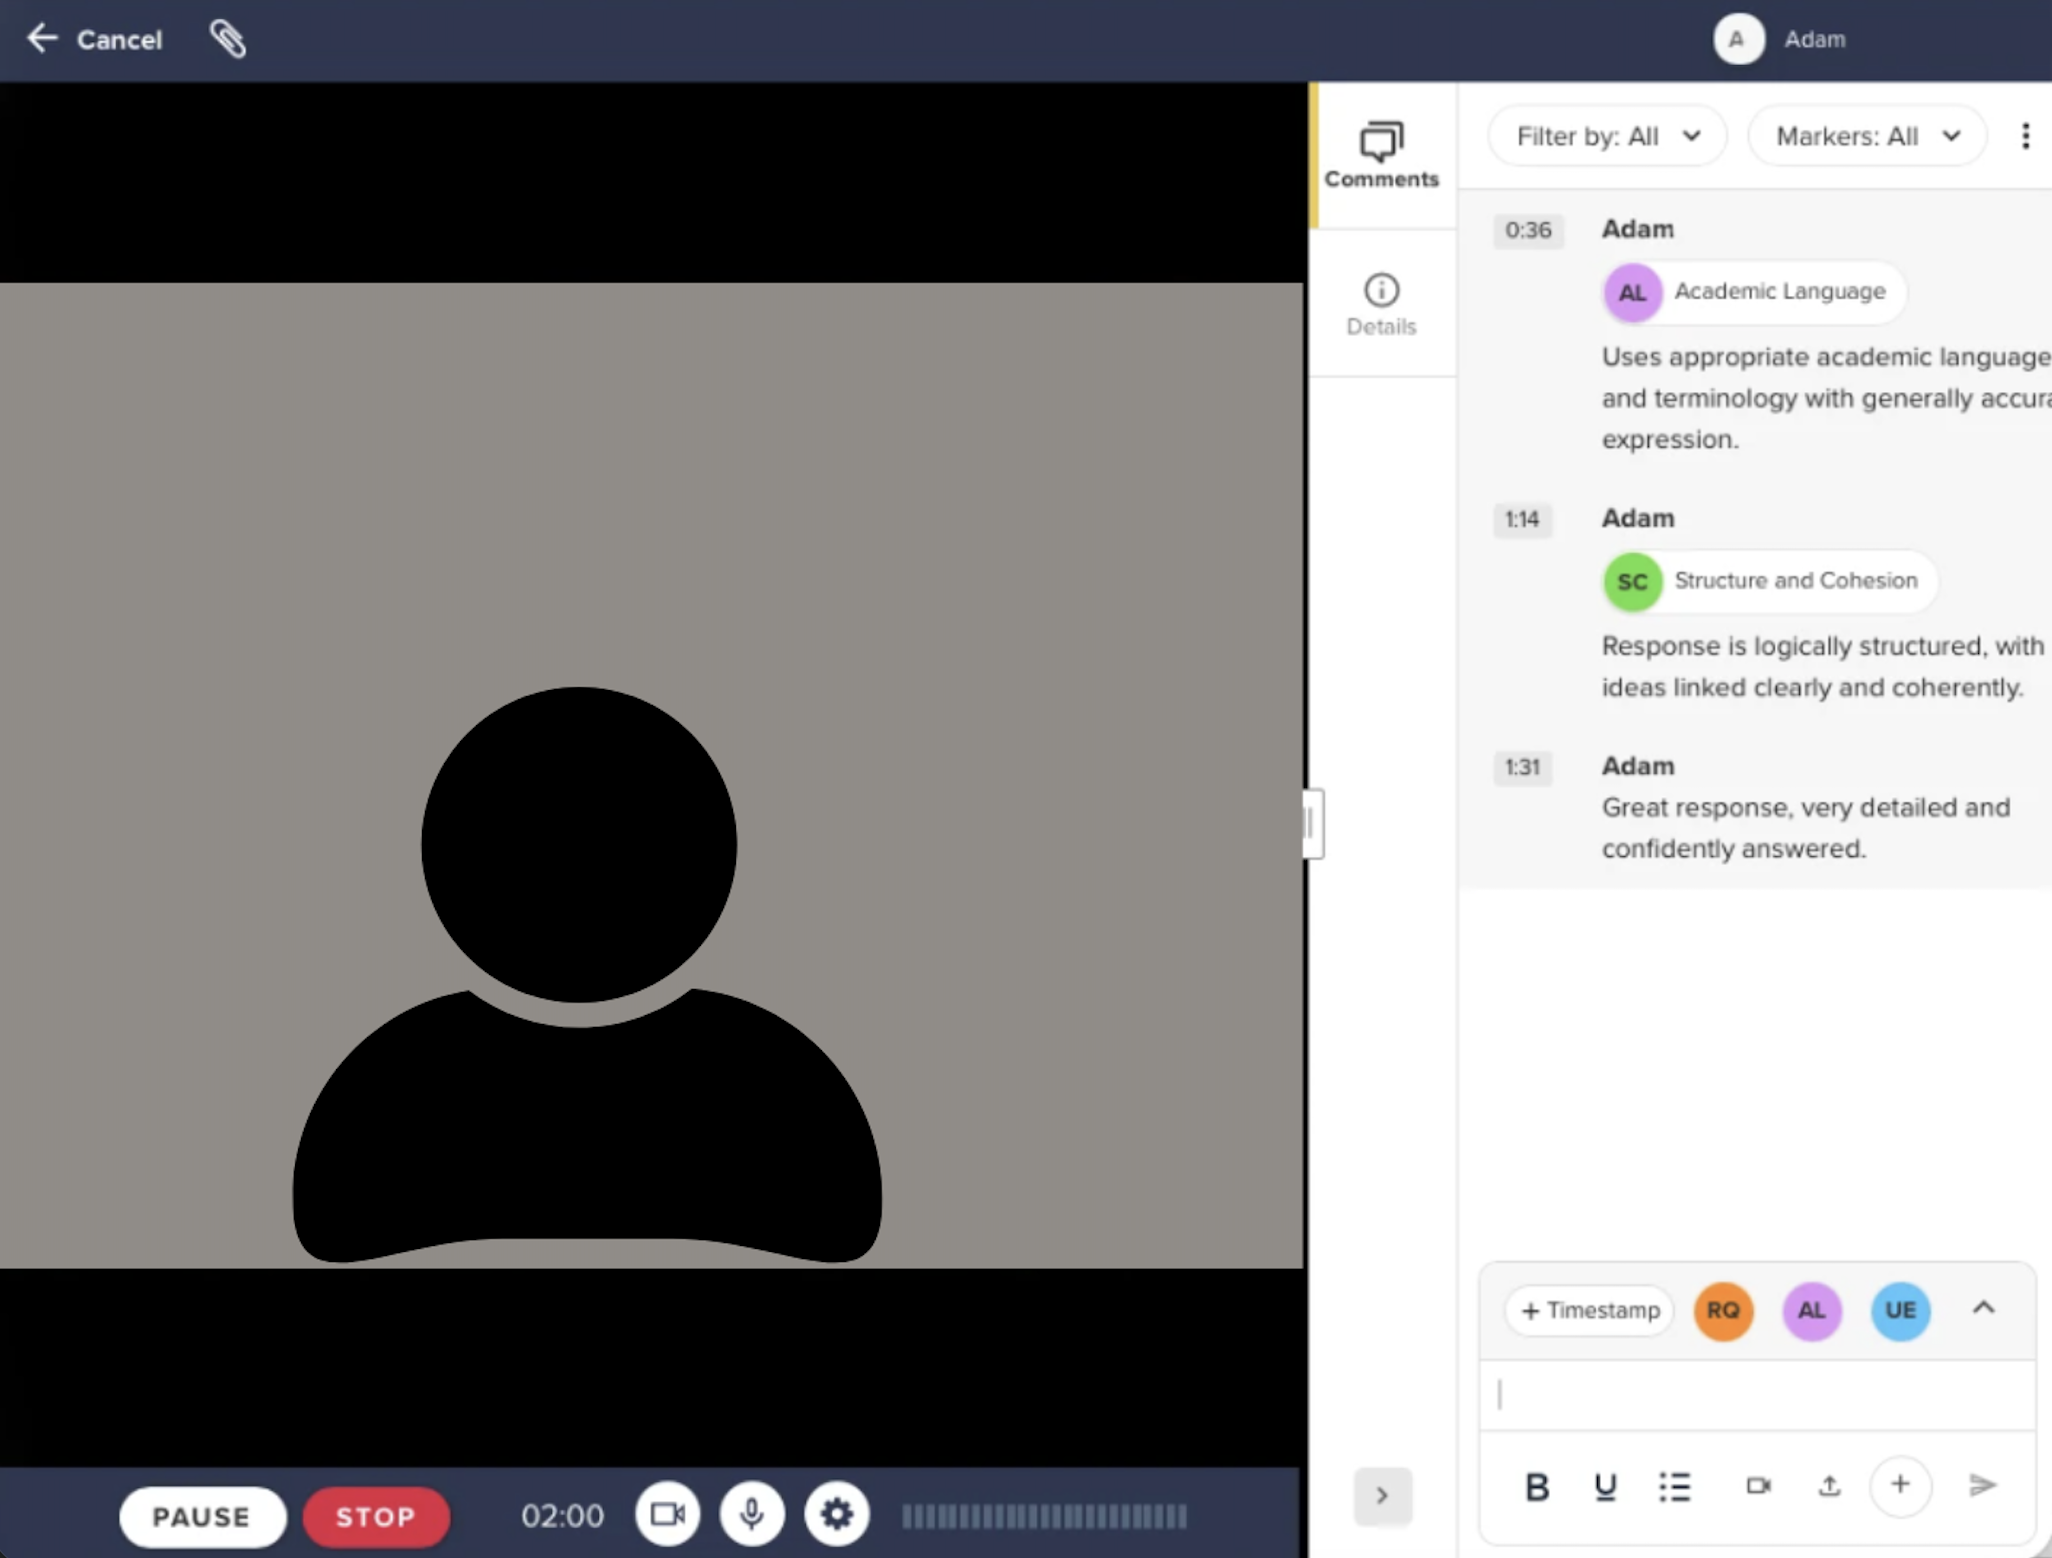
When complete, click Stop. Adjust the title if requires and then click POST to save.
Repeat this process for each student.
At any stage after recording, you may enter a grade for the student. Filter by Scored, then click the 3 dot menu on a video, then select Edit.
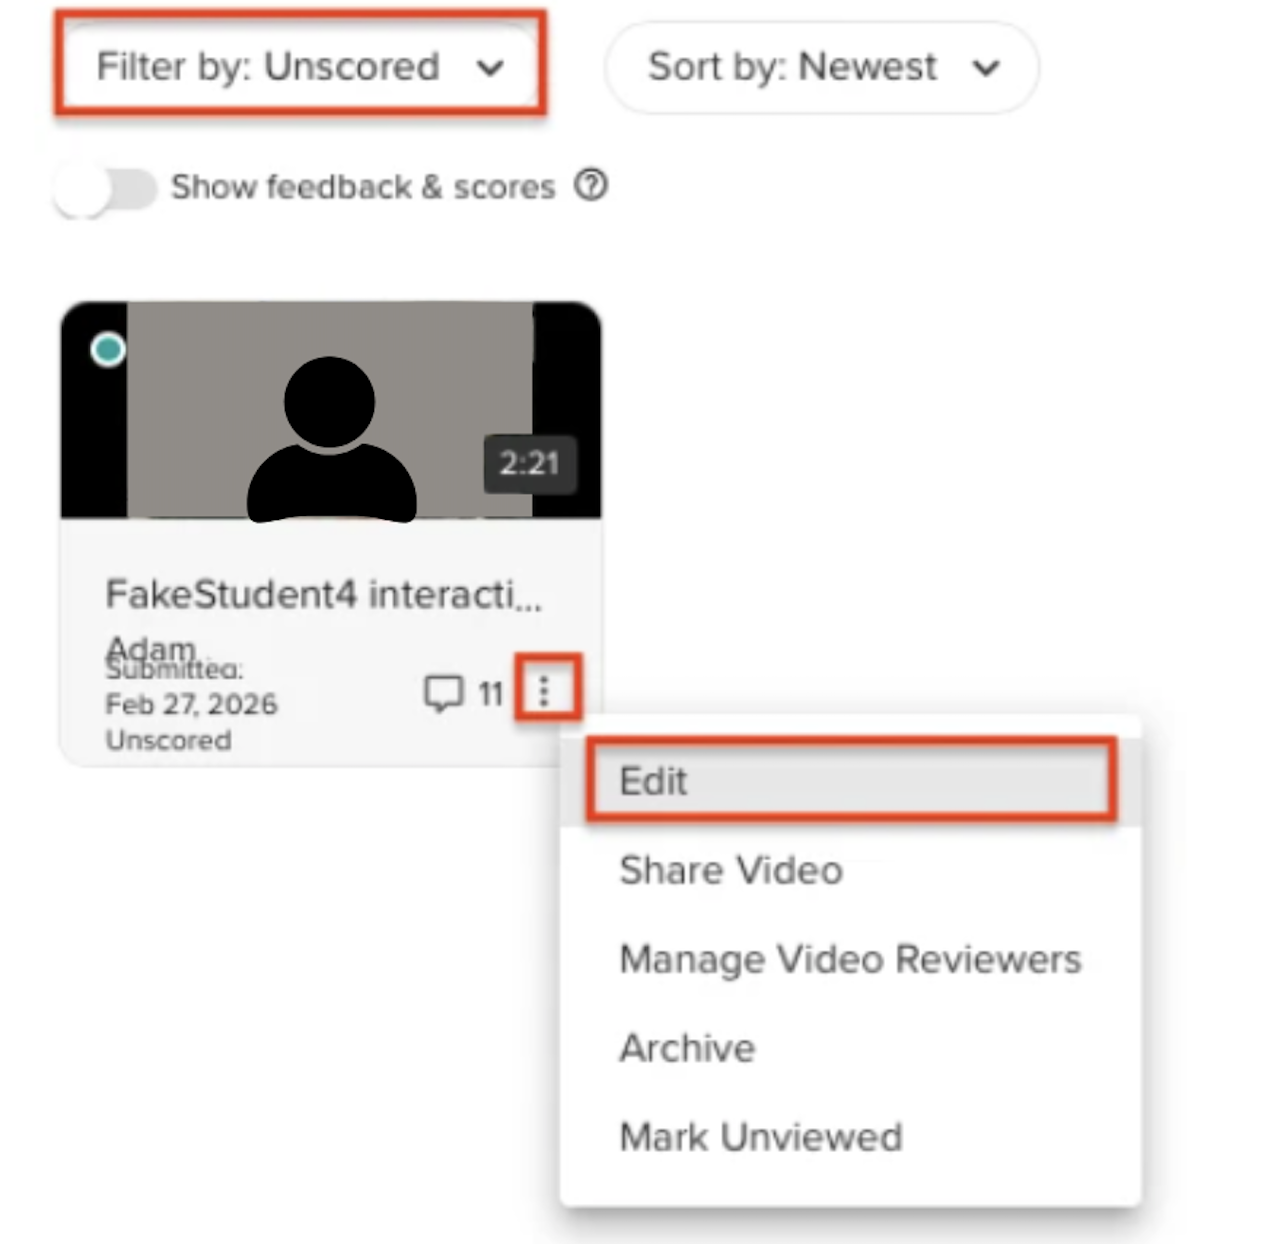
Enter a score and click Save. Repeat for each student.
When complete, toggle the Show feedback & scores that you deactivated previously at the start of this exercise.
This guide was last updated 22 May 2026.
Submit an LMS support request for further assistance or to report any errors or omissions in this guide.