Ten tips: Creating accessible subjects in the LMS
These ten tips will make your LMS subject much more accessible to students with access needs. As a bonus, most of them are also just good design practice – so they’re essential for some students, but they’re good for everyone.
If it feels like it’s all too much right now, start with just tip1, and build toward the others as you become more comfortable working in your subjects.
1. Use LMS pages, not PDFs
Publish your content directly in Canvas LMS pages and assignments (not in PDFs).
Why?
PDFs are a minefield for accessibility. Many PDFs are completely unreadable, and many more are technically readable by screen readers, but still very challenging to access.
Remediating PDFs
If you can’t avoid a PDF, provide students with an option to read the same content in a Word document.
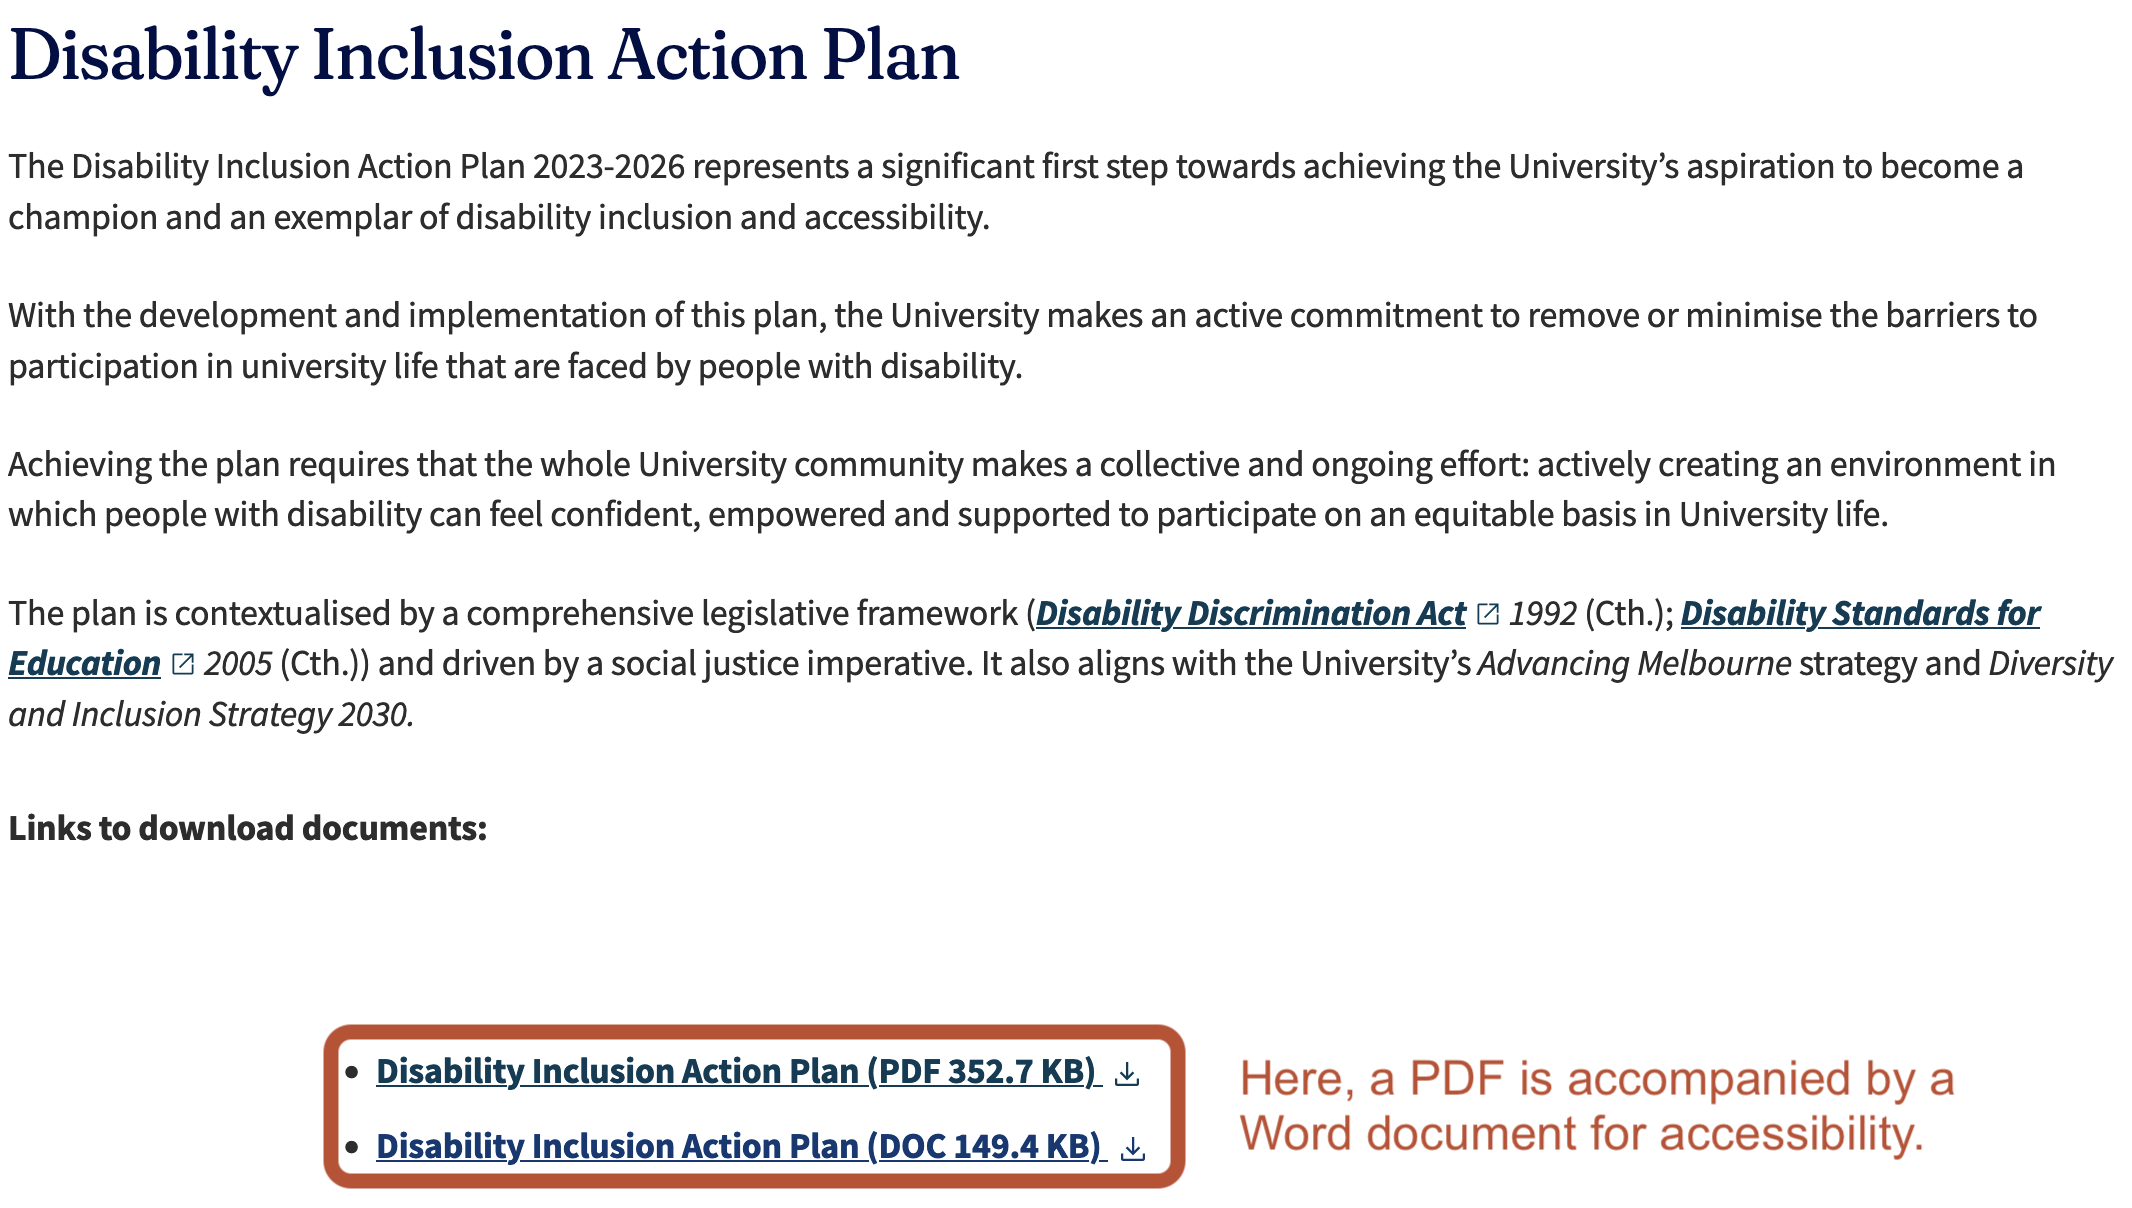
You will also need to make the PDF accessible. To make an accessible PDF:
- First, create an accessible Word document.
- Then use Microsoft’s Save As function for creating tagged PDFs.
- Finally, use the accessibility tools in your PDF reader to check the reading order. Windows users can use Nitro PDF’s accessibility tools. Mac users need to use Adobe’s accessibility tools or find a Windows user.
If you are making a PDF by scanning a hard-copy book page, be sure to OCR the page and then use accessibility tools to tag the headings and add the reading order.
If you are using LaTeX, there are still accessible options for you. For the odd equation, you can still build your pages in the LMS and use the LMS Math Editor to insert them. The Math Editor uses MathJax to make LaTeX available to screen readers. If you’re crafting entire documents in LaTeX, it’s still possible to create accessible LaTeX documents, and use a free tool like Pandoc to convert them to MathML.
As you can see, there are a lot of steps! Building straight into the LMS wherever possible lets you bypass these steps.
2. Use built-in styles
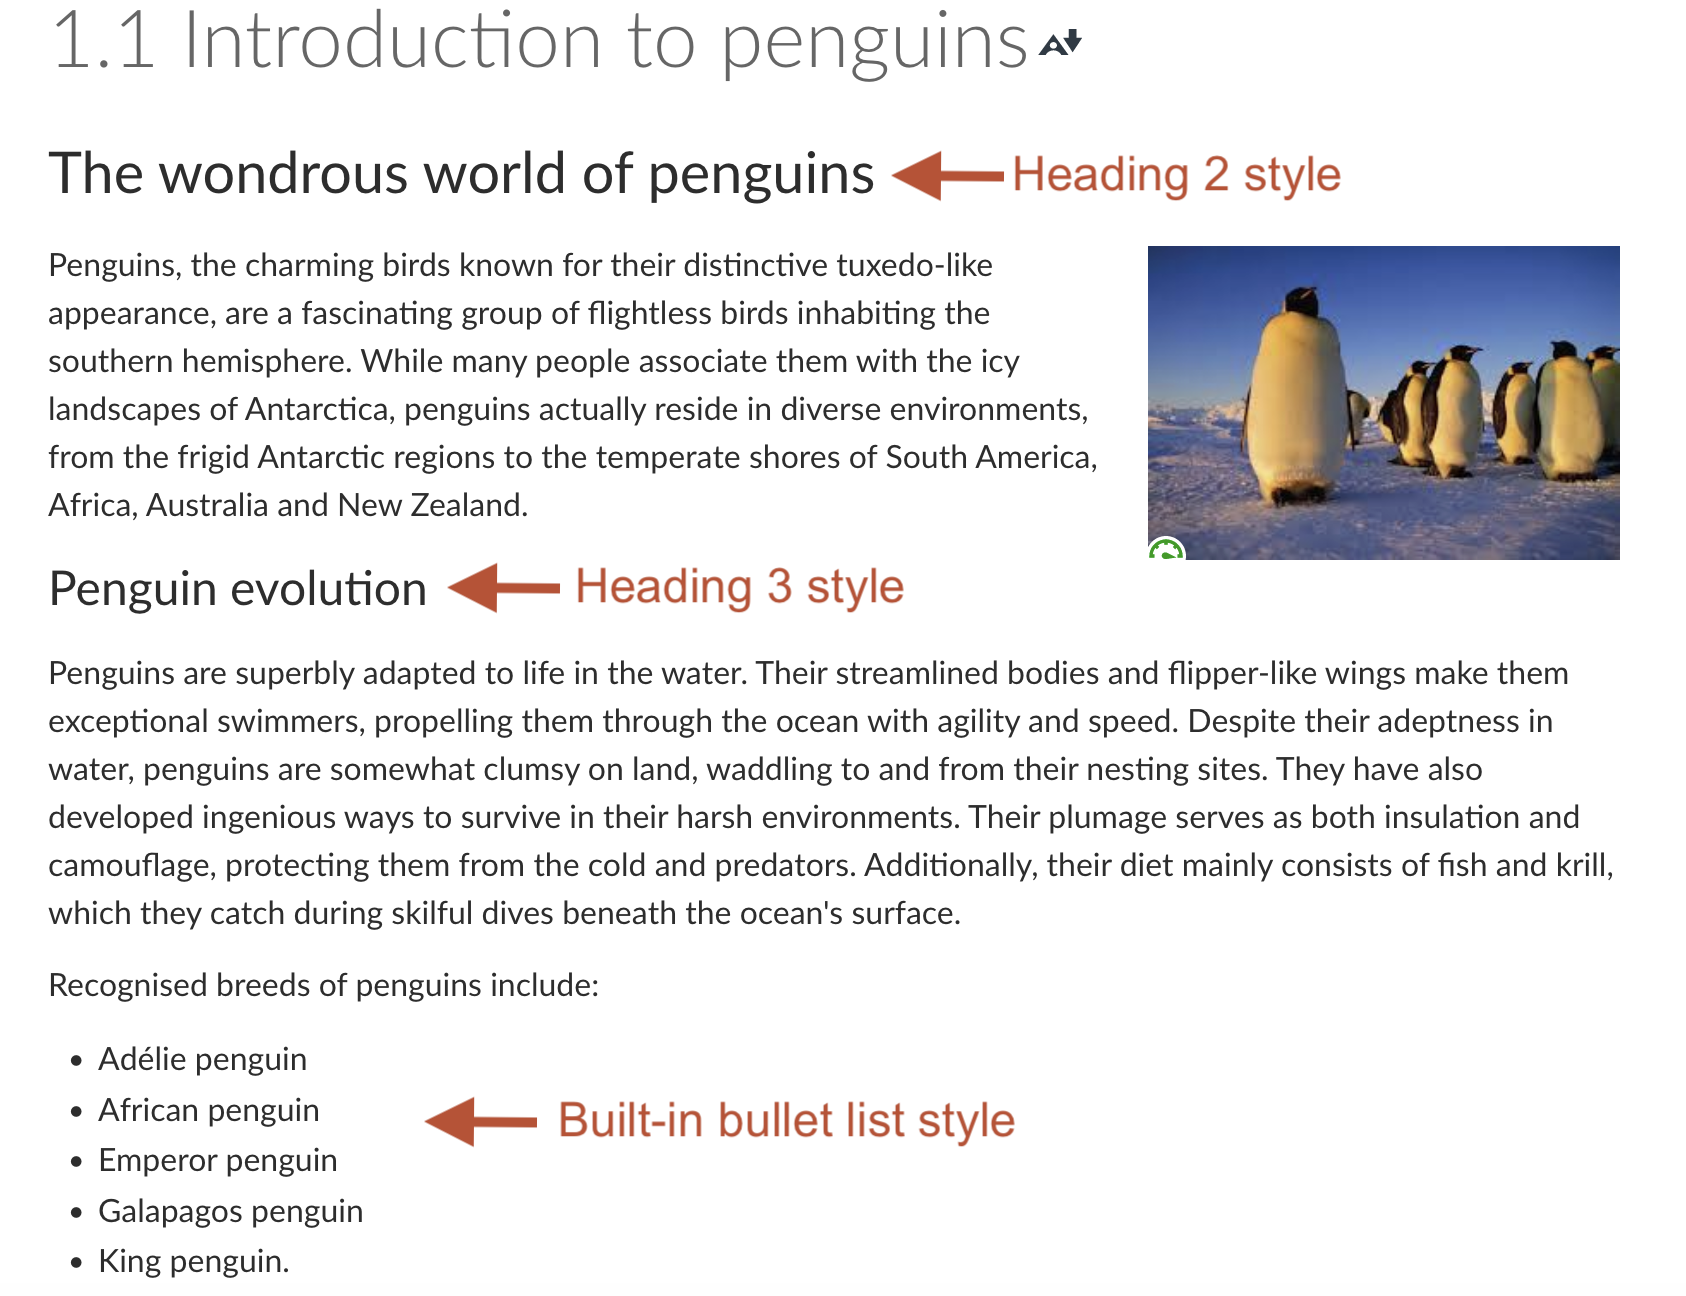
Now that you’re building your pages and assignments in the LMS, be sure to use the built-in styles for headings, lists, and paragraph text. Use Heading 2 as your first-level heading, and then Heading 3 and Heading 4 in that order if you need subheadings.
Why?
Built-in styles use code that screen readers recognise, which helps blind students and staff navigate the page. They also provide sufficient colour contrast with the background to be legible to people with various styles of colour blindness. Additionally, our built-in styles use left alignment, and minimise the use of italics and serif fonts, which helps students with dyslexia read more clearly. Finally, using headings and lists will help signpost content for your students, making your pages easier for everyone to read.
3. Use captions for videos
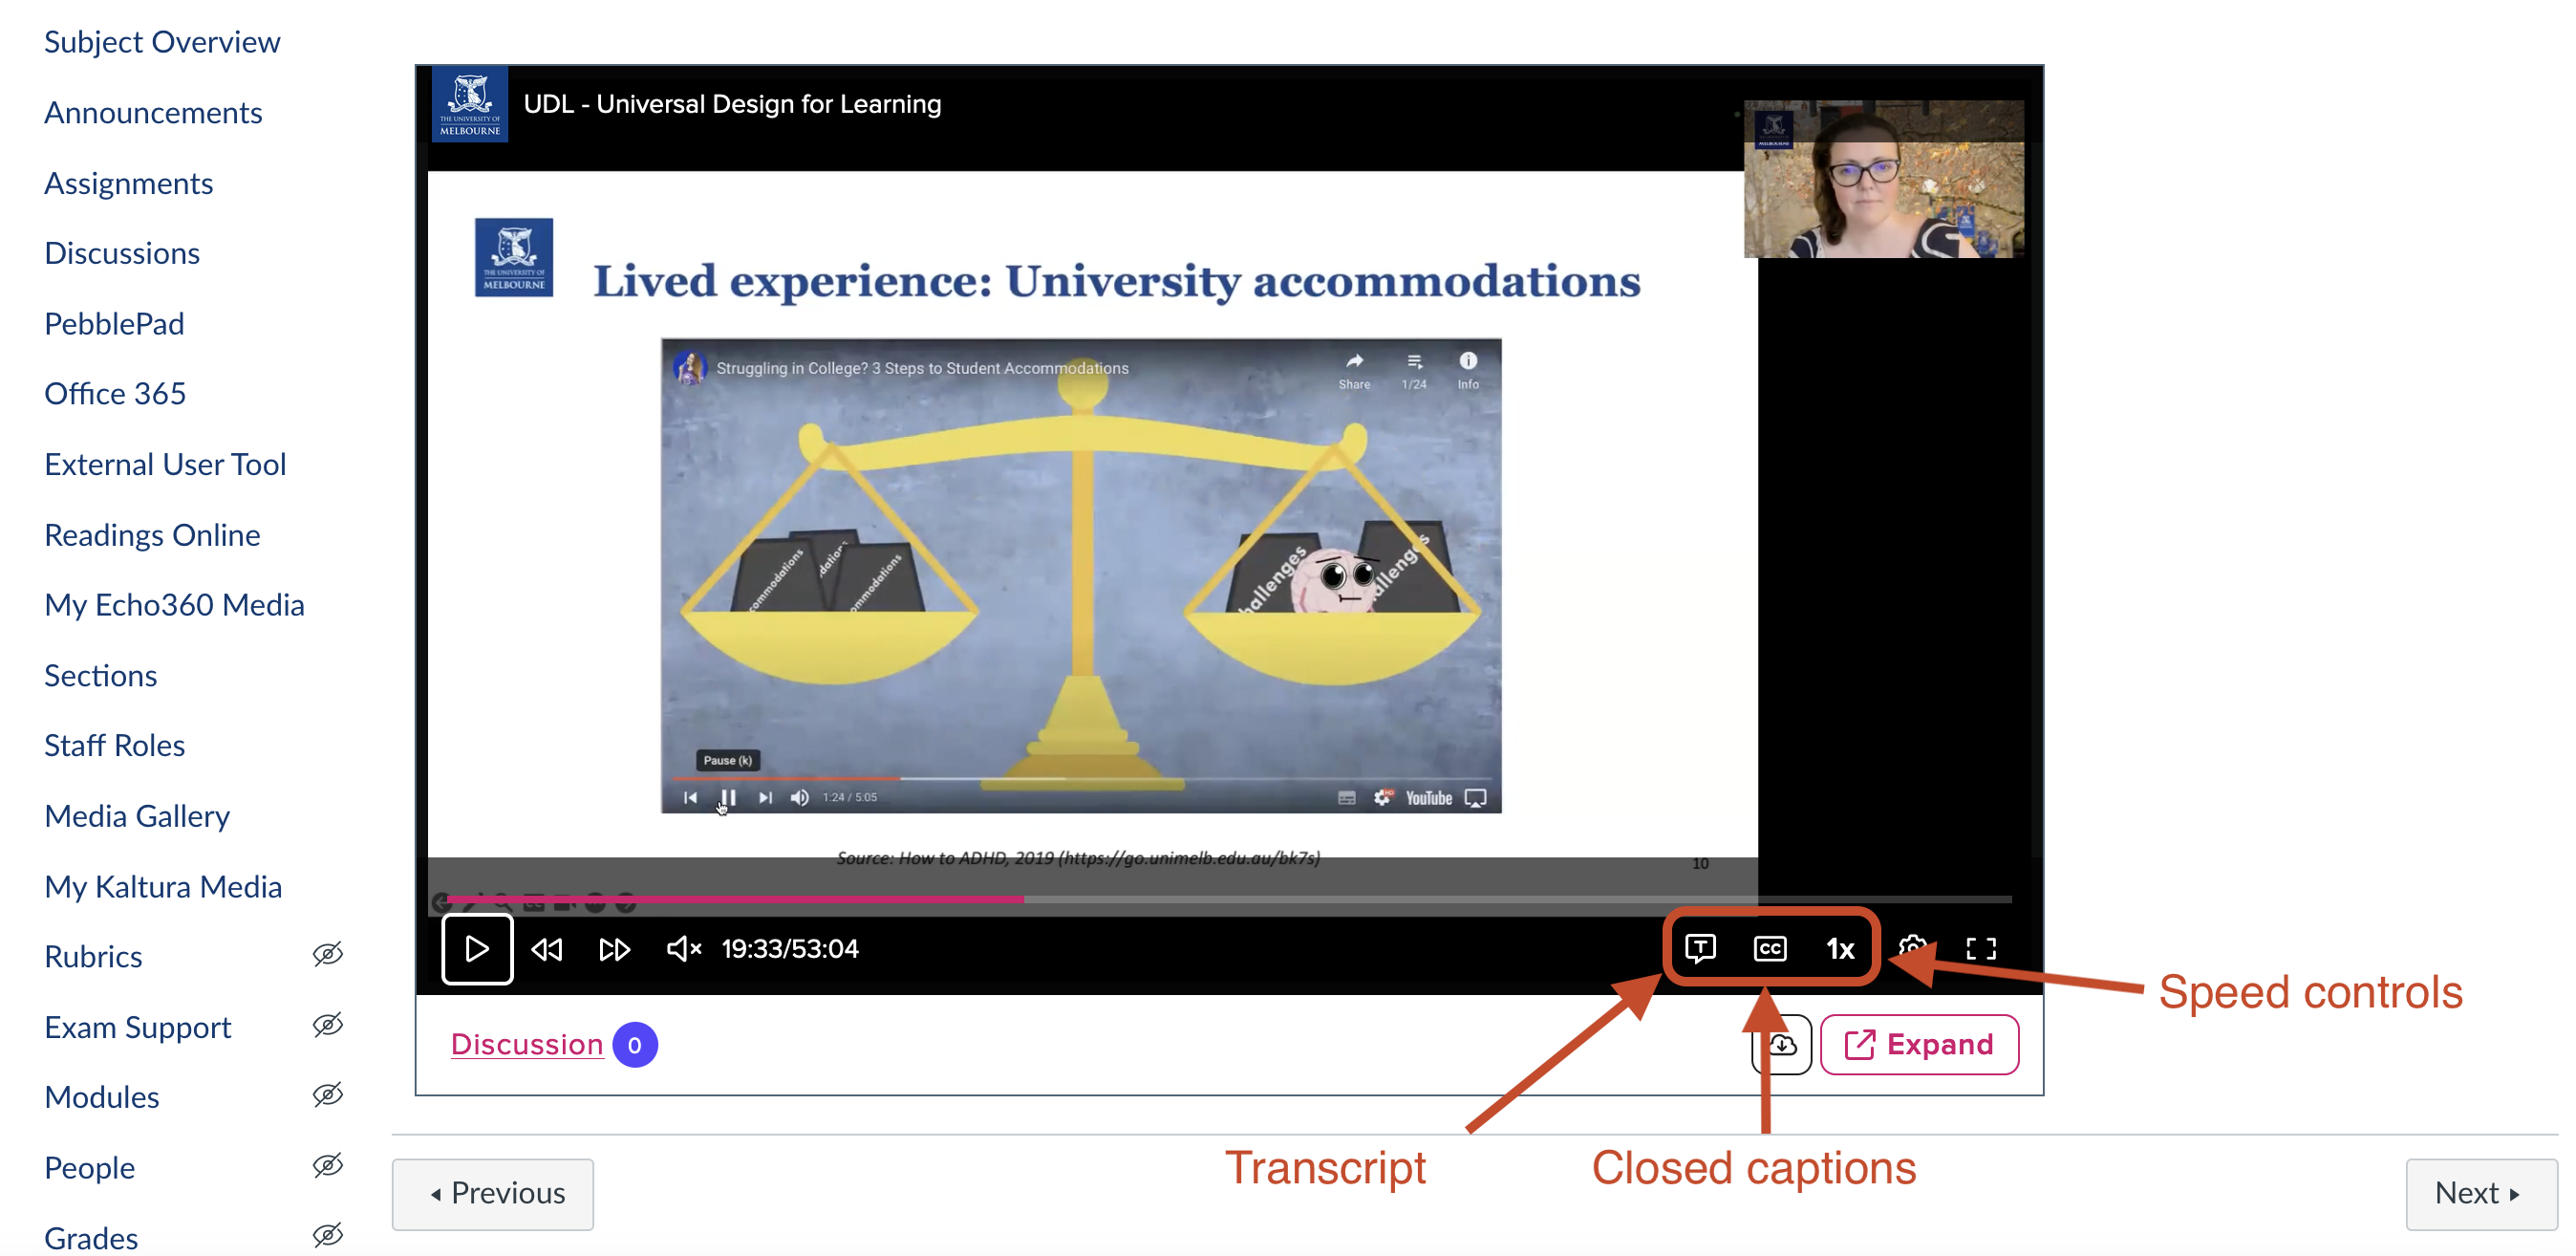
Ensure that your videos, including lecture videos, have captions. Provide transcripts with podcasts.
Why?
Students who are deaf or have hearing impairments won’t be able to use videos and podcasts without captions. They may even miss out on lectures entirely if the hearing loop in your classroom isn’t working for them. Some students may also be unable to attend lectures due to disabilities that are covered by the Disability Discrimination Act (1992). Even when students have typical hearing ability and attend lectures live, they benefit from being able to re-watch them later, slow them down, speed them up, and use captions to identify challenging terminology.
Tip
Use the captions from the automatic transcription service in Lecture Capture or Kaltura. If you’re teaching on Zoom, Lecture Capture will still generate captions for you. Just be sure to enable automated captions when starting the Zoom meeting, and record to the cloud.
4. Link meaningful text
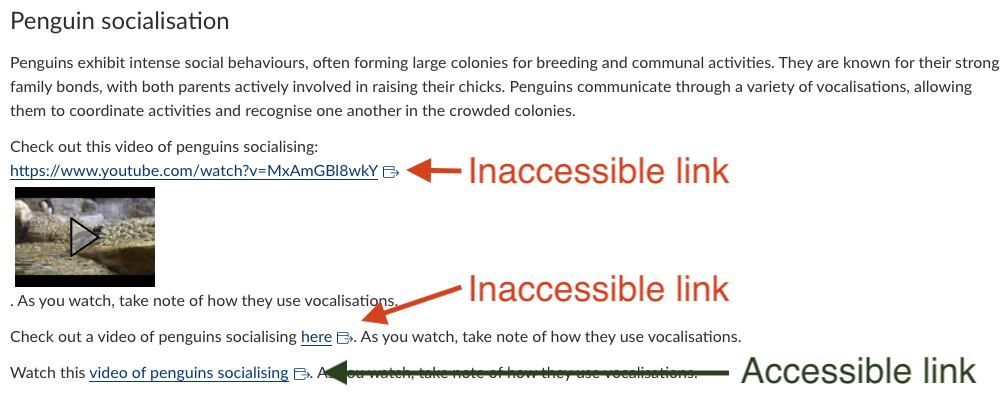
Hyperlink meaningful text (not URLs or the words ‘click here’.)
Why?
Students who use screen readers will aurally ‘scan’ the page for links, just like sighted students scan links visually. Short, meaningful link texts help students find the information they need quickly.
Tip
Shortcut keys for adding links to text: If you select text in your LMS page, you can use Ctrl + K (Windows) or Cmnd + K (Mac) to open a window that lets you paste a URL link on the text. This trick works in the LMS, as well as Word, PowerPoint and Outlook.
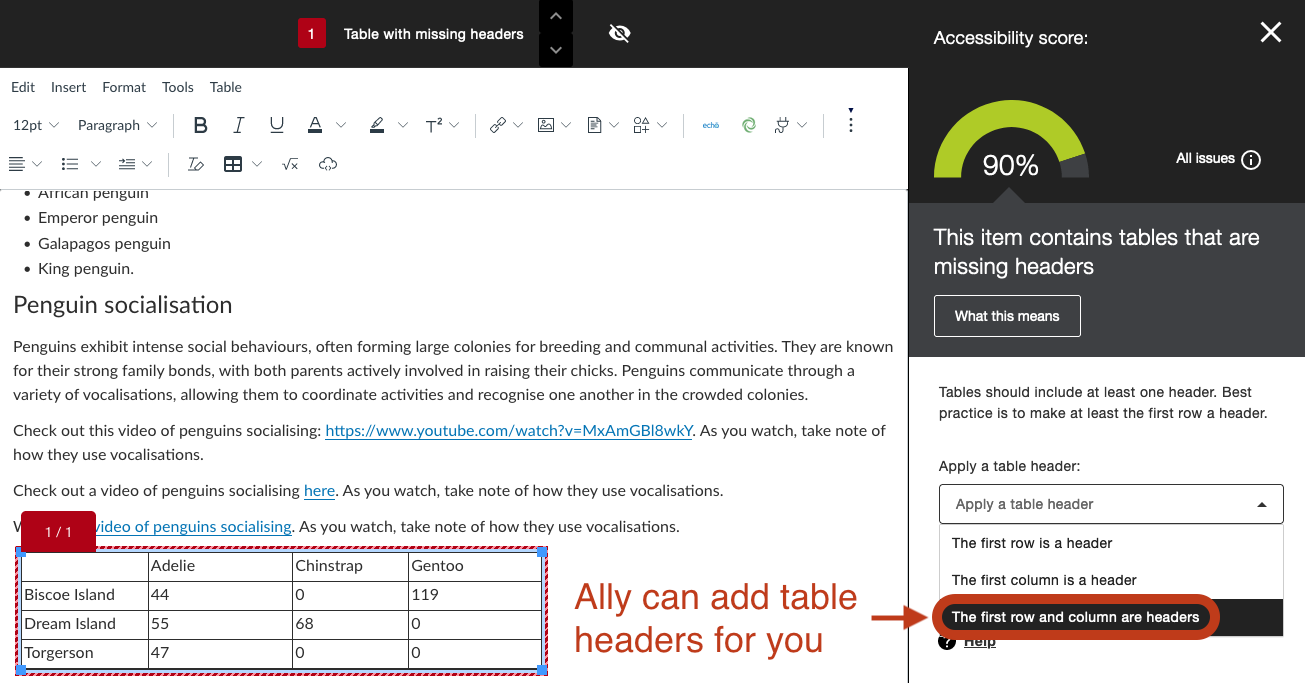
5. Minimise tables
Avoid using tables in your subject unless you really need the tabular format. For example, a table of terms and definitions can easily be a bullet list.
Why?
Tables are a minefield for accessibility, and they’re usually not responsive for small screens either.
Tip
We have Ally enabled in the LMS to help make materials accessible. If you must use a table, you can use Ally to add table headers.
6. Use accessible H5Ps
If you build H5P interactives, use H5P’s content type recommendations to select accessible activity types.
Why?
Some interactives can’t be accessed by screen-reader users, or by keyboard-only users. H5P’s list helps you choose interactives that everybody can use.
FYI
Learning Environments provides regular workshops on H5P and can run a custom workshop if desired.
7. Add alt texts
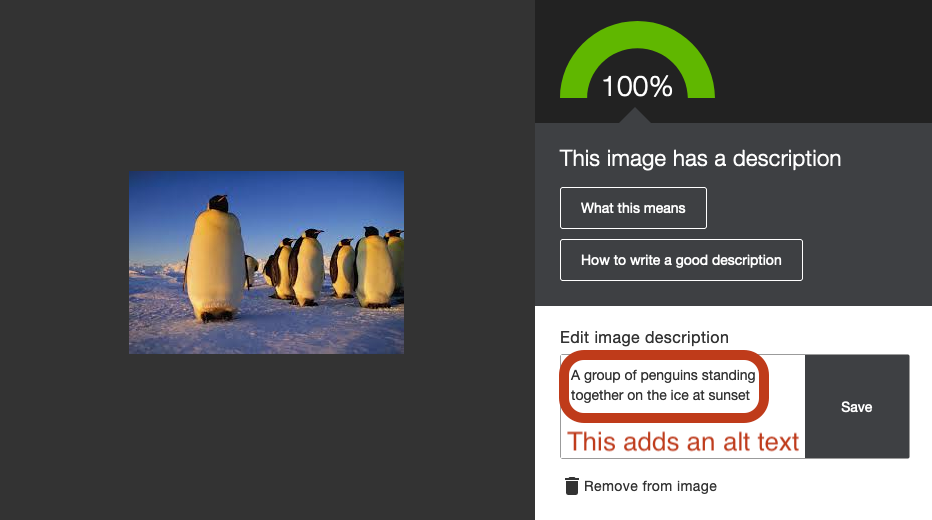
Provide image descriptions, otherwise known as ‘alt texts’.
Why?
Alt texts are the only way screen reader users can access your image. If a student’s internet connection lapses, the alt text is also the only part they may see.
Don’t know how to amend code? No problem! Since you’re putting your content straight in the LMS now, you can use Ally to add text descriptions.
Tip
Our accessibility site has helpful guidance on writing image descriptions.
8. Consider colour contrast
If you make graphics, use large, readable fonts, and allow reasonable colour contrast. If you make graphs, don’t just use colour to identify the lines or sections – use text or a symbol as well.
Why?
Students with some kinds of colour blindness will be unable to read your graphics and graphs if the colour contrast is too weak. As the Web Accessibility Initiative says in its colour contrast video, if it’s important enough to be seen, then it’s important enough to be clear.
Tip
Tools like the Colour Contrast Checker can help.
9. Avoid auto-play
Avoid flickering elements, spinning icons, gifs, or auto-play videos – unless the student can pause or stop them.
Why?
Auto-play elements are distracting for everyone, but they are especially challenging for many neurodivergent people.
Flickering or flashing elements are particularly bad for students with epilepsy.
10. Seek help
Don’t be afraid to ask for help! You can submit a support request to Learning Environments for:
- Guidance, tips, and 1:1 accessibility in the LMS support sessions
- Custom training sessions on accessibility or Universal Design for Learning (UDL).
The Ally Accessibility Report – your new best friend
The Accessibility Report is available in all subjects in the LMS. You will find it in your left-hand navigation menu. This dashboard lets you see the accessibility of your entire subject at a glance. From here, you can click on links to address identified issues right on the page.
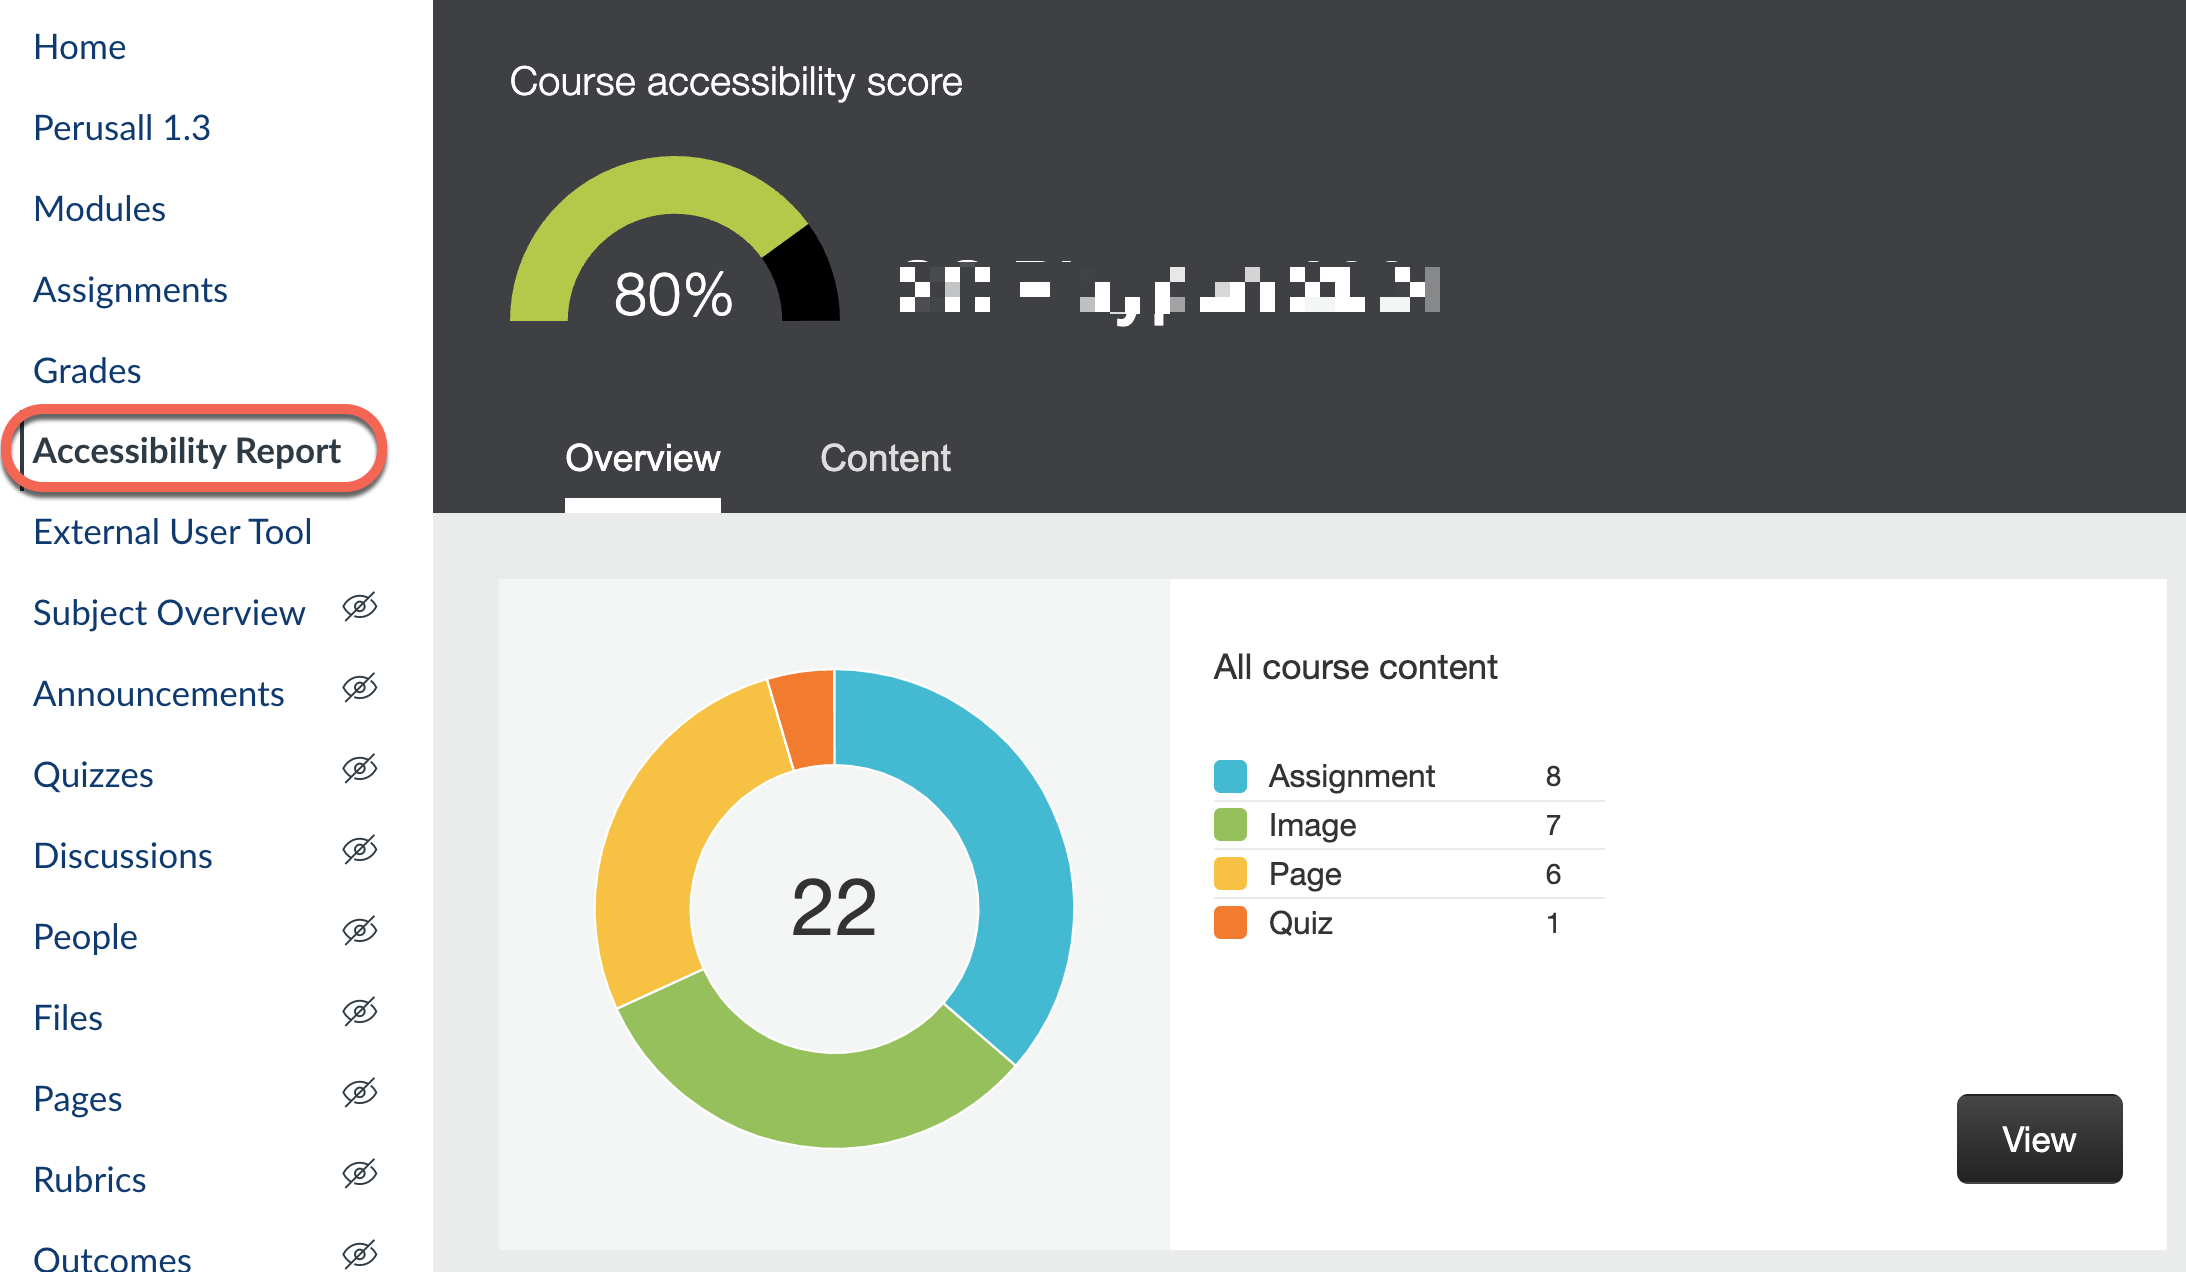
More information on the Accessibility Report can be found in the Ally guide.
This guide was last updated 18 Apr 2024.
Please report any errors or omissions in this guide by submitting an LMS support request.