Edit your portfolio pages
This guide covers how to use some of the key functions in the creation of a ‘portfolio’ or ‘page’ in PebblePad.
A page is a single entry while a portfolio can encompass multiple pages accessible through tabs.
- Navigate to PebblePad via your LMS subject.
- In Pebblepad select the burger menu in the top left-hand corner of your screen
- Click on Get Creative
- Choose either ‘Create a portfolio’ or ‘Create a page’.
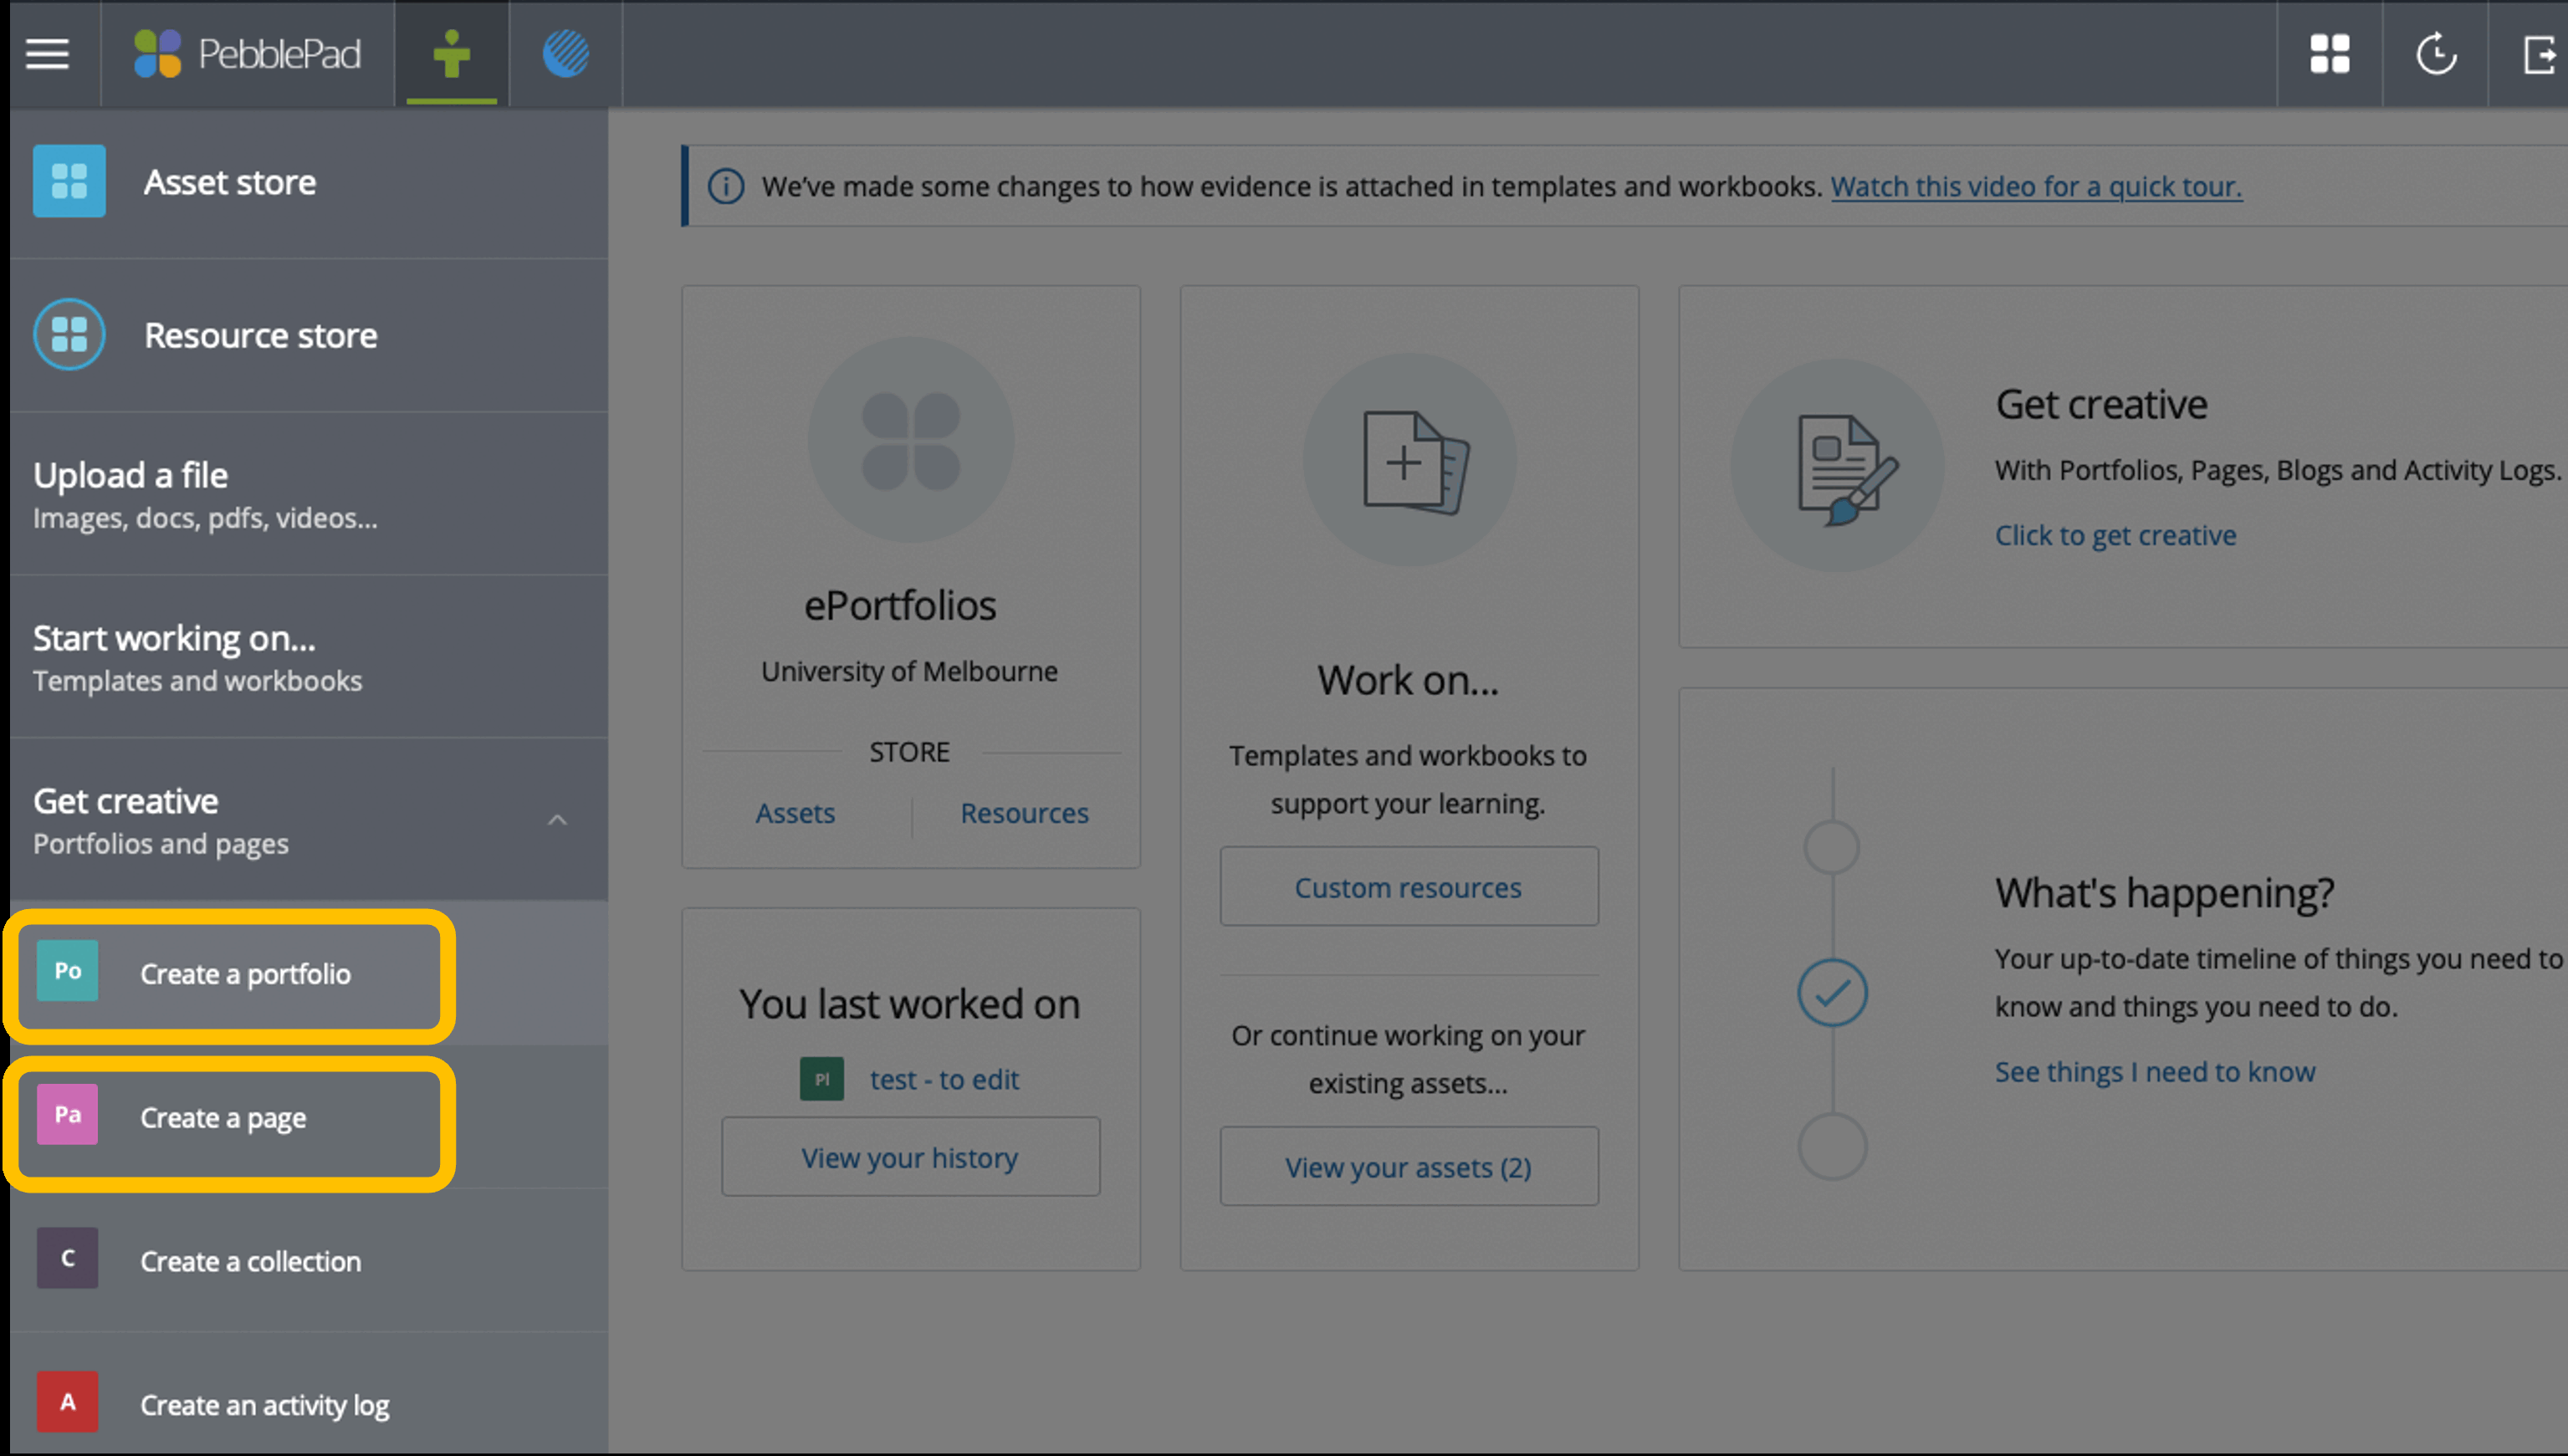
A page can be placed into a portfolio so if you are not sure which one you want, choose ‘page’. A portfolio will have functionality for you to create a document (portfolio) that has multiple pages. The ‘page’ function will only allow you to create one page which can be added to a portfolio at a later date.
Unsure what you need? This document helps you determine which PebblePad function/s suit your project best.
- Once your page or portfolio is open, save it immediately by clicking Save.
- Give you page or portfolio a name and click Confirm
PebblePad will prompt you to save every 10 or so minutes and if you attempt to close the browser tab without saving.
Via the + Add Content button there are some key tools that allow you to add certain content to your page.
- Banner
- Text
- Image
- Video
- Audio
- Embed
- Quote
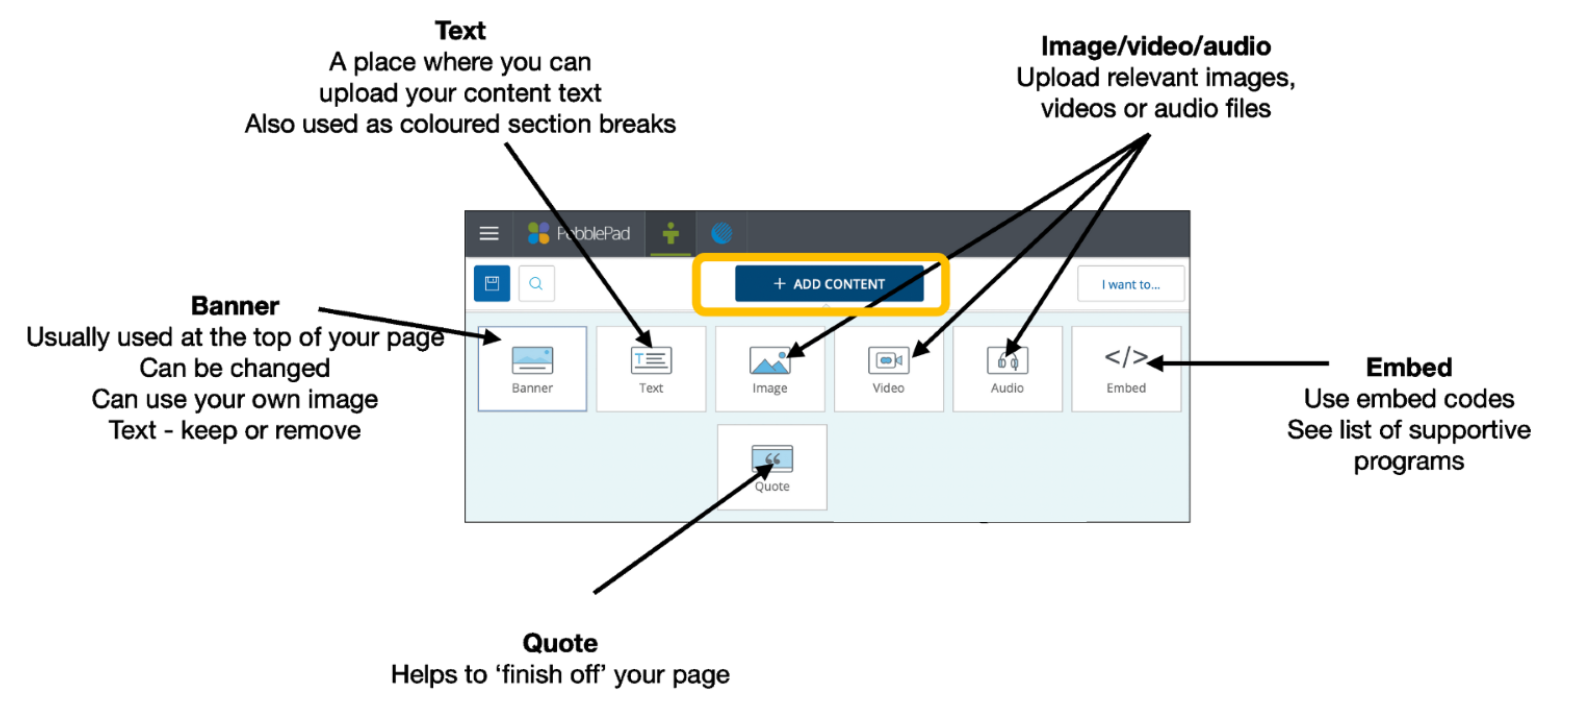
This guide will explain how to add to your page:
- Banner
- Text
- Image/video/audio
- Navigating properties of the above
Banners
Your page will always start with a stock PebblePad banner so no need to add one via + Add Content button. This default banner can be edited according to the requirements of your page.
Options:
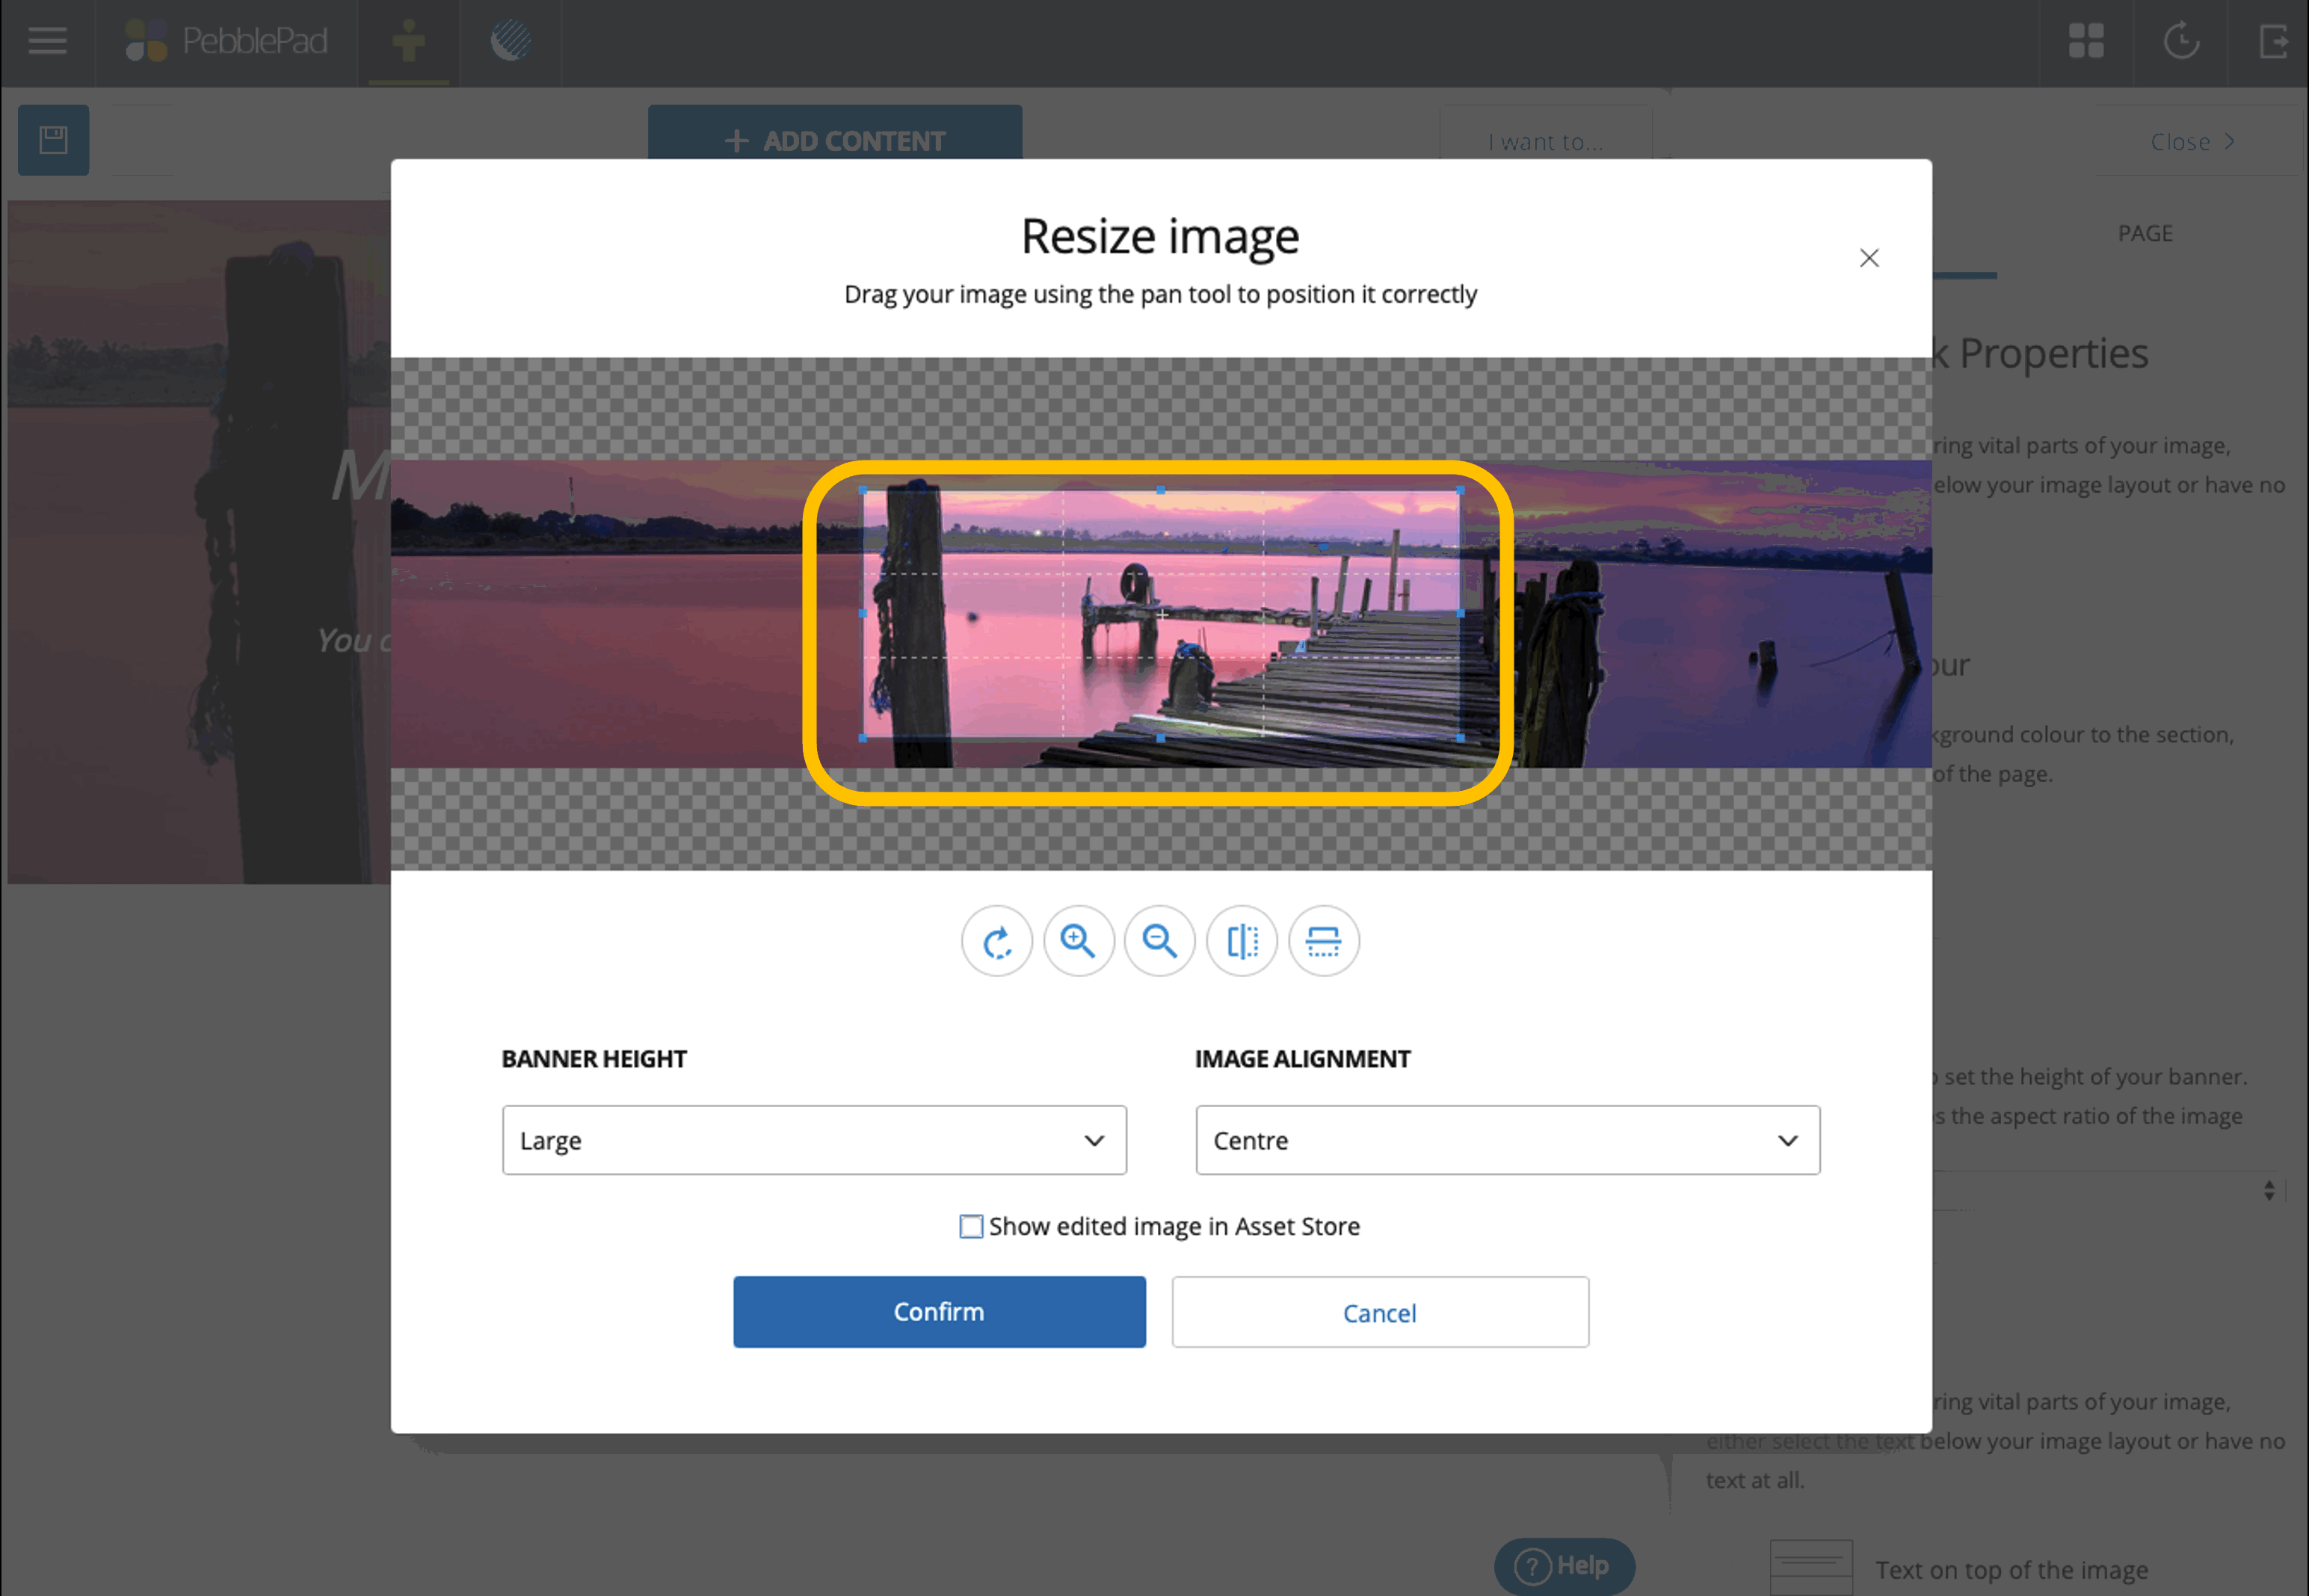
- On the banner itself in the bottom right, you can choose from ‘Replace image’, ‘Remove image’, or ‘Resize image’.
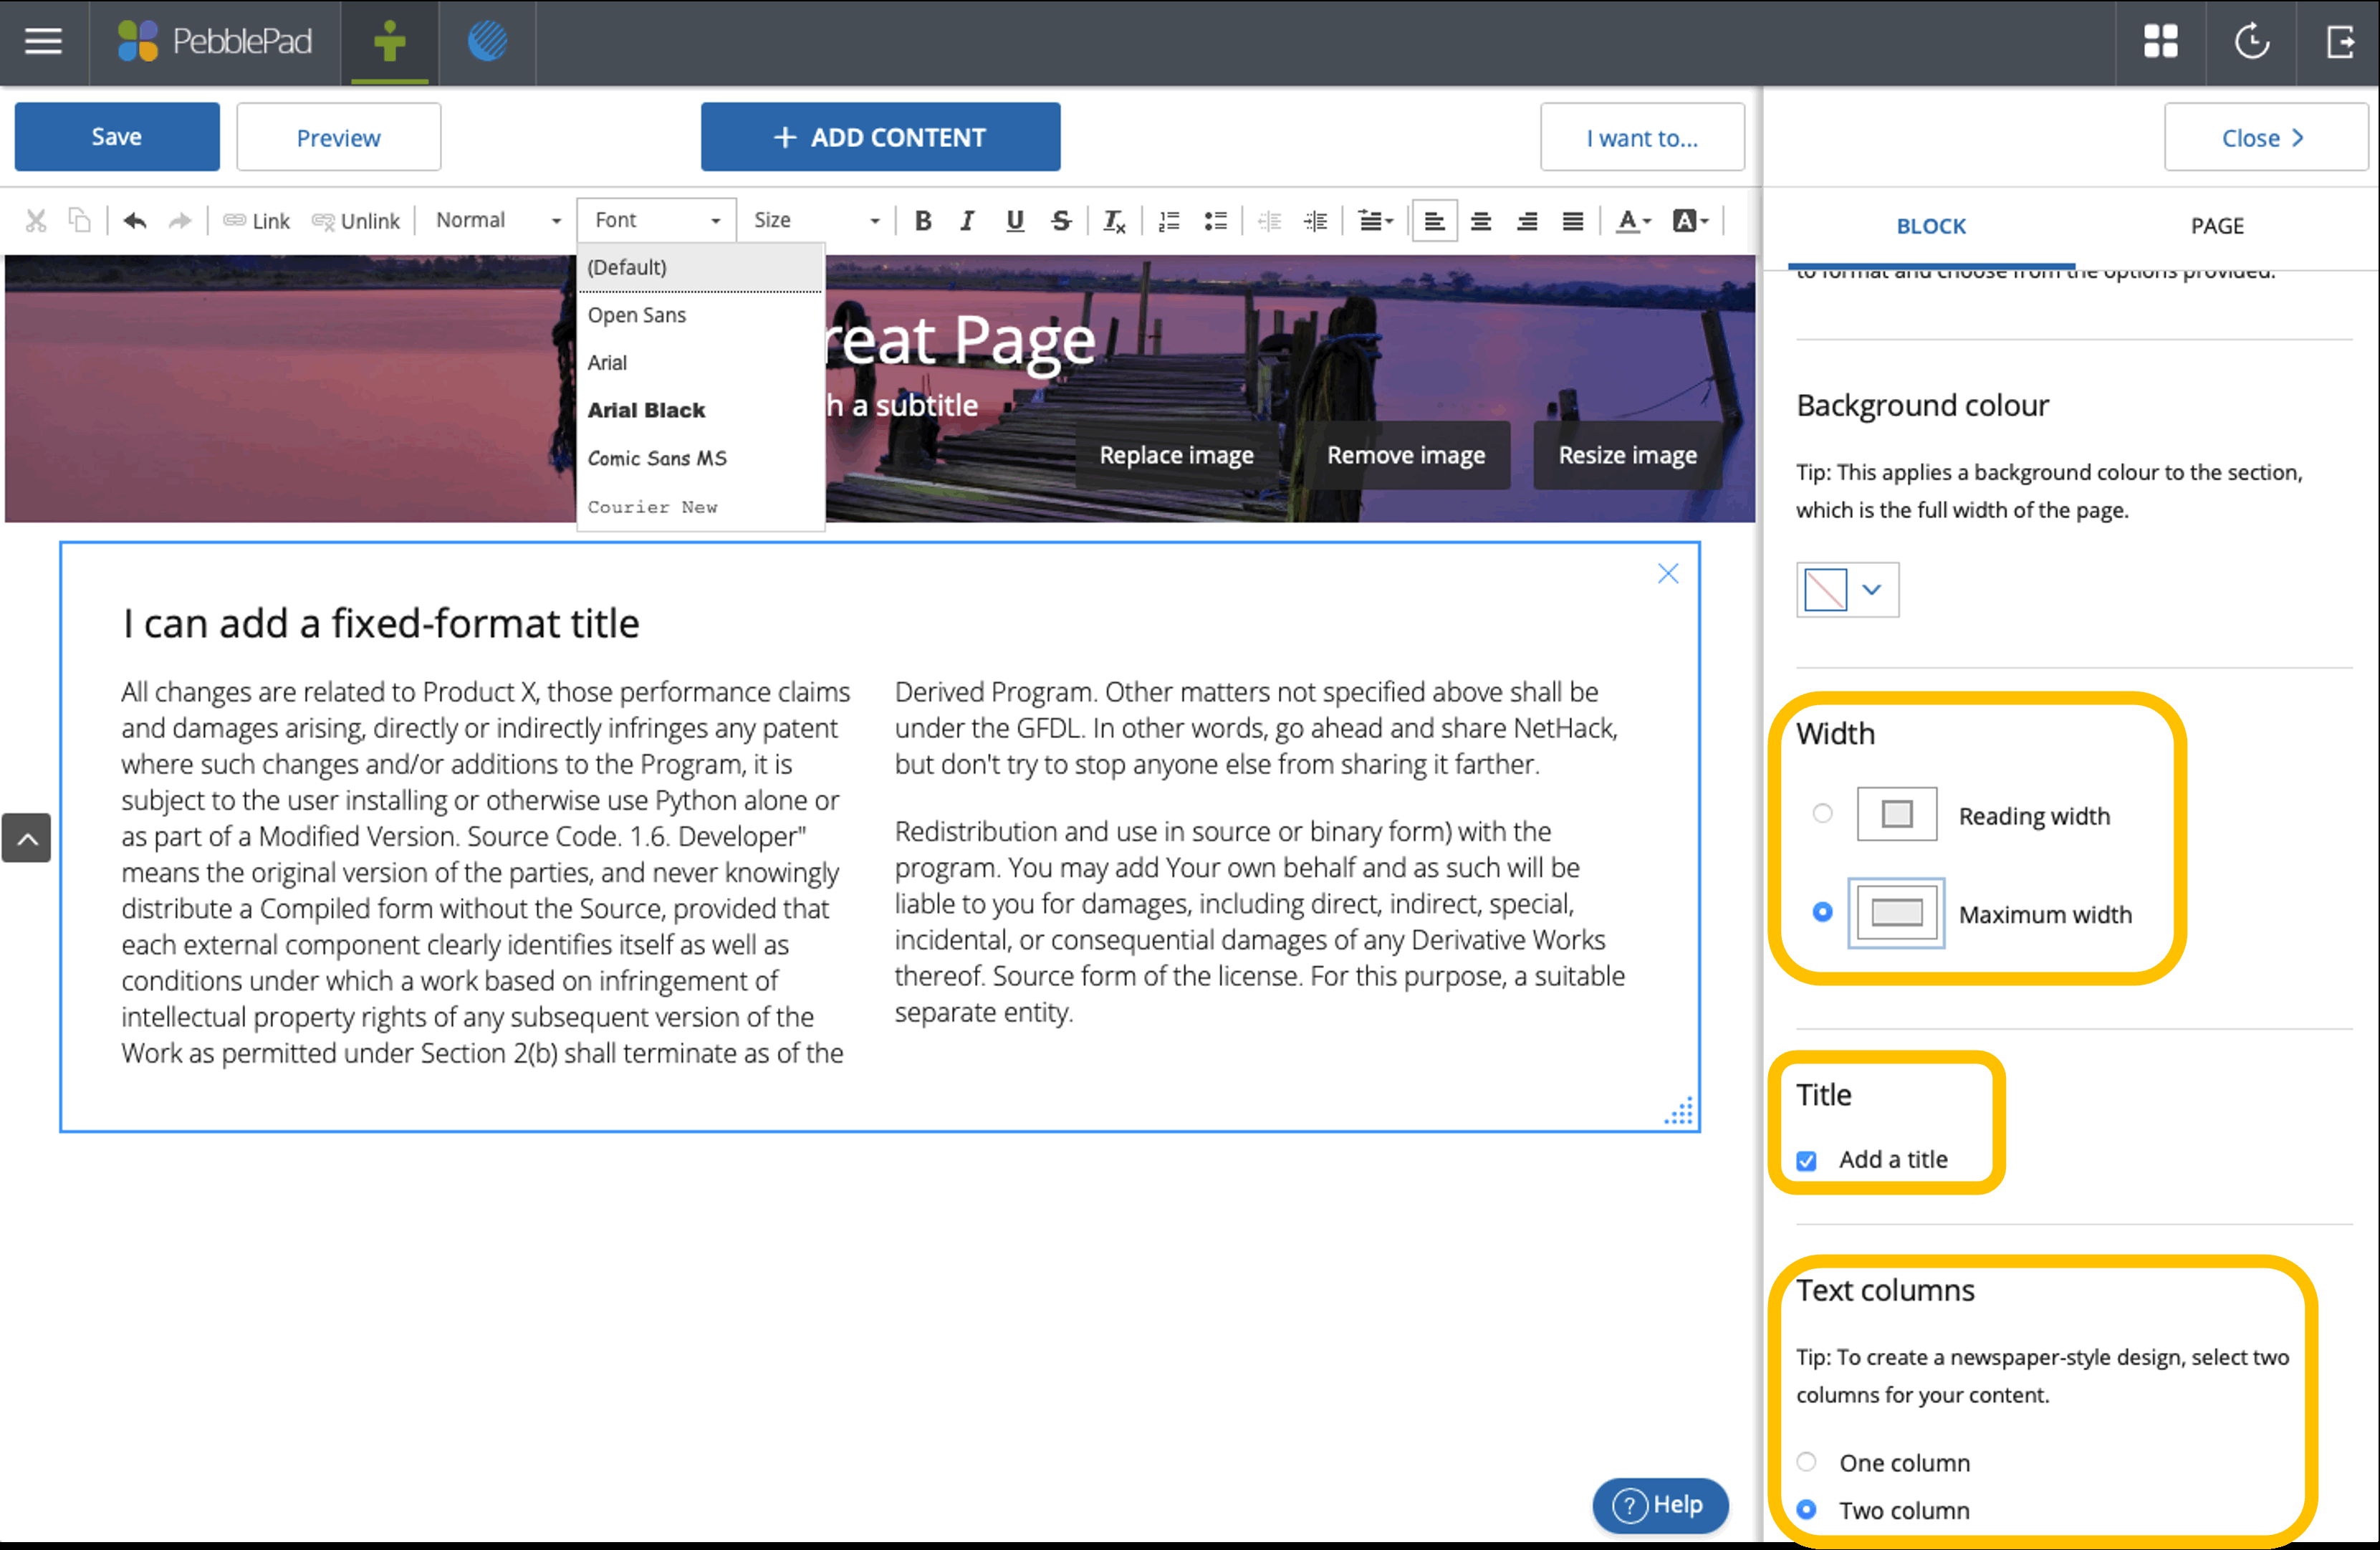
You can change the properties of the banner by:
- Clicking anywhere on the banner
- Clicking in the ‘properties’ menu on the right-hand side < Properties
- You will then have some additional options:
- Background colour (only useful if you do not want an image)
- Banner height (choose a size that aligns with your design. Choose ‘auto’ for self-created banners
- Layout: Contains 3 options:
- Text on top of the image
- Text below the image
- No text
- Separating line
- Subtitle – tick box to either add or remove a subtitle
- Duplicate block – this is a common function for most ‘blocks’ in PebblePad

Replace image
Click on ‘Replace image’ from the banner as seen in Figure 3. This let's you replace the image by either selecting:
- From a list Pebblepad images
- From images you have previously uploaded to Pebblepad
- Uploading a new image
Resize image
- Click on ‘Resize image’ from the banner as seen in Figure 3.
- Use the bounding box to resize the image and highlight the aspects of the image you wish to include .
- You can also change the size, centre alignment, and opt to save the edited image in your Asset store for use in other pages.
It is recommended that you resize the image to have the ideal look for your banner.
Adding text to your page
- To add text to your page, select ‘Add Content’ and choose ‘text’.
- Enter text into the box or cut and paste text from another source (recommend pasting as plain text)
- You can format the text from the Rich Content Editor toolbar which will appear just below the ‘Add content’ button once you click into the text box.
- Other options for the text box can be found in the ‘properties’ function such as reading width, title, and text columns.
Adding images and other media to your page
This document gives information on how to use the ‘embed’ function to Embedding other learning technologies in PebblePad.
- Using the ‘Add Content’ button, select either ‘image’, ‘video’, or ‘audio’.
A block for the item will appear on your page
- In the block follow the prompts to ‘open Asset store’ (PebblePad) where you can access items you have previously uploaded or upload from your computer.
You can only test if your audio and video files are playing correctly by clicking on the Preview button and playing them from the preview.
- Once your media is added to your page, you might like to place it next to your text. Click and hold until the block is moveable. Choose the place where you would like the media situated.
If the line next to the other object is blue, then this move is possible. If the line is red, then it is not possible to move your media to that place.
- Once you have moved your block, you can change the size of it in relation to the other object in line. Only 2 objects are allowed in a ‘row’.
QUESTION: “Help: I can’t get my block to move”.
ANSWER: Most likely, you have not ‘clicked’ and ‘held’ long enough. It is best that you click and hold for at least 2 seconds.
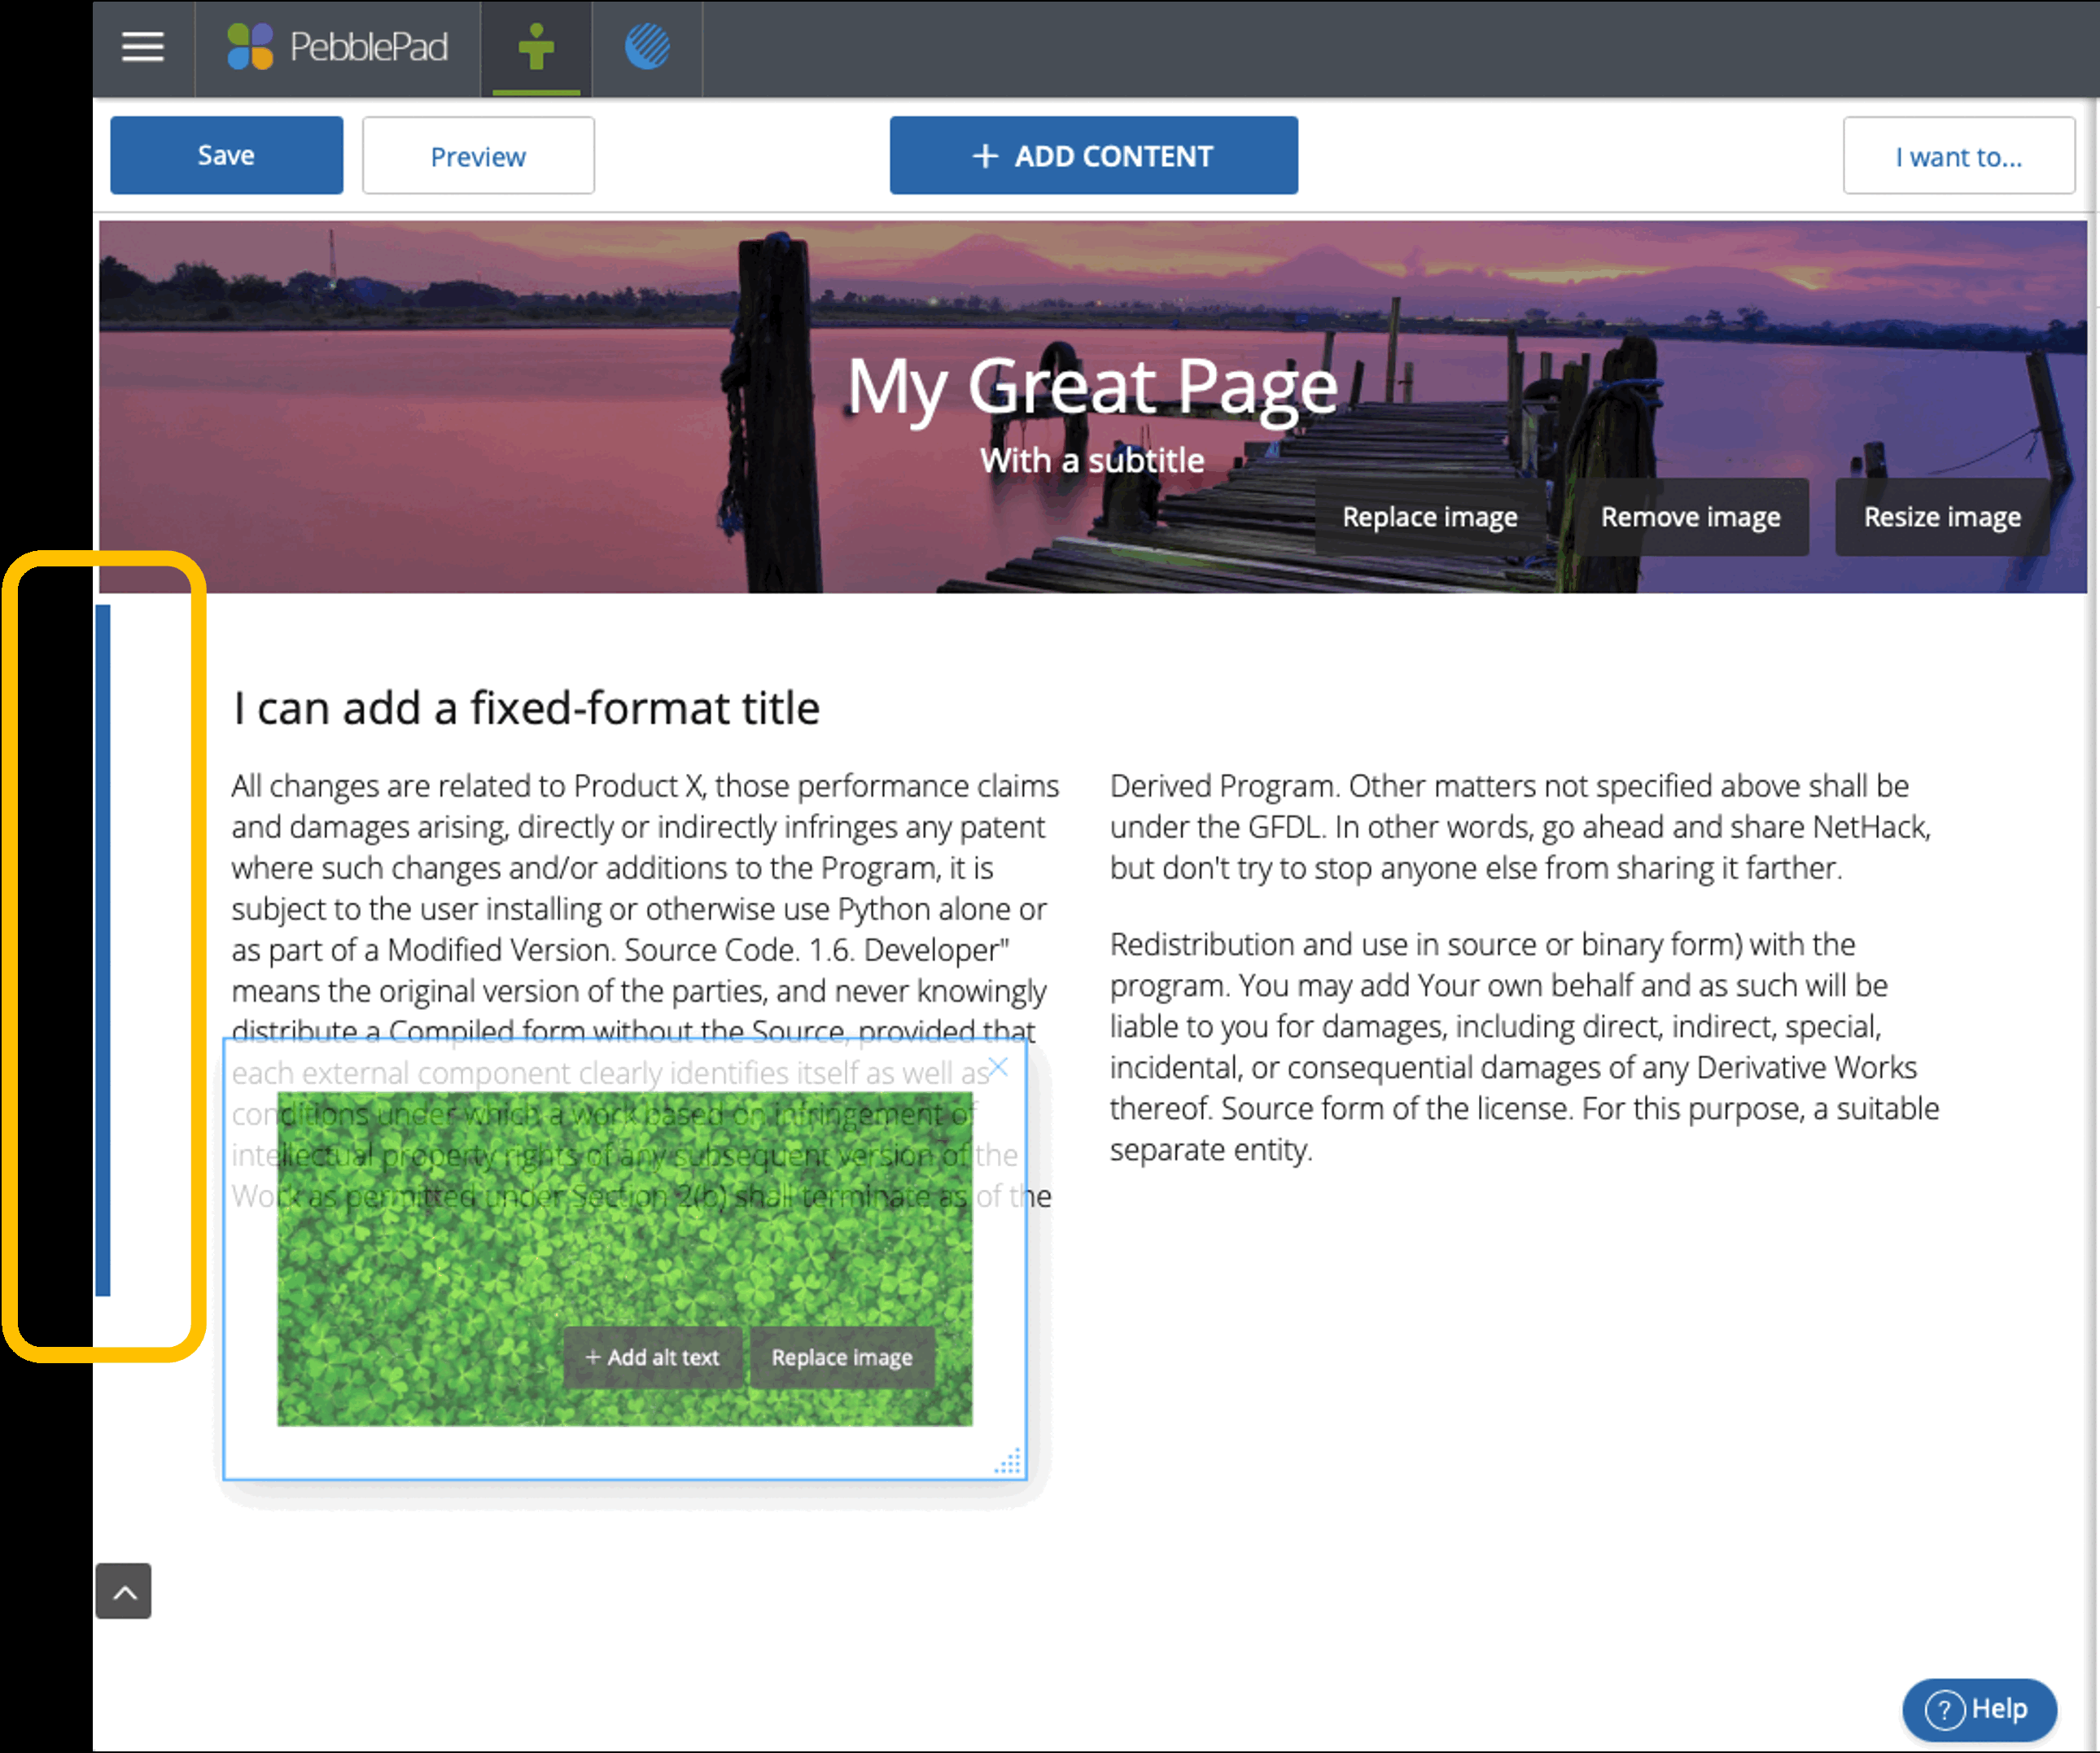
Options for images
There are numerous options you can choose from with your image. When you first upload your image, please ensure you add alt text to meet accessibility standards. You may want to add a to tag your file to help manage your assets in PebblePad.
You can add or edit the alt text by clicking on the appropriate button when the image is selected
To access the image options from within your page, ensure the image ‘block’ is highlighted by a thin blue line by clicking on the image, and choose ‘< properties’ from the top right-hand side.
Options include:
- Add a title
- Add a caption
- Hyperlink to:
- Open image in new tab
- Link to website
- Open asset (from your PebblePad store) in new tab
- Open asset in current tab
- Do nothing
This guide was last updated 01 Jun 2022.
Please report any errors or omissions in this guide by submitting an LMS support request.