Field Friend Explore student guide
Field Friend Explore is a platform that provides scaffolding for field-based experiential learning.
Introduction to Field Friend Explore
Field Friend Explore (formerly known as Field Friend Web) is a platform that provides scaffolding for field-based experiential learning. You are provided with an interactive map on your mobile device’s web browser showing the locations that you need to visit. When you arrive at each of these locations, you will be guided through prompts, explanations, and interactive questions set up for you. You can construct your own understanding by taking spatially referenced notes, photos, and audio and video files.
Refer to the student guide below for detailed instructions on how to participate in a field-based learning activity in Field Friend Explore.
How to access Field Friend Explore
To access Field Friend Explore, go to ffe.le.unimelb.edu.au
Sign in using your University of Melbourne SSO login details
Settings and permissions
You will need to turn on location services on your device.
iPhone
To enable location services:
- Open the Settings app on your iPhone
- Select Privacy & Security
- Select Location Services, and turn on Location Services
- Scroll down and select the web browser that you’ll be using for the trip (eg, Safari Websites)
- Select While Using the App
- Turn on Precise Location
Android
To enable location services:
- Swipe down from the top of the screen and tap settings if it’s showing
- Tap Location
- Enable Location access if it is not enabled. Then tap App location permissions
- Select the web browser that you will be using for your trip, eg Chrome
- Tick Allow only while using the app and switch on User precise location
Mac
To enable location services on:
- Open Systems Settings
- Select Privacy & Security
- Select Location Services, and turn on Location Services
- Scroll down and select the web browser that you’ll be using for the trip (eg, Safari or Chrome)
Windows
To enable location access for Field Friend Explore on your Windows device, follow the browser-specific instructions below:
- Access location settings for Chrome
- Access location settings for Firefox
- Access location settings for Microsoft Edge
Before starting your Trip
Prior to going on your Trip, ensure that you are in the correct Site as you may be enrolled into multiple. You will be able to see all the Sites that you are enrolled in at the top of the Home page.
Each Site will have different Trips for you to go on.
To change Sites, simply click on Change Site to expand the list of Sites you are enrolled in and click on the Site that has the Trip you want to select.


How to go on a Trip
Before clicking on a Trip, ensure that you are in the correct Site. Trips can be located on the Home page of Field Friend Explore.
To start going on a Trip, follow these instructions:
- Click on the Trip on the Home page
- Each waypoint or location in Field Friend Explore will be unlocked automatically when you are within a 20-metre radius.
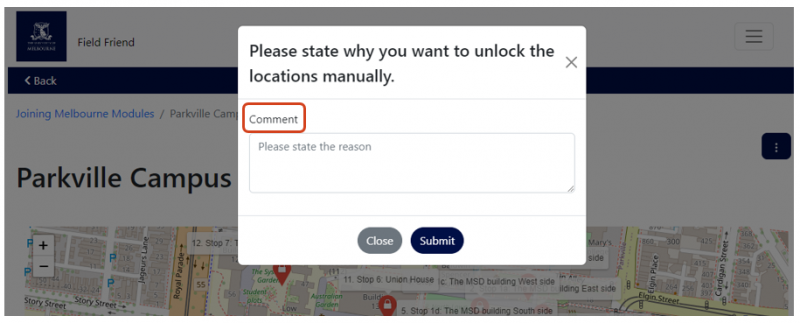
However, in cases where physical attendance is not possible, you can unlock waypoints manually and provide a valid reason for your absence. Within a trip, click on the three-dot icon located in the top-right corner. Select Unlock all locations in the dropdown menu and provide a reason to unlock the waypoints manually and click Submit. Your Subject Coordinator will be able to view the reason you provide.
You should now be able to see all the waypoints on this Trip and click on them to view more information.
Click on the fullscreen button for an expanded view of the map.

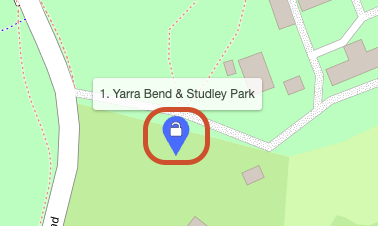
To view more information about a particular waypoint, click on the location icon of each waypoint. You can toggle back and forth between viewing the image of the waypoint and the textual information provided.


How to view waypoints and attempt questions
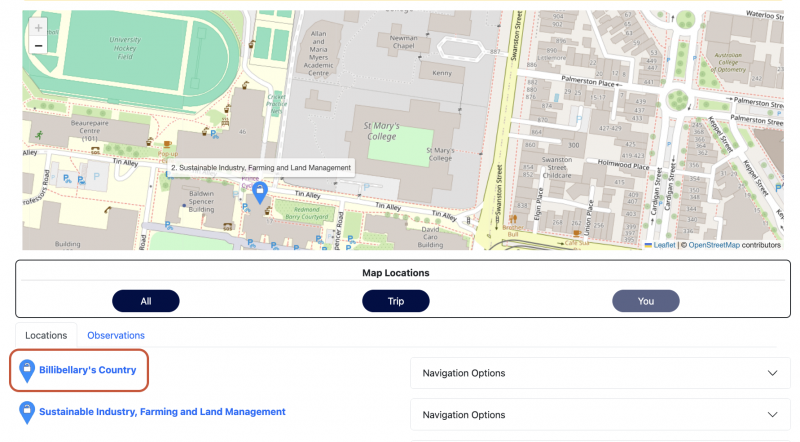
Once a waypoint has been unlocked (refer to the instructions above), you may access the activities by clicking on the unlocked waypoint(s) listed under the map.
From there, you can select a question to answer from the questions dropdown list located at the top of the page.

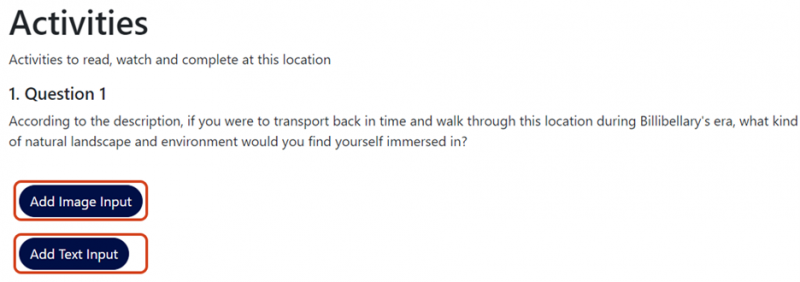
For each question or activity, you can add text, image, or other media formats, by clicking on the relevant button.
Adding a response
Adding a video file
Mobile version (video)
- Once you click on Add Video Input, a tab will appear. Click on Open Camera to record a video of your surroundings to add onto Field Friend.
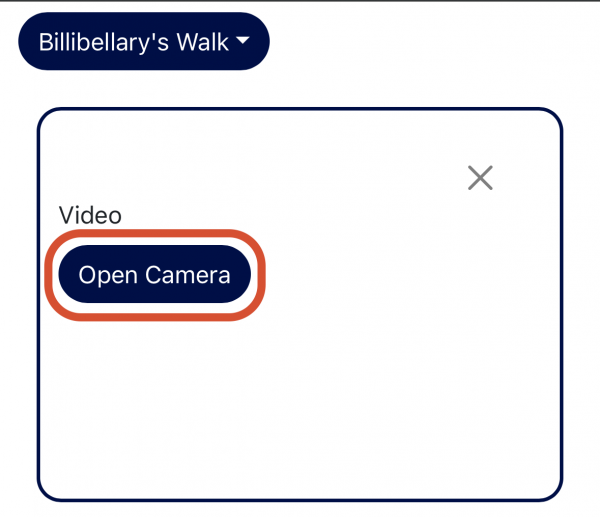
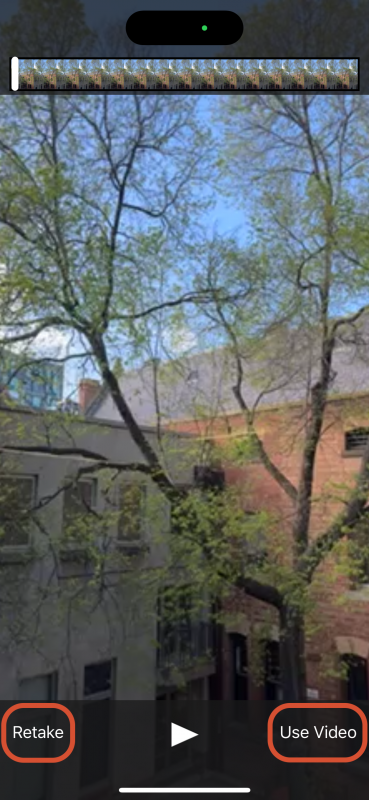
- If prompted, please allow your browser to access the Camera and Microphone.
- Start recording your video. Once done, you can either Retake or Use Video.
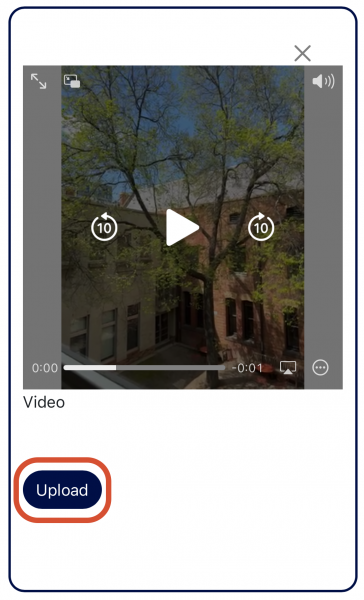
- Click on Upload to publish the video. You will see a confirmation once your upload is successful. Click on Ok to dismiss the notification.
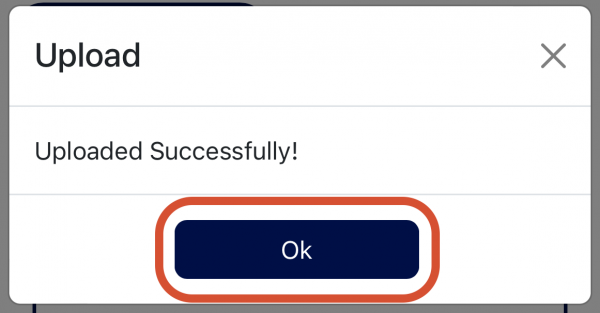
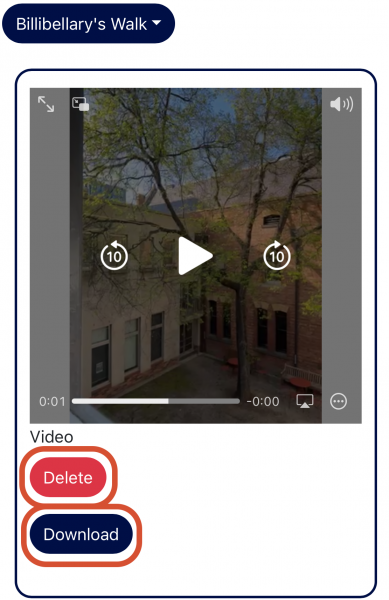
- Once uploaded, you can choose to either Delete or Download the video by clicking on the respective buttons.
Desktop version (video)
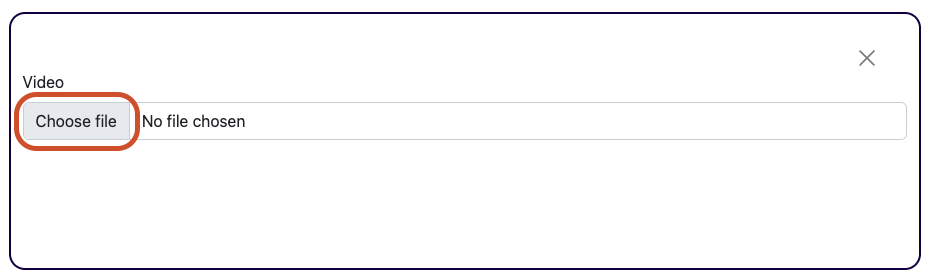
- Once you click on Add Video Input, a tab will appear. Click on Choose file and select a video from your computer to add onto Field Friend.
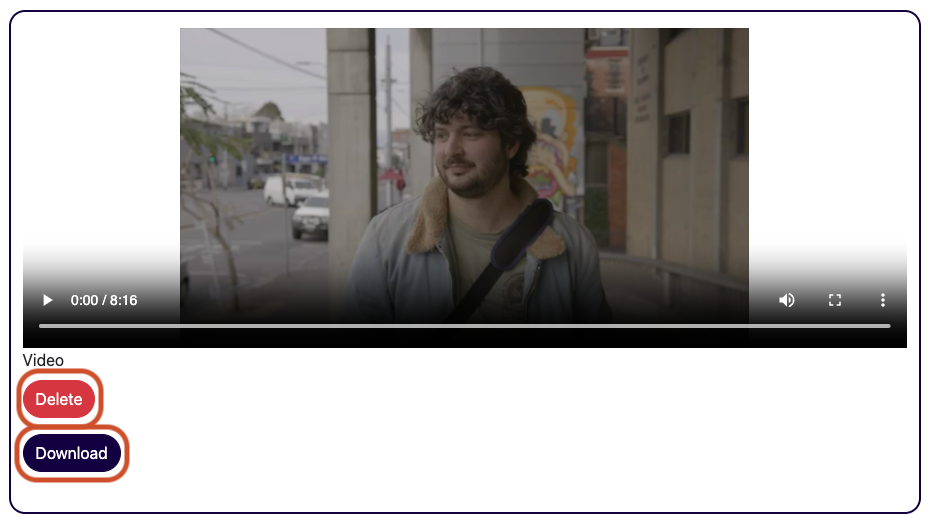
- Once a video has been selected, click Upload.

- Once uploaded, you can choose to either Delete or Download the video by clicking on the respective buttons.
Adding an audio file
To record an audio clip to add as input, ensure you have allowed your Microphone to be used in your browser as well as in your computer’s system settings.
- Once Microphone access has been enabled on both your computer’s settings and browser, click on Allow access to microphone
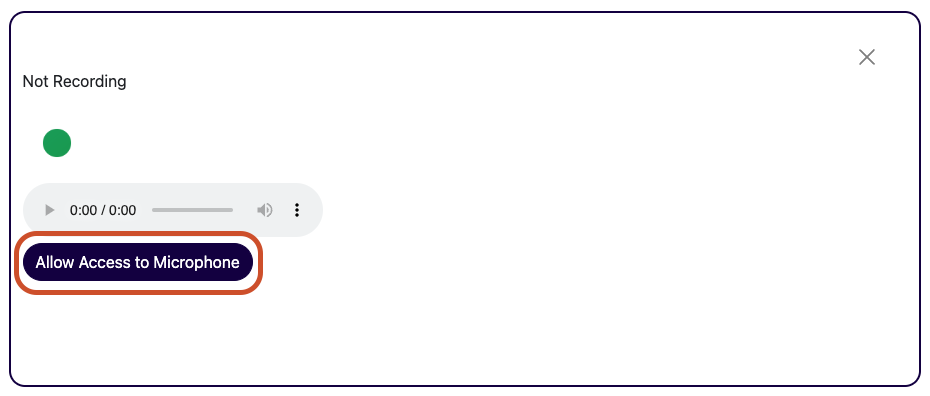
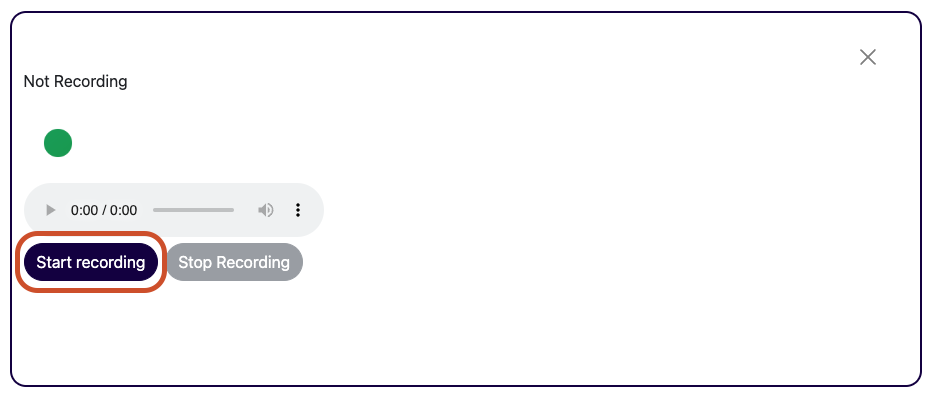
- The green dot will turn red, and the status will be changed to ‘Recording’. Speak into the microphone and once done, click on Stop recording.
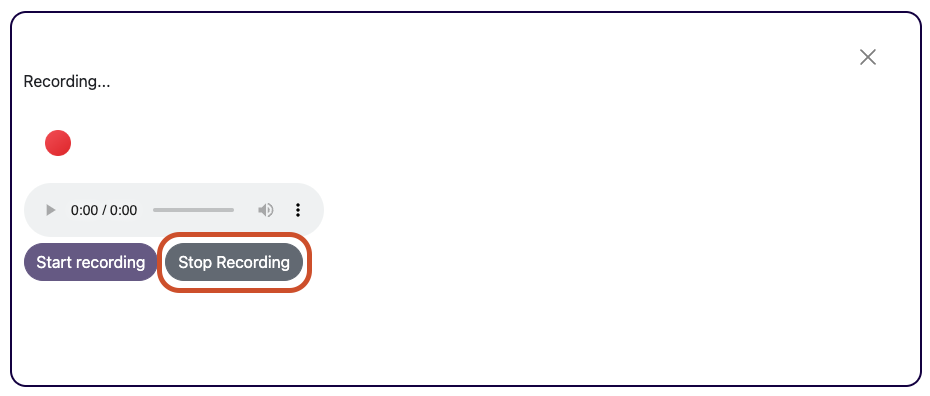
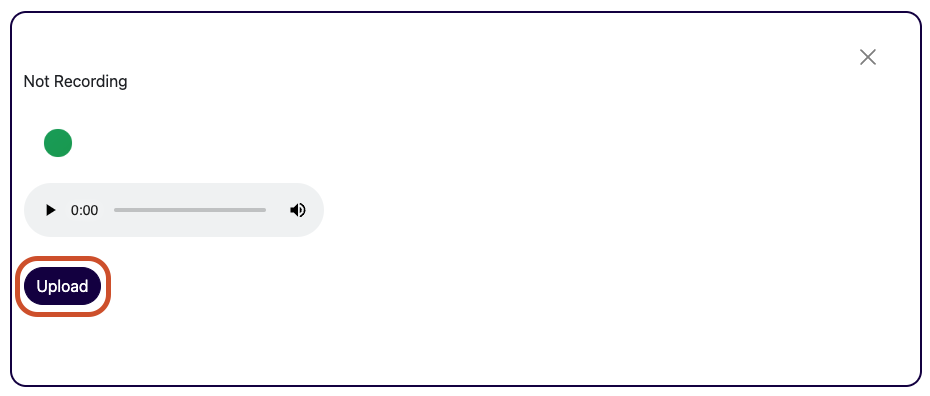
- You can listen to your recording prior to uploading by clicking on the Play button on the media player. Once you are ready to upload, click on the ‘Upload’ button. A message will appear to prompt that the audio file has successfully been uploaded.
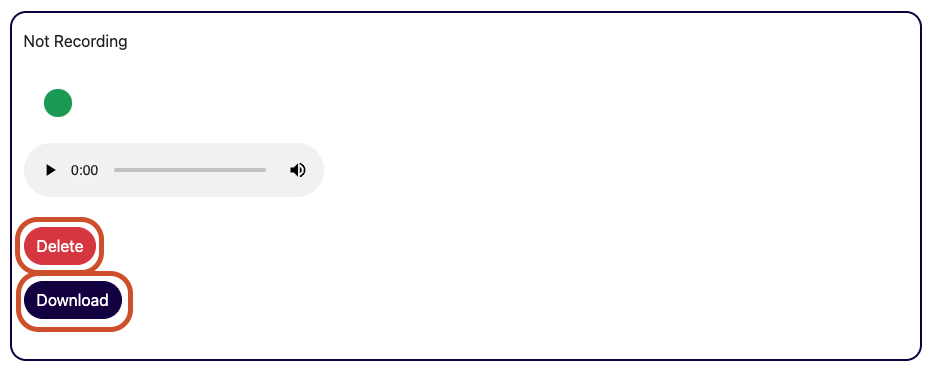
- Once uploaded, you can choose to either Delete or Download the audio by clicking on the respective buttons.
Adding an image file
Mobile version (image)
- Once you click on Add Video Input, a tab will appear. Click on Open Camera to take a photo of your surroundings to add onto Field Friend.
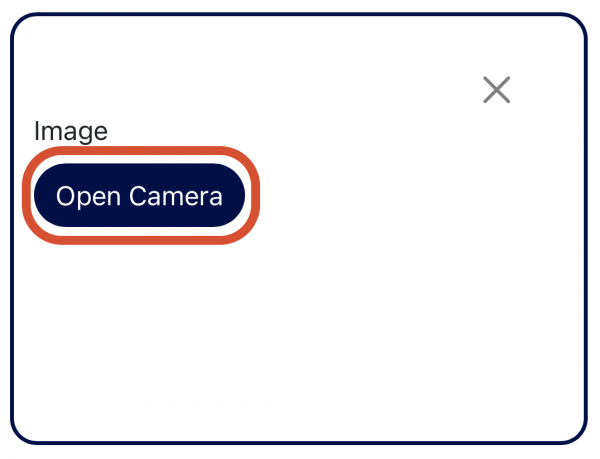
- If prompted, please allow your browser to access the Camera.
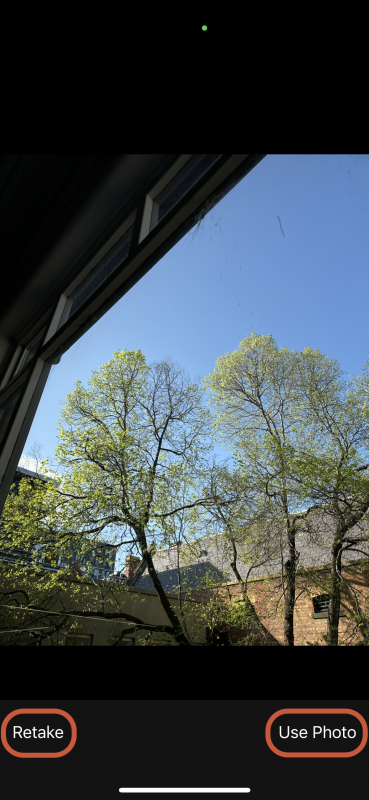
- Start taking your photo. Once done, you can either Retake or Use Photo.
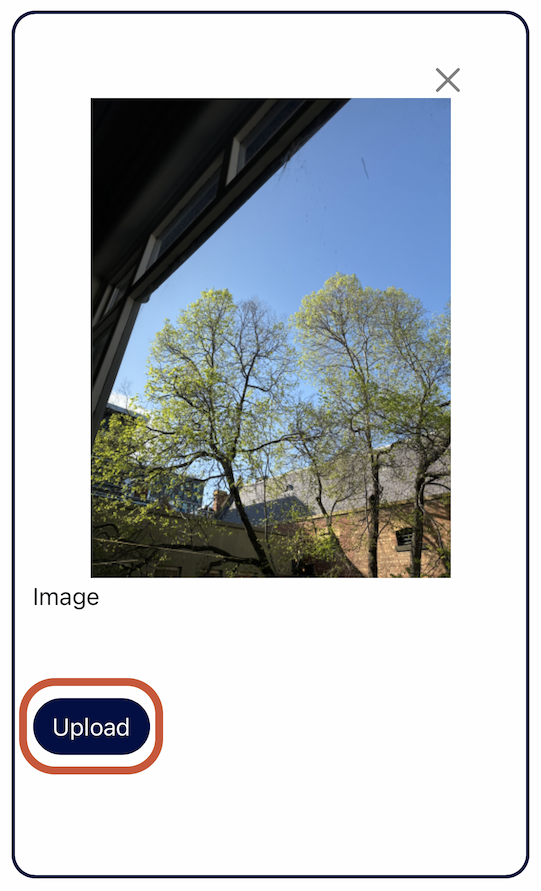
- Click on Upload to publish the photo. You will see a confirmation once your upload is successful. Click on Ok to dismiss the notification.

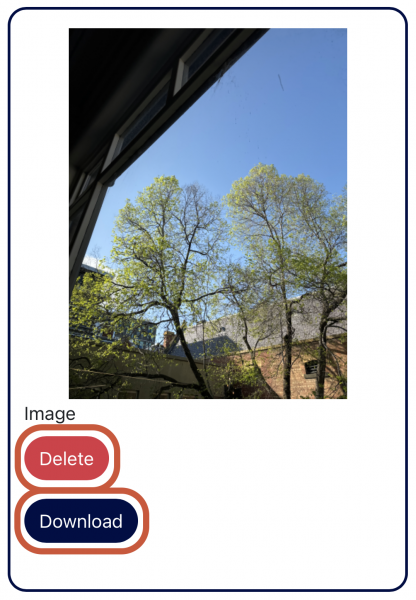
- Once uploaded, you can choose to either Delete or Download the video by clicking on the respective buttons.
Desktop version (image)
- Once you click on Add Image input, a tab will appear. Click on Choosefile and select an image from your computer to add onto Field Friend.
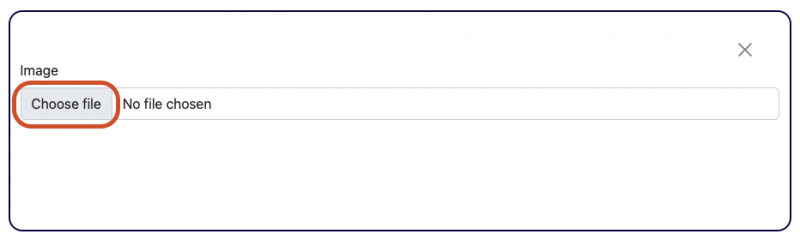
- Once an image has been selected, click Upload
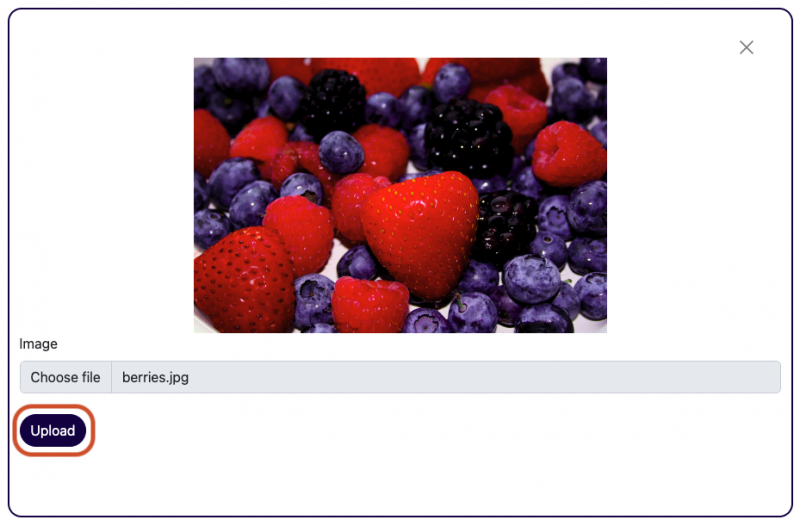
- Once uploaded, you can choose to either Delete or Download the image by clicking on the respective buttons.

Adding text input
- Enter your desired text into the textbox and click on Save once complete.
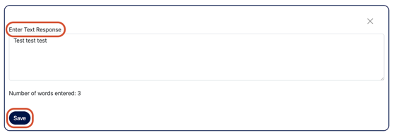
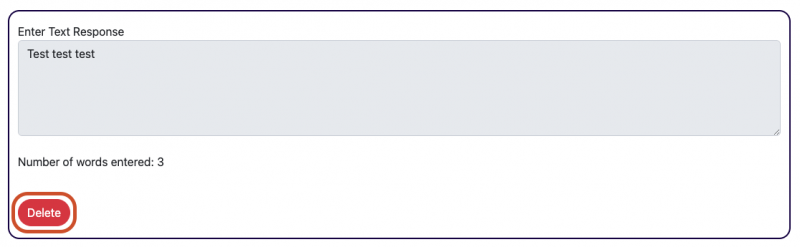
- To edit the text, click on Delete – your last written text will still be kept.
Group member responses
If you have been organised into groups within a Field Friend trip, you will be able to view your group members’ responses for each waypoint on the desktop version of Field Friend. Click on the Check out your friends’ answers dropdown and select a group member’s name to view their response. If you have a lot of group members, you can filter them by typing their name into the field that appears.

Note:
- To view your group members’ responses, you must use a laptop or desktop computer.
- You will not be able to alter or delete your group members’ responses (including media).
How to post observations
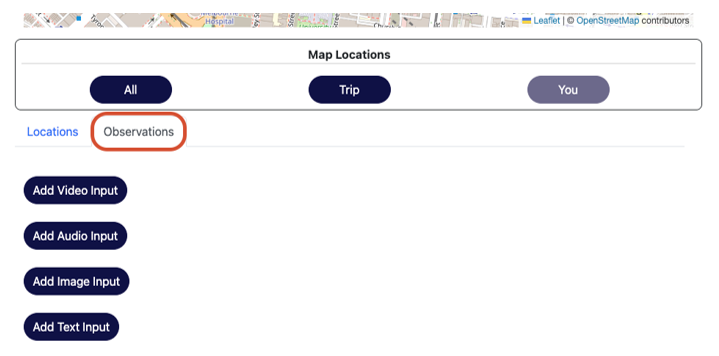
Observations are optional videos, audio, images, and text that you may wish to post while on a Trip. These are unrelated to the questions that you complete at each waypoint and are meant to be seen as supplementary feature for you to capture any sights and sounds you see while on a Trip.
To add observations of what you have seen while on a Trip. Click on the Observations tab and select the corresponding type of media you want to input.
Frequently asked questions
-
Read the advice below carefully before you go on a Field Friend trip
- Always go into the field with others, never go alone
- Review specific risk assessment and safety information provided for each trip in the LMS
- Ensure you fully charge your phone before starting the trip
- Recommended gear checklist:
- Headphones for listening to Virtual Guide videos (that can preferably be worn in one ear only).
- A portable power bank in the event of low battery, particularly if you have an older model device. If you do run out of battery, work with your peers on their device.
- Appropriate footwear
- Sunscreen/Hat
- A warm and/or waterproof jacket (depending on weather forecast)
-
After you have captured your media, please upload it. Otherwise, it will be lost when you go to another location. Large media files may take time to upload so don’t click away from the app scree until complete.
-
You should ideally capture media directly in Field Friend using the Add Video Input and/or Add Image Input buttons. However, you can open Field Friend on a computer and attach the pre-captured media files by using the Add Video Input and/or Add Image Input buttons.
-
You will need to turn on location services by following the instructions in the Settings and permissions section above.
Safety precautions
- Install the SafeZone app onto your device.
- Be aware of your surroundings and use your phone’s speaker or a one earpiece when viewing the videos at the waypoint
- In the unlikely event of an emergency, call 000
Troubleshooting
Manage cookies and cached files
If Field Friend is failing to load data properly, you may need to clear your browser’s cache. Follow the instructions below to clear browser’s cache on your mobile phone and computer:
Mobile device:
- Clear the history, cache and cookies from Safari on your iOS device
- Clear cache and cookies from Chrome on your Android device
Desktop:
- Clear cache and cookies in Safari on Mac
- Clear cache and cookies in Chrome on your Windows computer
- Clear cache and cookies in Firefox on your Windows computer
- Clear cache and cookies in Microsoft Edge on your Windows computer
Spinning wheel
When you log in to Field Friend for the first time via SSO, you may encounter a never-ending spinning wheel. This is normal and it can take up to five (5) minutes to load the data for your trip. However, if the spinning wheel stays for more than 5 minutes, please try the following steps to troubleshoot it:
- Click the reload button on your web browser and wait for 5 minutes
- If Step 1 didn’t work, clear your browser’s cache by following one of the links above, then access Field Friend again
- If the above steps didn’t work, clear your browser’s cache again, then log in to the LMS. After logging in to the LMS, try accessing Field Friend.
- If none of the above steps worked, contact your Subject Coordinator by following the instructions in the Getting support section below.
Getting support
If you are experiencing difficulties using Field Friend and need help, please contact your subject coordinator providing:
- Your name and username
- The name of the site, trip, location and/or question you are having difficulties with
- A clear description of the problem
- Details of the device you are using, including:
- The device type. E.g. iPhone 13 mini, Samsung Galaxy S23
- The browser being used. E.g. Safari, Chrome, Firefox, Brave
- A screenshot showing the page that you are on.
This guide was last updated 19 Aug 2026.
Please report any errors or omissions in this guide by submitting an LMS support request.