Embed EchoVideo media in the LMS
In the LMS, staff can embed EchoVideo media directly using the rich content editor.
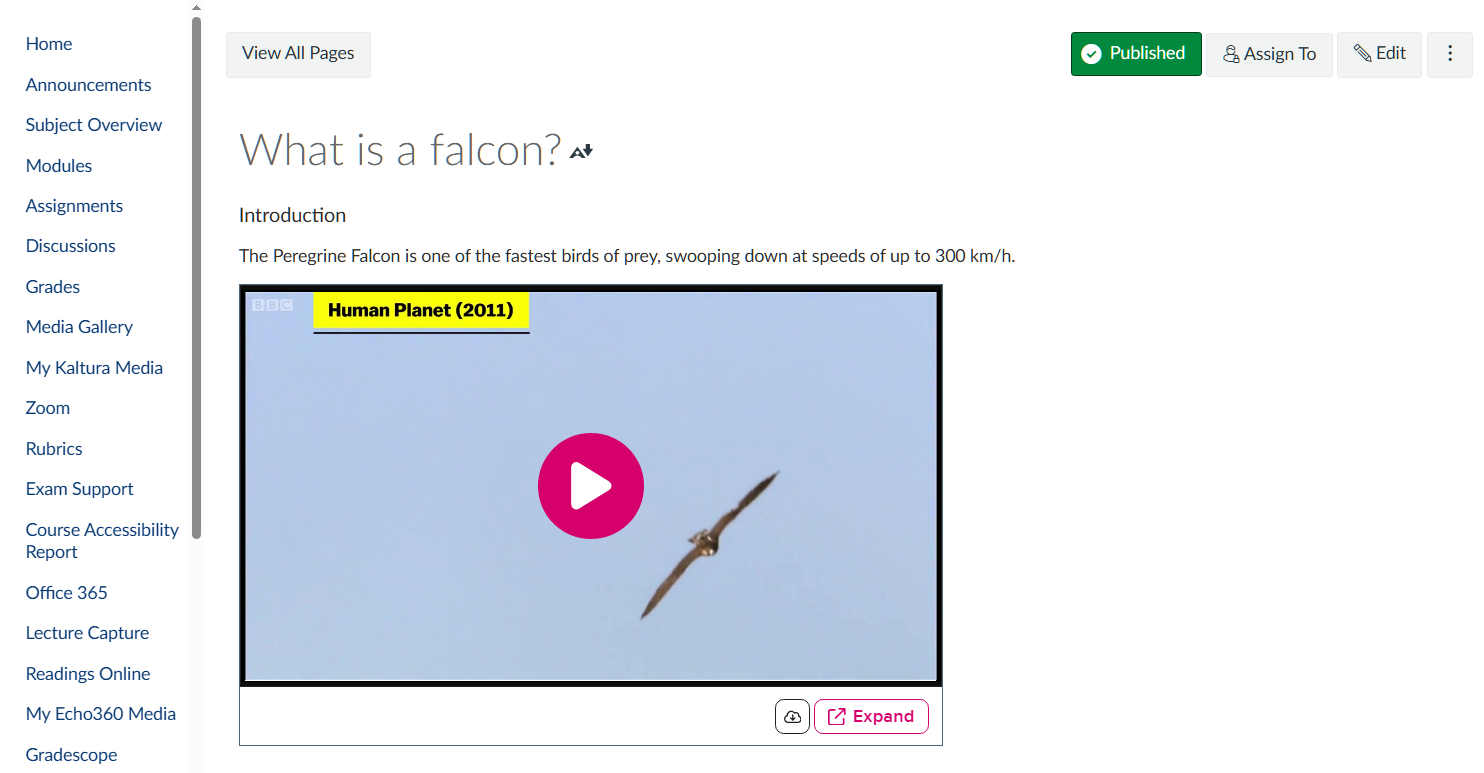
If you have media that has been recorded or uploaded in EchoVideo, you can embed it in LMS pages alongside text as a complementary resource.
Note that you can only embed media in an LMS page if it has been added to your EchoVideo Library. See our managing recordings guide for how to:
- Create a copy of media (for example, a lecture recording) to add it to your Library
- Upload other types of recordings and media to your Library (for example, Zoom recordings)
- Trim or cut segments from your recording before embedding it
- Upload slides or pre-recorded media into EchoVideo to accompany your recordings.
Student-view by Canvas LMS is currently incompatible with EchoVideo embeds. This does not mean that students are unable to view embedded media, only that the student-view tool does not accurately reflect what EchoVideo embeds look like for enrolled students.
To see what a page with an EchoVideo embed would look like to students, we recommend enrolling a (test) external user in a student role and verifying by viewing the pages as this external user.
Embed media from your EchoVideo Library
There are two main ways to embed EchoVideo media into the LMS rich content editor.
A. Create an embed code from the EchoVideo media
- In EchoVideo, click on the media asset you would like to embed.
- From the media details page, click on the Publishing tab.
- From the left-hand Embeds menu, click Create Embed Code.
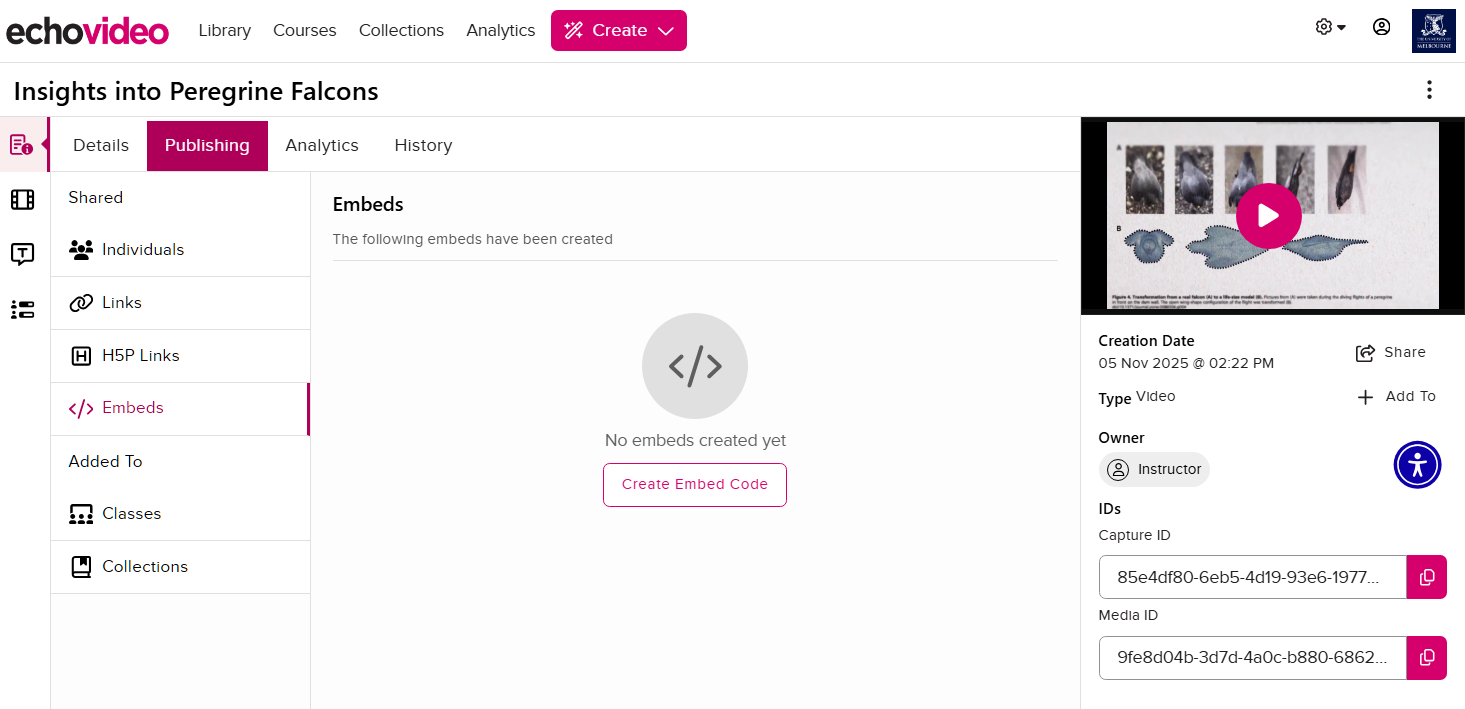
- Once created, copy the embed code. Note: You can click on the three-dot menu to configure the embed settings.
- Go to the LMS page that you want to embed your media and click Edit.
- In the toolbar for the rich content editor, click Insert and select Embed from the dropdown.
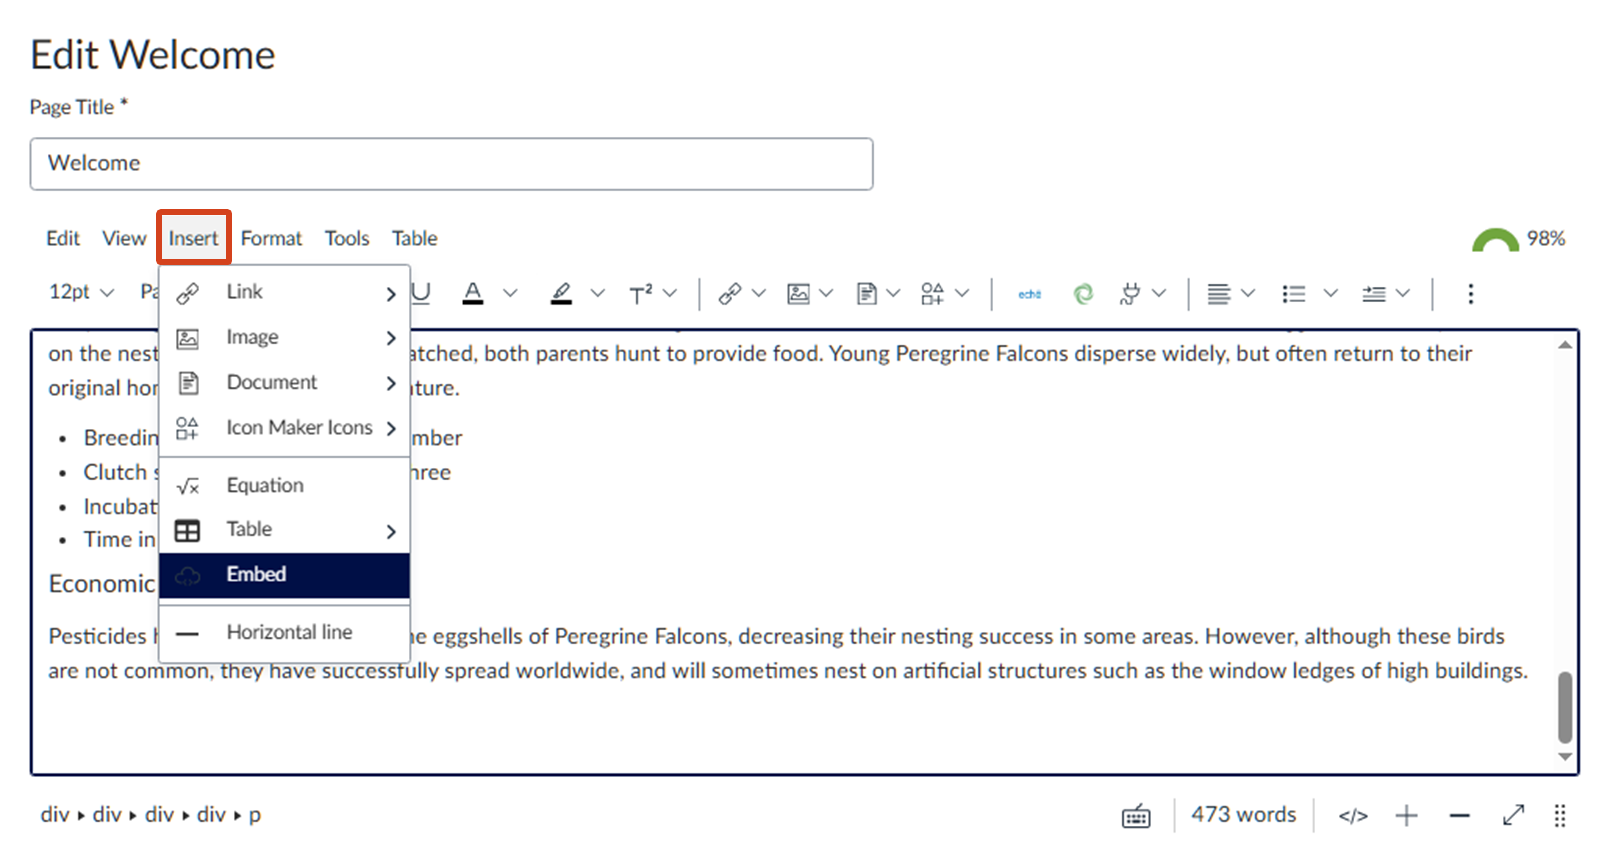
- Paste your copied embed code in the field and click Submit. A preview will appear in your rich content editor.
- Finally, on the bottom-right of the LMS page, click Save.
B. Use the rich content editor’s Apps plugin
- Go to the LMS page that you want to embed your media and click Edit.
- In the toolbar for the Rich Content Editor (RCE), locate and click on the Apps icon and select Lecture Capture from the dropdown.
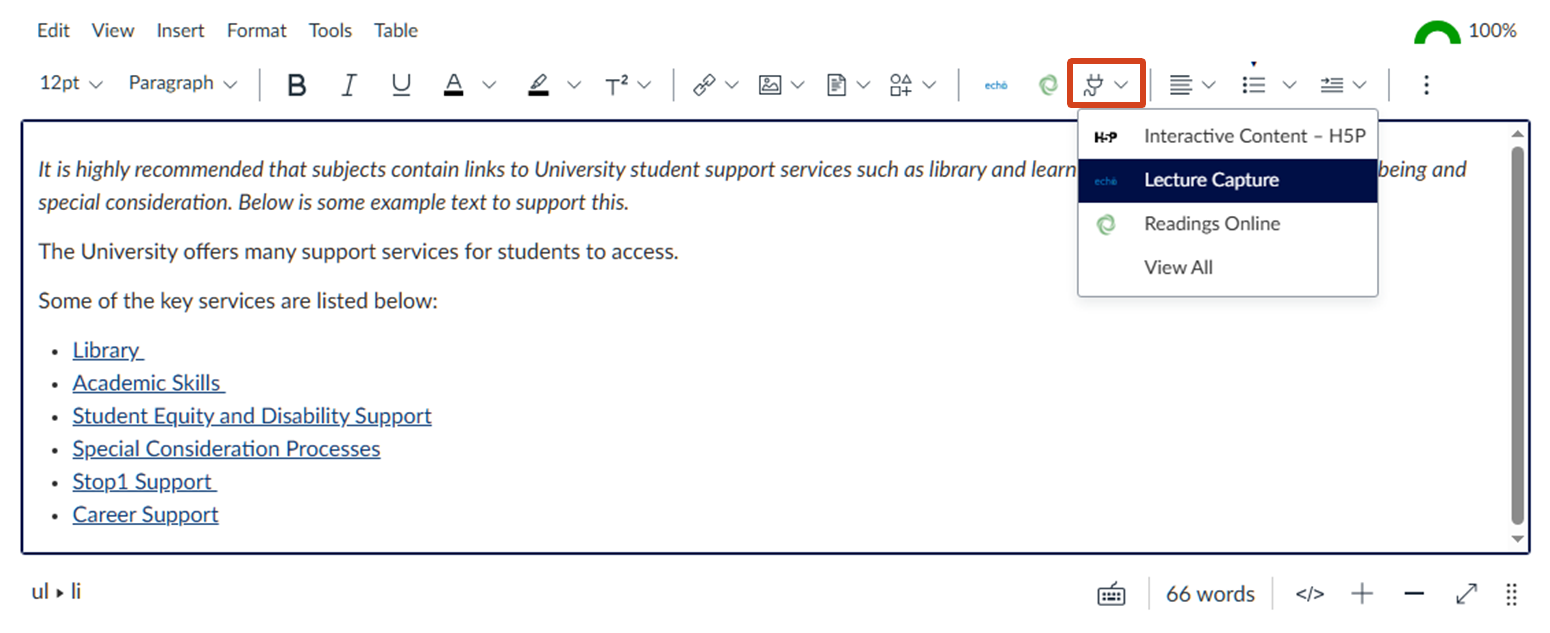
- If the media has already been added to your Library, click Launch Media Picker. If your media has not been uploaded to EchoVideo but is stored on your device, click Upload Media to first upload the media before clicking Launch Media Picker .
- Once in the Media Picker, select the media that you wish to embed in the RCE before clicking Next. Up to 50 media assets can be selected. If more than one media asset has been selected, a playlist will be created.
- With your media selected, you can configure the Player Style, Size, and Start At time in addition to toggle Autoplay, Automute, Discussions, and Link. If a playlist has been created, you will be given additional fields for a playlist Name, Description, Tags, and Order.
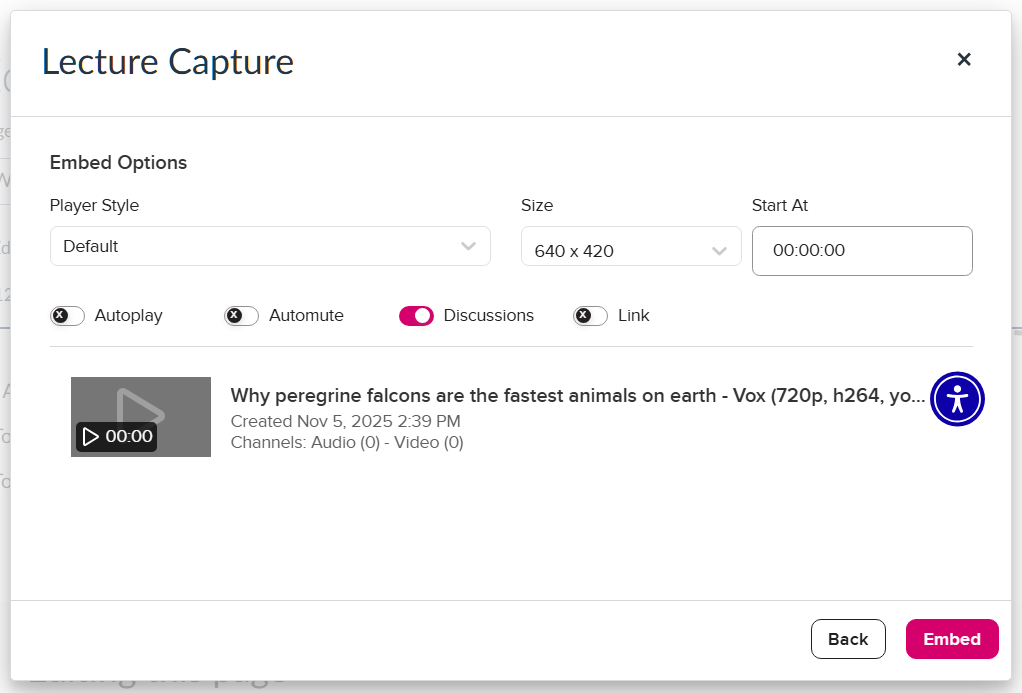
- Click Embed and the selected media will appear in the RCE as a preview.
- Finally, on the bottom-right of the LMS page, click Save.
Embed recordings from previous semesters
The guidance above applies to reusing content from previous semesters. Copying media you have access to but do not own (for example, lecture recordings) will automatically add it to your Library. From there, follow the outlined steps to embed those recordings into your LMS subject page.
If a large number of recordings from a previous semester are required, please submit a support request to copy recordings in bulk from a previous semester into the current semester.
Supporting resources
This guide was last updated 18 Mar 2026.
Submit an LMS support request for further assistance or to report any errors or omissions in this guide.