Field Friend Web staff guide
This staff guide introduces Field Friend Web, a platform designed to enhance field-based learning with guided prompts, location-based notes, and multimedia, enabling interactive experiences for students.
Introduction to Field Friend Web
Field Friend Web (formerly known as Field Friend) is a platform that provides scaffolding for field-based experiential learning. Students participate in small group field trips and are guided through the process with prompts, explanations, and interactive questions set up by staff. Students can construct their own understanding by taking spatially referenced notes, photos, and audio and video files.
Field Friend Web allows staff to develop and manage field trips and the locations (waypoints) for each trip. Refer to the staff guide below for detailed instructions on how to set up field-based learning activities.
How to access Field Friend Web
To access Field Friend Web, go to ffw.le.unimelb.edu.au
Sign in using your University of Melbourne SSO login details
Sites, trips, and waypoints: A quick terminology overview
Staff will be able to request a Site in Field Friend Web for your specific subject or for general usage. For subject-specific sites, they will be created for each instance of a subject (e.g. Semester 1, 2025; Semester 2, 2025), similar to how the individual subjects are structured in the LMS. Subject-specific sites cannot be re-used for multiple teaching periods.
Each Site contains Trips, which are journeys or excursions set out for students to go on to collect information and note down observations. A Site could have multiple trips for students to embark on.
Within each Trip are specific locations, known as waypoints, for students to check into. At each waypoint, subject coordinators or tutors can set questions for students to complete to show their understanding.
Global Sites are sites that exist for any staff or student to enrol in. They are good for campus-wide initiatives that are looking for a large number of participants.
Playpen Sites are sites that should only be used for testing and development purposes. Staff can use a playpen site to test Field Friend Web’s functionalities or test the learning activities that they have created. No students should be enrolled in playpen sites.
How to request a new Site
Staff will need to submit a support ticket to Teaching and Learning Innovation to request a new site for their subject. A new site will be created and any associated details will be provided by upon completion of the request.
How to create a Global Site
Any normal Field Friend Site can be turned into a Global Site. Follow the instructions below to switch a Site to a Global Site.
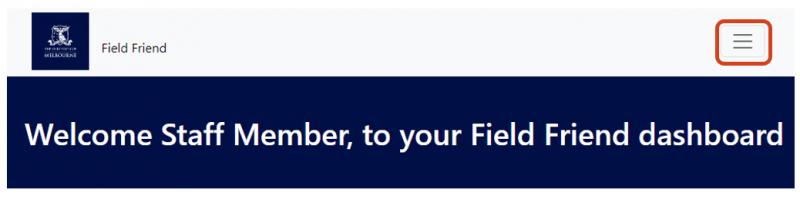
- Click the hamburger menu icon in the top right corner, then click on Admin in the menu.
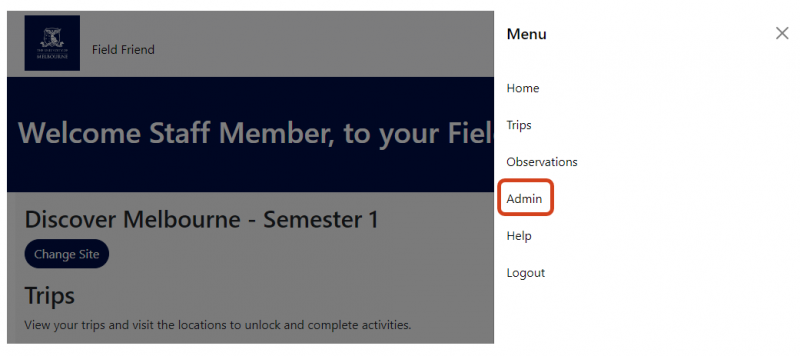
- Click on the Site Settings link for the Site that you want to switch to Global Site

- Click the toggle labelled Global to switch the Site to a Global Site
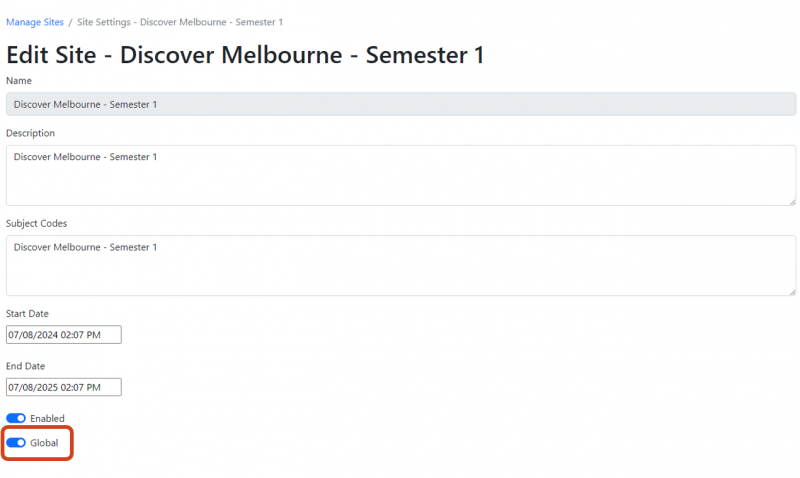
- For every Global Site that is created, a sign-up QR code is generated. This will allow anyone with the QR code to scan it and enrol in the Global Site.
- Click Save Changes to finalise the switch to a Global Site

How to create a Trip
- Click the hamburger menu icon in the top right corner, then click on Admin in the menu.
- Click on the Site Settings link for the Site that you want to switch to Global Site
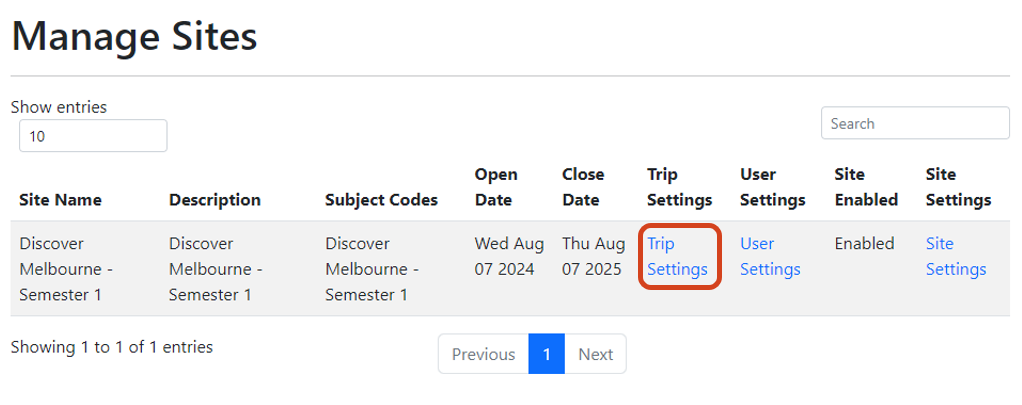
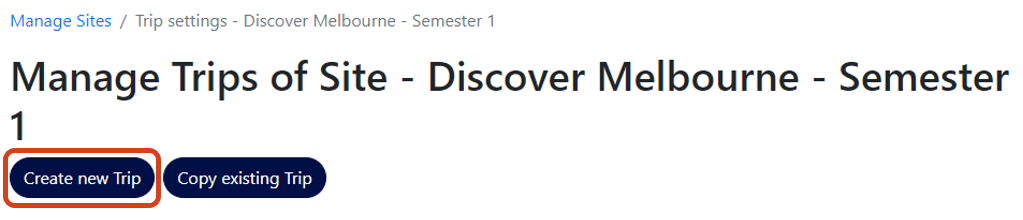
- At the top of the screen, click on Create new Trip
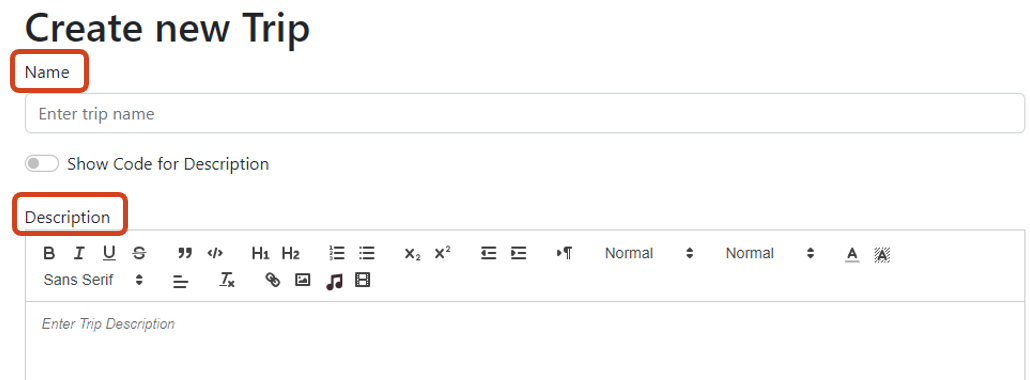
- Add Trip name and a description
Add a start and end date for the Trip.
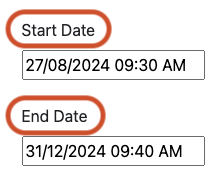
Note: Trips that have not started will not be visible to students but can still be accessed by staff for development purpose via the Admin menu. Trips that have ended will be automatically moved to the Closed trips section. For closed trips, students are still able to view the trip and view and download their submitted content, but cannot add new content or answer questions.
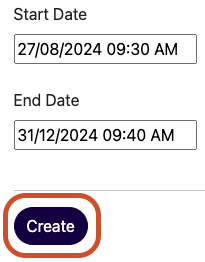
- Click Create at the bottom to finalise and create your Trip.
How to copy an existing Trip from another Site
Field Friend allows you to copy an existing Trip from another Site. This can be useful when you want to develop a trip in your Playpen (or development) site, test it and make sure it functions as expected, before copying it over to a live site. Additionally, this function enables you to copy trips from one semester’s site to another semester’s site, making it easier for you to reuse an existing trip.
To do so, click on the hamburger menu at the top right corner of your Home page, click on Admin, and select Trip Settings for the Site you wish to copy into (destination Site).
- In this example, we are looking at copying a Trip from the ‘Discover Melbourne – Semester 1’ site to the ‘Discover Melbourne – Semester 2’ site. To do so, click on Trip Settings for Discover Melbourne – Semester 2.

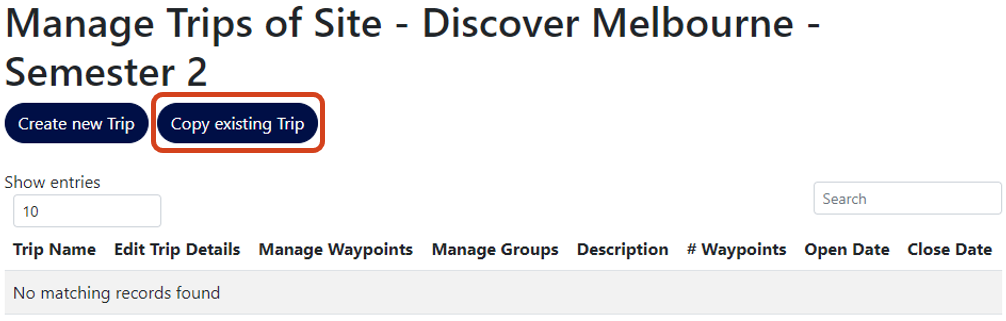
- Click Copy existing trip, then choose the site you want to copy from

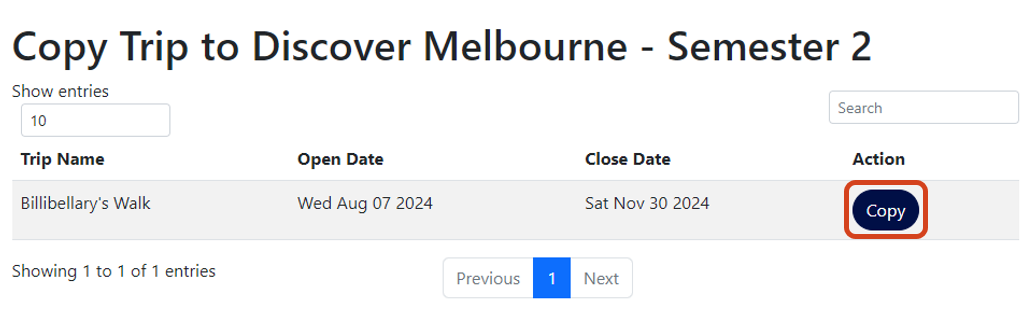
- Click Copy
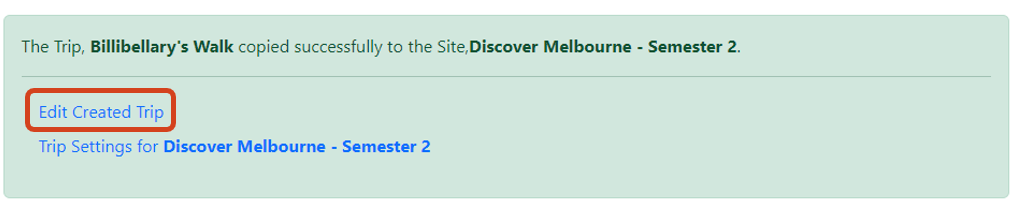
- To edit the name and description of the newly copied trip, click on Edit Created Trip
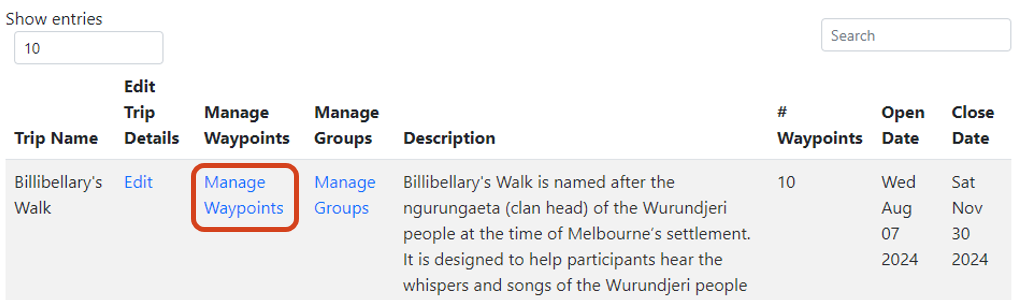
How to access locations or waypoints
Creating locations or waypoints
- From the Admin menu, click Trip Settings on the relevant trip that you want to add new locations or waypoints to
- Click Manage Waypoints
- Click on the Create new waypoint button at the bottom of the Manage Waypoints of Trip page

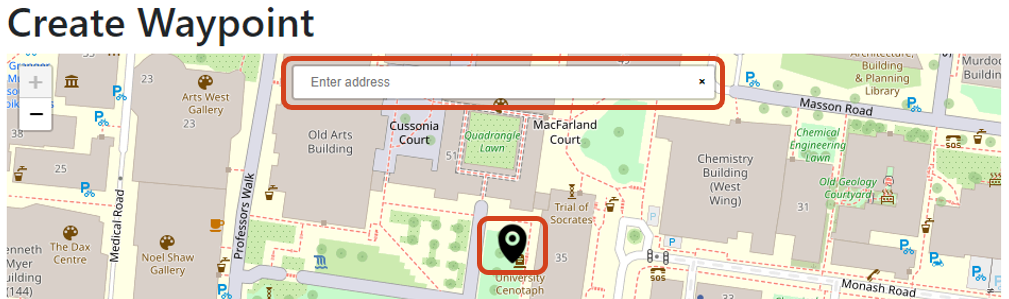
- Select a location on the map using location name/address, by entering its coordinates, or by dragging and dropping the location pin.
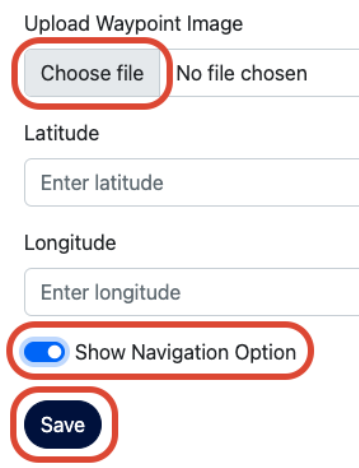
- Enter the waypoint name, description and image, then click Save. There is also an option to turn onnavigation options. This will ensure that Google/Apple maps are shown in the dropdown beside the waypoint list for students.

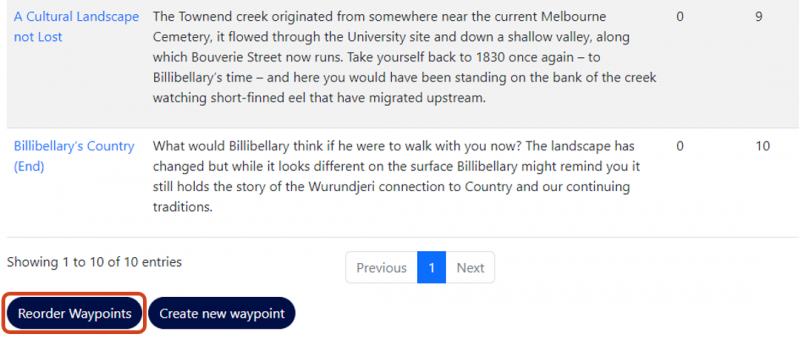
- Locations or waypoints can be re-ordered by clicking on the Reorder Waypoints button, then dragging and dropping the waypoint item to the preferred position.
Creating activities and questions
Once a new waypoint has been created, the option to create questions or interactive activities will be made available. Follow the steps below to create a new question for the waypoint.
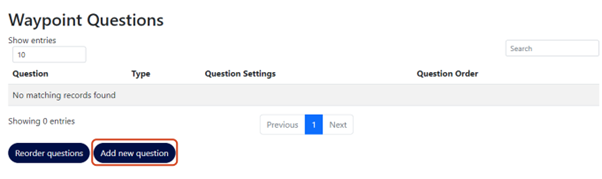
- Click the Add new question button
- Select the Question type from the dropdown menu

Multiple choice questions
- Enter the question in the Title field
- Provide a description if required
- Set the maximum number of attempts students can have for this question.

- Provide general feedback for the question if needed. General feedback is text that is shown to the student after they have attempted the question.
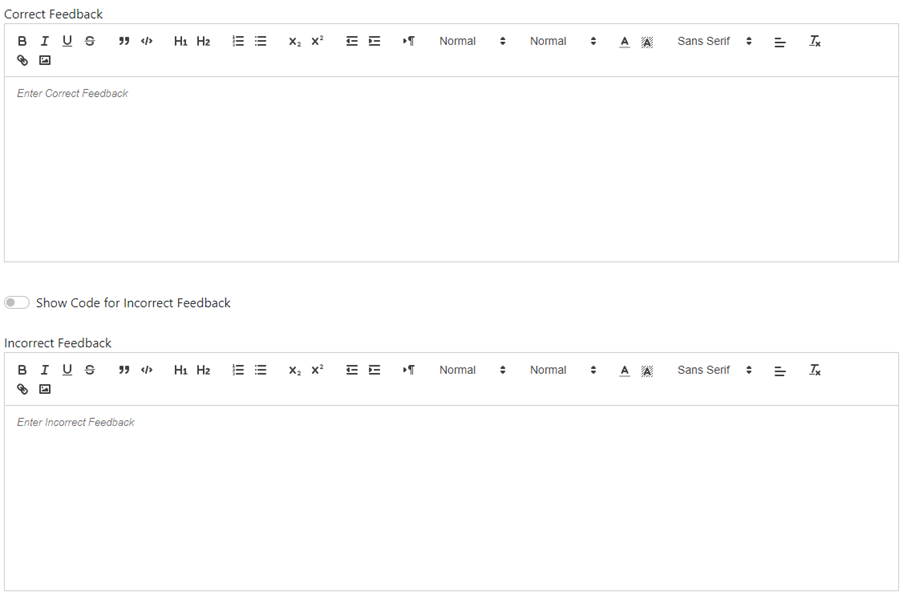
- Click on the Add new Answer Choice button to start adding the answer choices

- Enter the choice text and choice feedback. Select the radio button if the provided choice is the correct one. Note: Only one answer choice can be designated as the correct choice.
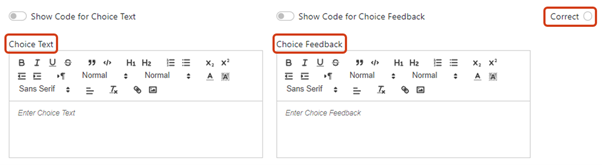
- Click the Save Question button save the question settings.

Multi select questions
- Enter the question in the Title field
- Provide a description if required
- Set the maximum number of attempts students can have for this question
- Provide general feedback for the question if needed. General feedback is text that is shown to the student after they have attempted the question.
- Click on the Add new Answer Choice button to start adding the answer choices
- Enter the choice text and choice feedback. For this question type, multiple correct answers can be selected by selecting the Correct checkbox.
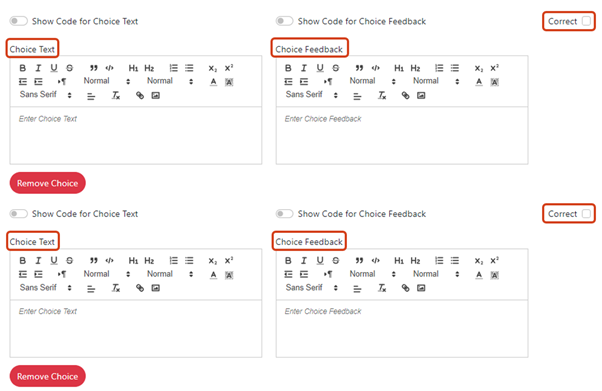
- Click Save Question to save the question settings
Response questions
- Enter the question in the Title field
- Provide a description if required
- Specify the accepted response format(s) that students can submit for this question by using the toggle button to turn the format option on or off. Note: For each format that is selected, the minimum and maximum number of inputs can be chosen.

- Click the Save Question button save the question settings
Text questions
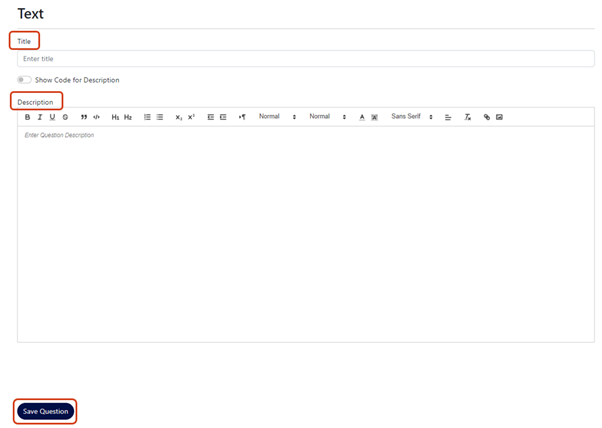
The Text question type is used to include a passage of text which can provide further information on the waypoint.
- Enter the title and description, then click the Save Question button to save the question settings
Unlocking waypoints manually
Waypoints will be unlocked automatically when students are within a 20-metre radius. However, in cases where physical attendance is not possible, waypoints can be unlocked manually by students with a valid reason for their absence.
How to enrol users to a Site
Staff and students can be added to a Field Friend Site manually via the Admin menu. Follow the instructions below to enrol users to a site.
- Click the hamburger menu icon in the top right corner, then click on Admin in the menu.
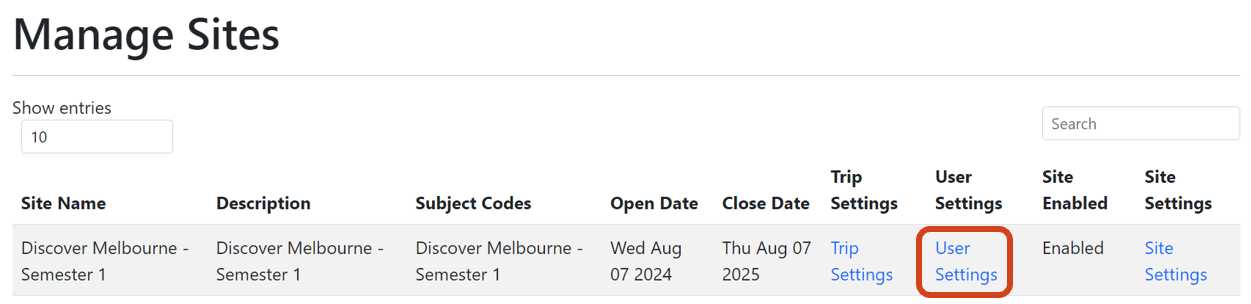
- Click the User Settings link for the site you want to enrol users to
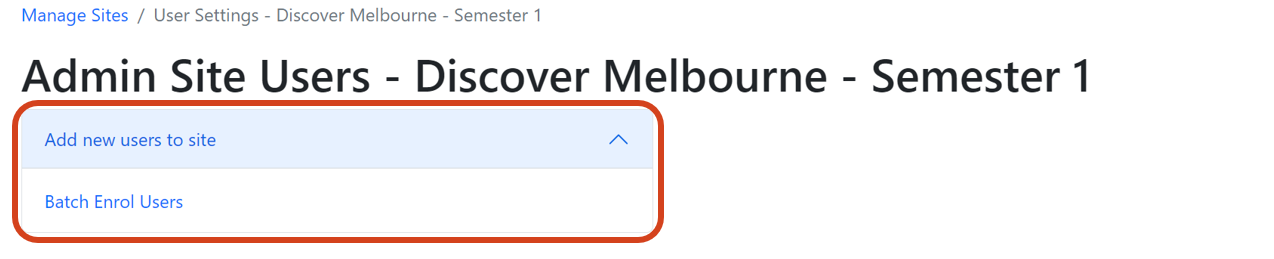
- Click on the Add new users to site dropdown menu, then select the Batch Enrol Users option
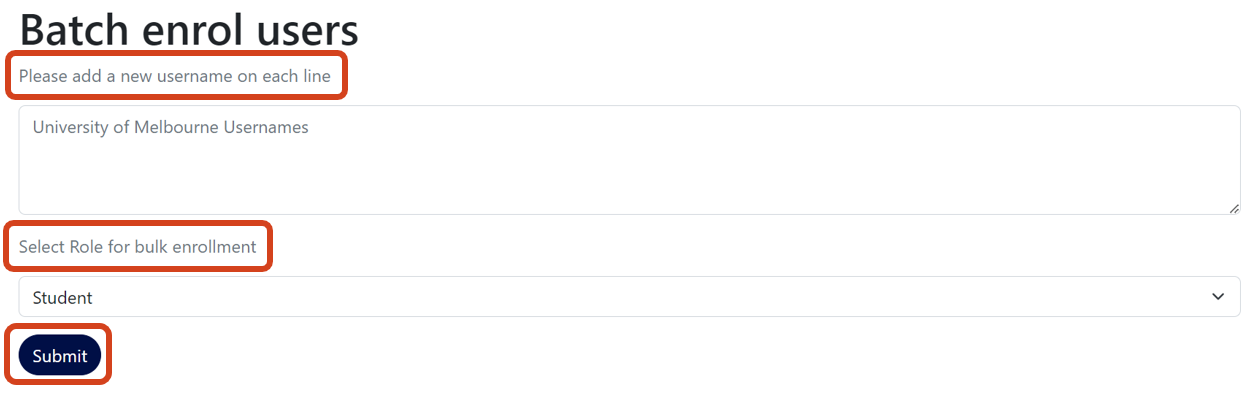
- Add each user’s University of Melbourne username on each line, then select a role (student, tutor etc.) to apply to the enrolment(s), and click Submit
How to manage students in groups
Creating student groups
Groups can be created within each Field Friend trip to allow students to explore the trip’s waypoints together. Follow the instructions below to set up groups within a trip:
- Click the hamburger menu icon in the top right corner, then click on Admin in the menu.
- Click on the Trip Settings link
- Click on the Manage Groups link that corresponds to the trip for which you want to set up student groups
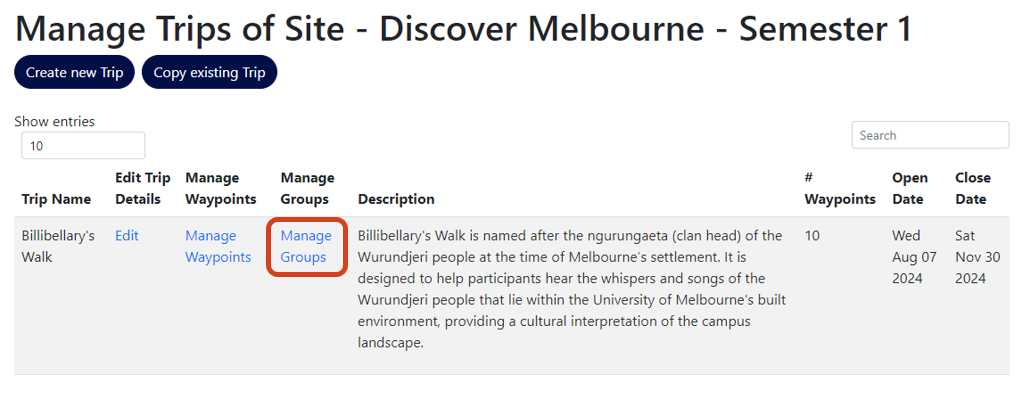
- Click Create new Group

- Provide a group name and a group description, then click Create

Enrolling students to a group
Method 1: Using an Excel spreadsheet
This method is good for batch enrolling large numbers of students into Groups.
- Click Download Group Membership. This action will download an xlsx file which you can enter the group membership details into.

- In the xlsx file, record the students’ username under the Username column, and their corresponding group under the GroupName column.

- Save and upload the file via the 'Upload Updated Membership Excel' field.

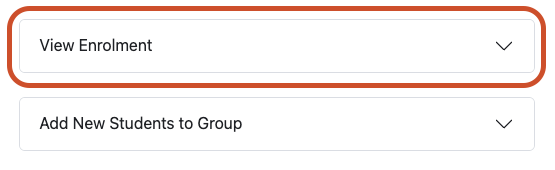
- Group membership details can be viewed by clicking on the group name, then expanding the View Enrolment accordion.

Note: Students within a group cannot unlock waypoints as a group and will have to do so individually. They can view other group members’ answers at each waypoint.
Method 2: Using the in-built enrolment function
This method is good for adding single students or small batches of students into Groups.
- Follow previous instructions on how to create student Groups
- Click on Add New Students to Group to view the current list of enrolled students who have yet to be placed in Groups
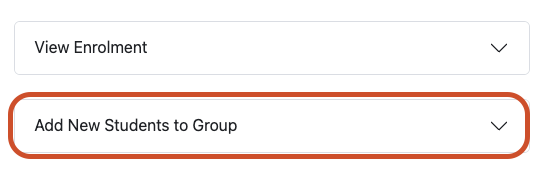
- Select students to add into Group by selecting the boxes next to their details. Once done, click Add Selected Users to Group

- Click View Enrolment to see the list of students successfully added to the Group.
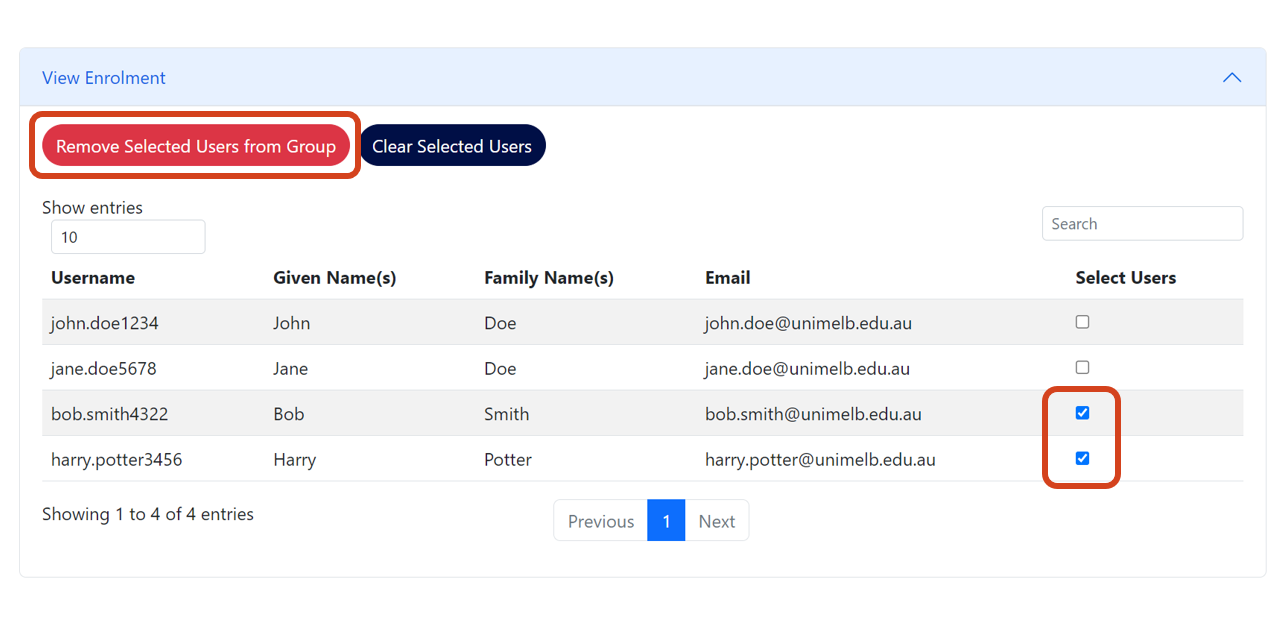
- To remove students from Group, select the boxes next to their details. Once selected, click Remove Selected Users from Group
- Once done with all enrolments, click Save Changes
How to access students’ submissions and statistics
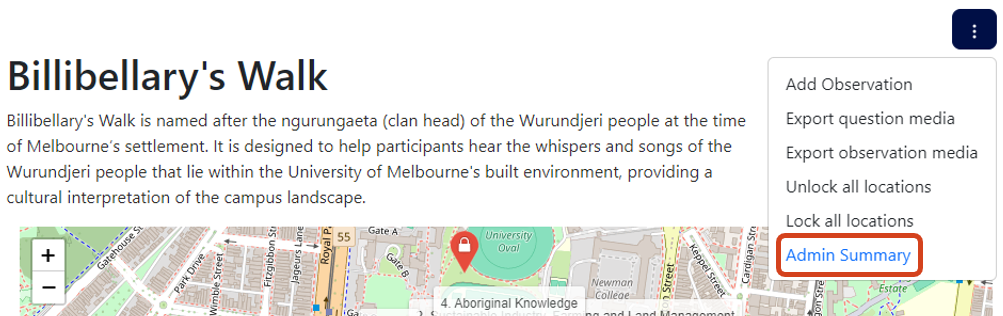
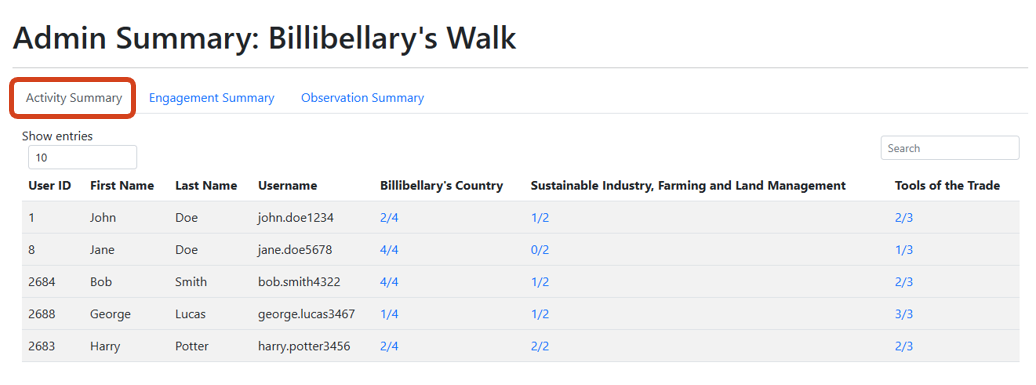
Students’ submissions and statistics relating to a Field Friend trip can be accessed via the trip’s Admin Summary menu. The three summary reports (Activity Summary, Engagement Summary, and Observation Summary) included in the Admin Summary menu can provide a snapshot of students’ level of engagement and participation with the trip.
How to access the trip’s Admin Summary menu
To access the Admin Summary menu:
- From the homepage, click on the trip for which you want to check students’ submissions and statistics.
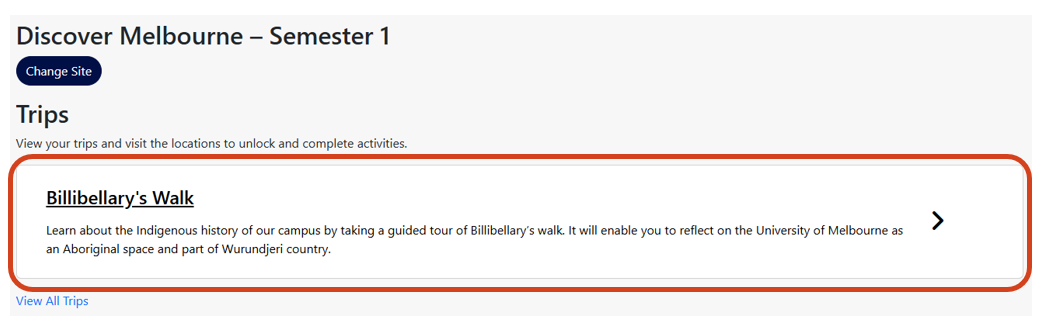
- Click on the three-dot icon located in the top right corner of the trip, then select Admin Summary
Activity Summary
The Activity Summary report provides a summary of the student activities or their responses to the questions on each of the waypoints of that trip. Clicking on the number under each waypoint will take you to the student’s response to the waypoint question(s).
Engagement Summary
The Engagement Summary report provides an overview of the student’s engagement with each waypoint within the trip, and whether students have actually visited the waypoint in person, or they have manually unlocked it.

Observation Summary
When students go on a trip in Field Friend, they have the option to note down their observations (as an image, an audio file, a video file and text). You can view your students’ observations for a specific trip by clicking on the View link under View Observations.

This guide was last updated 30 Jun 2025.
Please report any errors or omissions in this guide by submitting an LMS support request.