Automatic transcription services
Lecture Capture and Kaltura both provide an automatic transcription service (also known as automatic speech recognition - ASR). The transcript will become available approximately 30 minutes after a recording has been made available:
- To students via Lecture Capture
- In the Kaltura Media Gallery.
The speech recognition software does not produce a perfect transcript. Displaying a live transcript or video captions from an automatic transcription does not necessarily meet accessibility requirements. Follow up with Student Equity and Disability Services if you need more advice on making your recordings and transcripts more accessible.
Lecture Capture (Echo360)
To edit the text of the transcript:
- Go to your Echo360 Library.
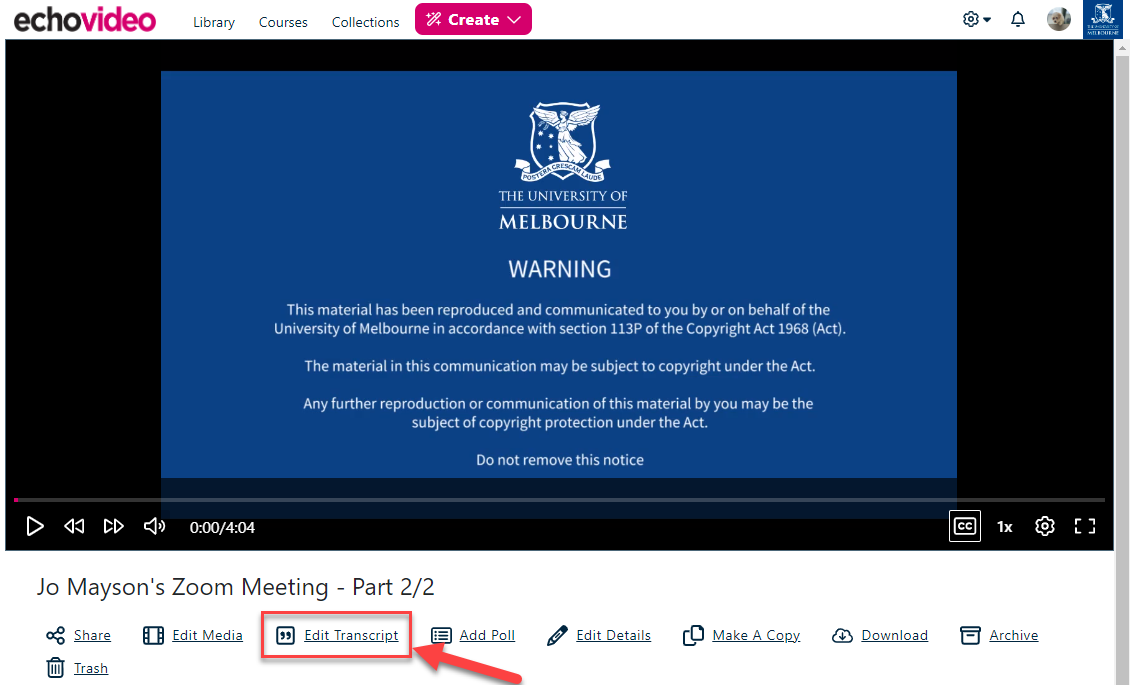
- Select the video you want to edit and click Edit Transcript to enter edit mode.
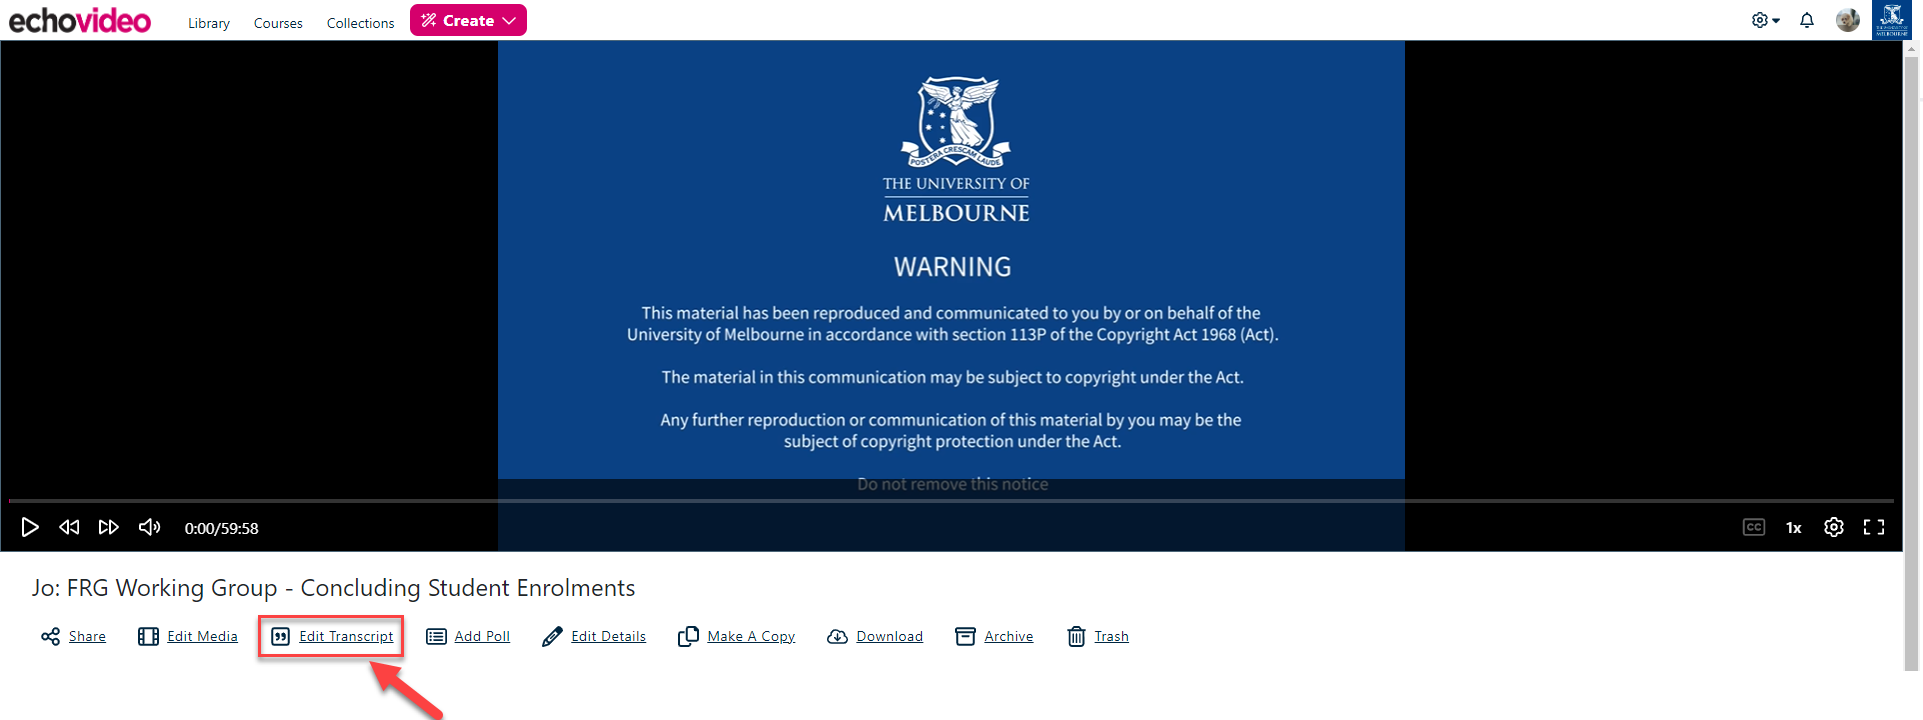
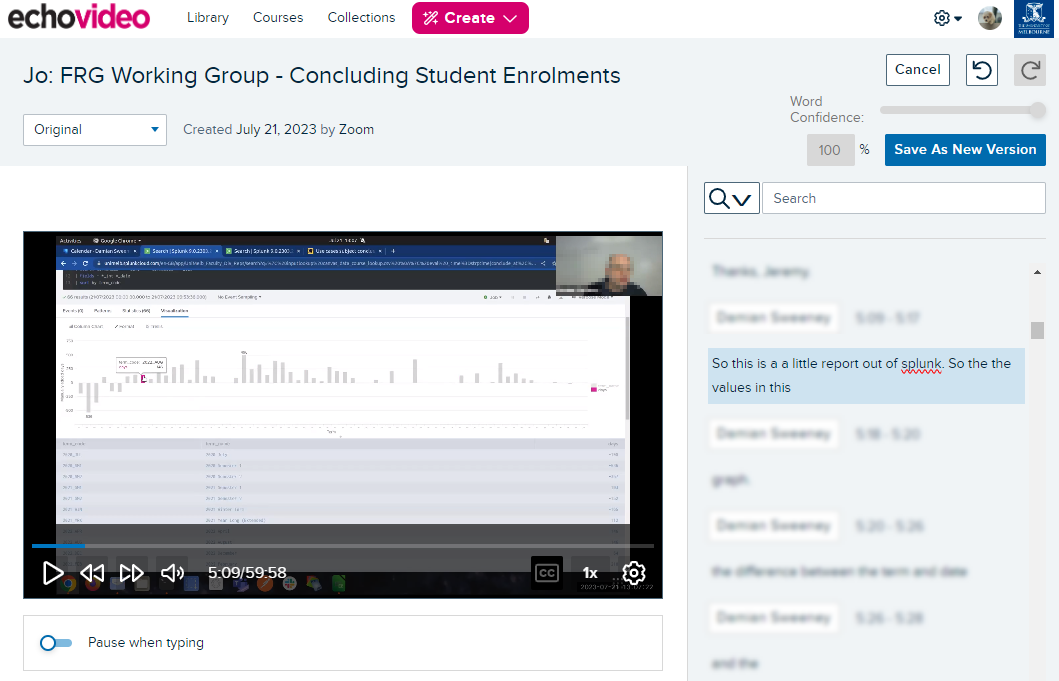
When the Transcript Editor opens, it displays a playback panel on the left, and the text of the transcript, broken up into timed cues, on the right.
Once in edit mode, the right panel changes, allowing you to click into any of the text cues to edit it.
When finished, click Save As New Version. This creates a new version of the transcript complete with your edits.
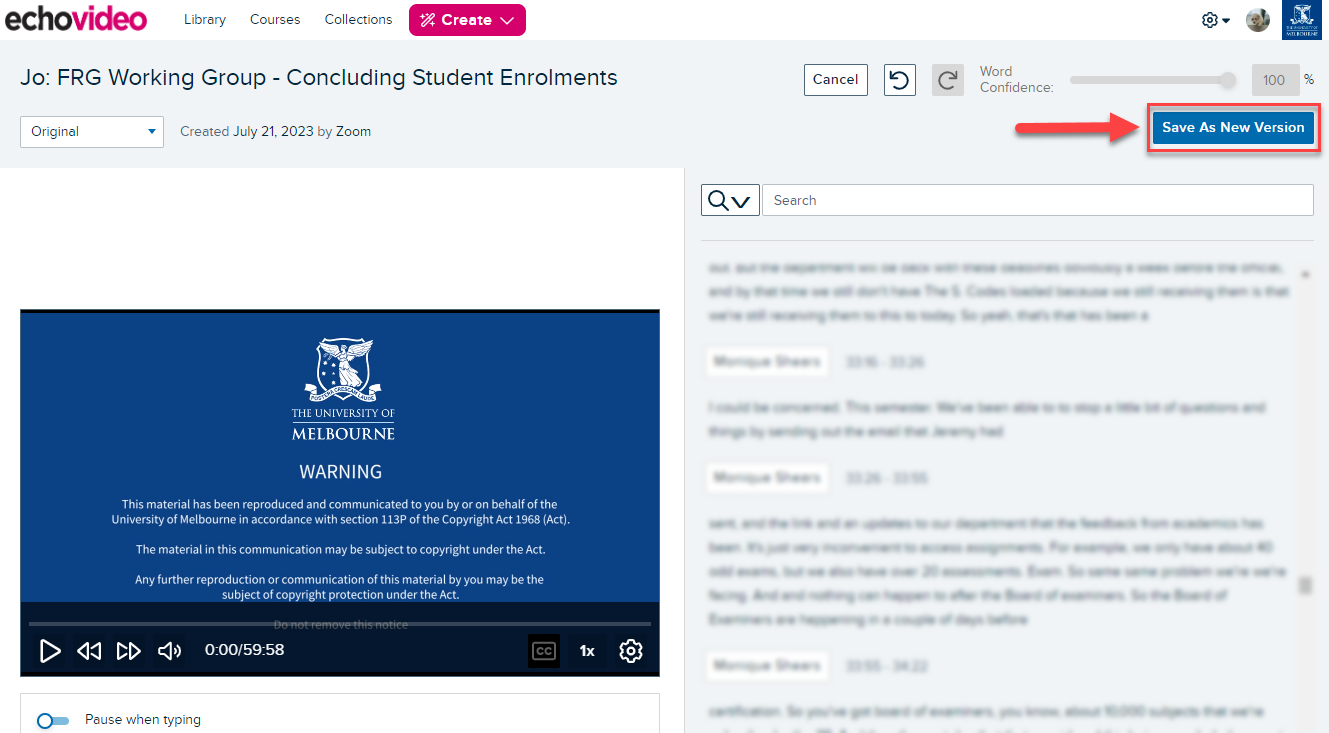
Once you have made your edits and saved your changes, your edited version becomes the current transcript applied to the recording.
Please make any adjustments to the media itself before editing the transcript. The system will generate a new transcript after each media edit to ensure the alignment of generated text and the media.
Using the transcript to search within your video recording
To find a specific part of your recording, you can search for words or phrases in the search box at the top of the transcript panel. Entering text into the search box immediately launches a search of the transcript for matching terms.
All matches in the transcript are highlighted in yellow, allowing you to either use the previous/next buttons, or scroll through the transcript to find them.
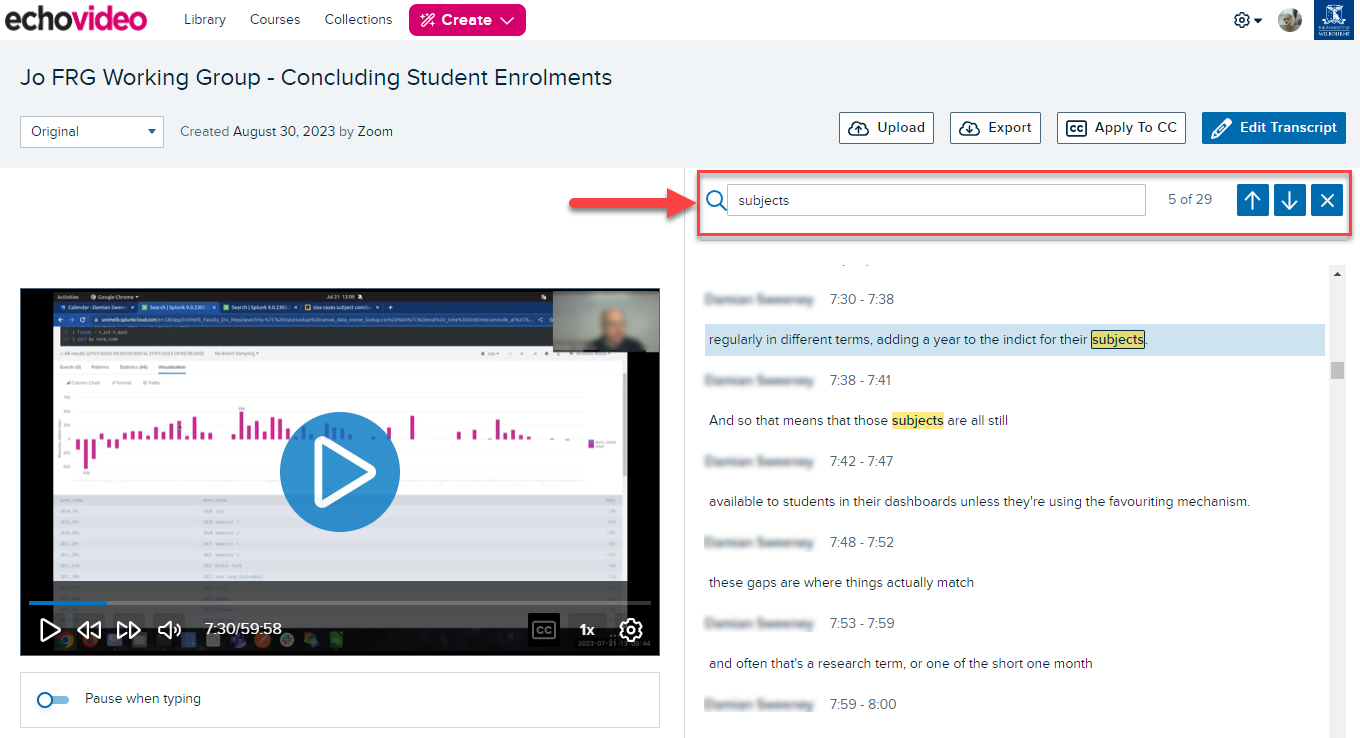
Clicking on the word or phrase you searched for in the transcript will change the location shown in the media viewer to match the time of the selected part of the transcript.
Adding closed captioning files to a capture
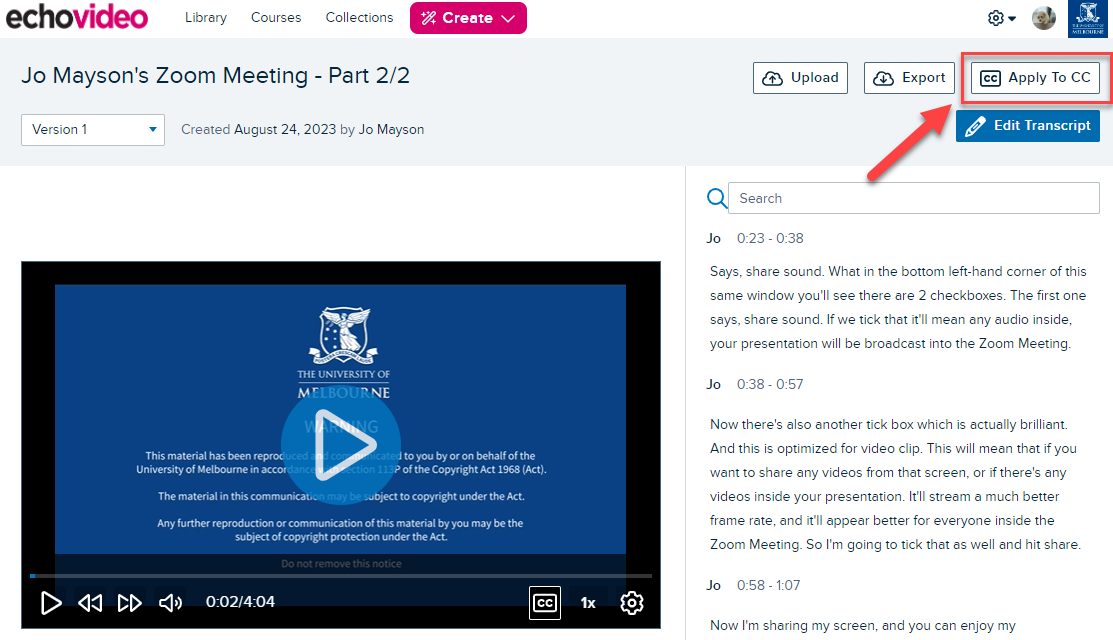
Click Edit Transcript to open edit mode and if the video has been shared to a subject through Lecture Capture, there will be an option next to ‘edit transcript’ called Apply To CC.
Click the Apply To CC button. This applies the current version of the transcript to the closed captioning file for the video.
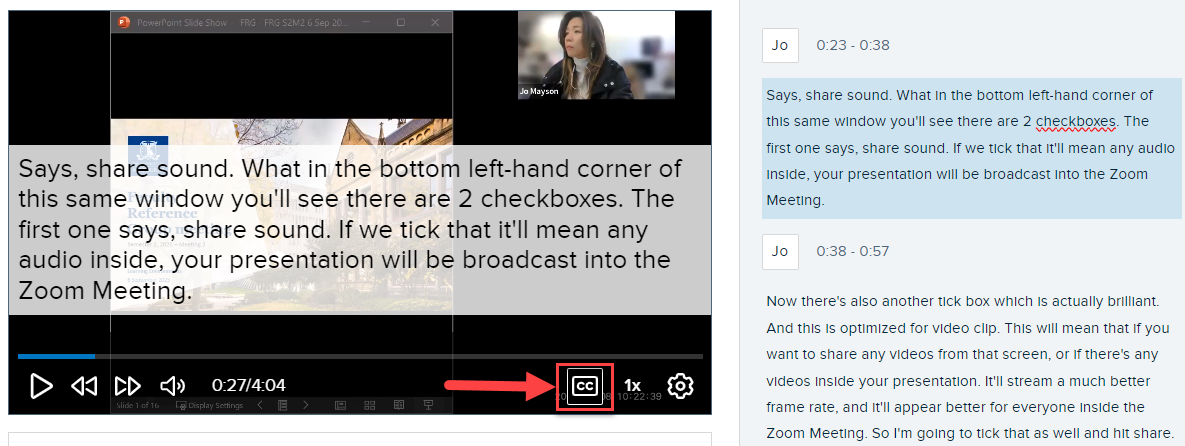
To view the closed captions in action, play the video in the playback panel, with the CC button turned on.
Known issue with Firefox browser
In some instances the newly applied closed captions will NOT appear in the Transcript Editor until you refresh the page. The captions are applied however, and refreshing the page resolves the issue and makes the captions visible in the editor. This only occurs in the Firefox browser.
Find out more about Lecture Capture
Kaltura
Edit the transcript
The captioning and transcription services for Kaltura can be accessed via the Edit menu of your Kaltura video. You can navigate to Edit by clicking on the pencil icon next to your video in the My Media gallery or by clicking the ellipsis on your video followed by the pencil icon.
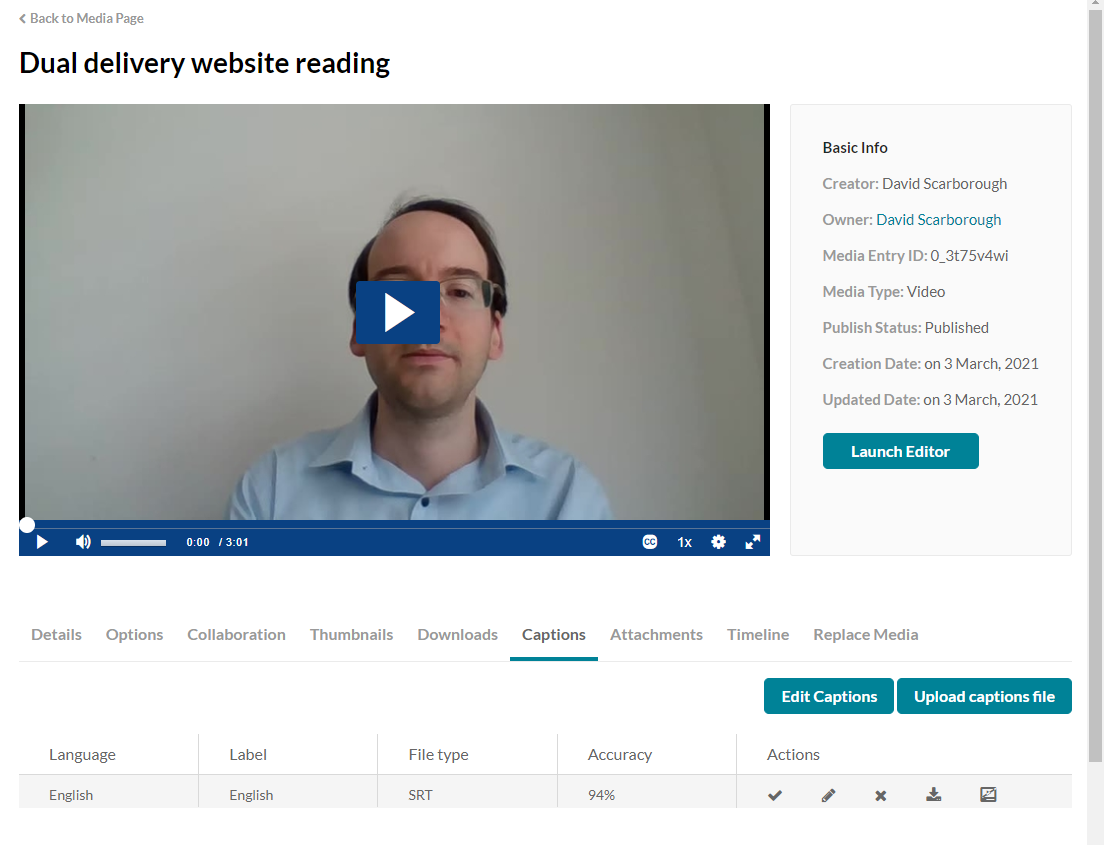
Click the Captions tab followed by Edit Captions to access the transcript editor. The editor shows captions on the left-hand side and the video on the right. As the recording is played, the relevant caption will appear on the video and the caption highlighted in the left-hand side editing area. Click into the caption content cells to overwrite individual content and timing. To delete the selected caption cell, click the rubbish icon.
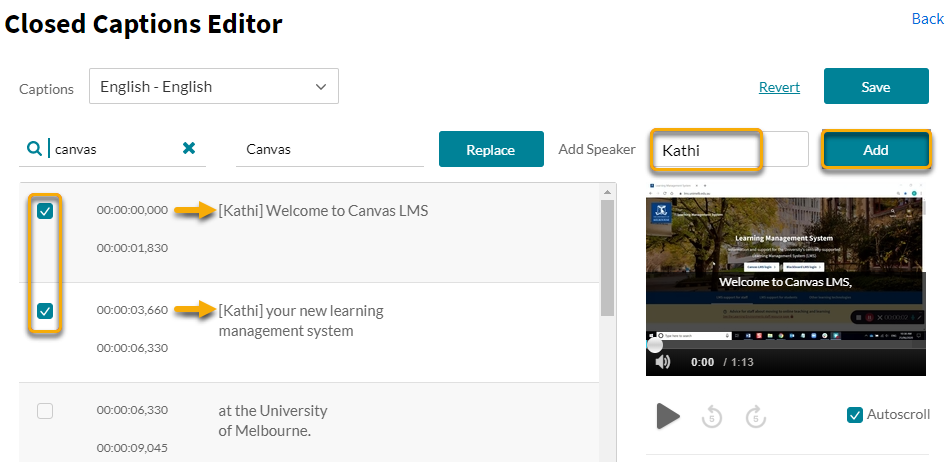
You can also replace reoccurring incorrect words easily using the Replace with option. Enter a word into Search in Captions field, then enter the replacement word into the Replace with field. Then click Replace. In the example above, ‘canvas’ has been replaced with ‘Canvas’.
Click the plus icon to add a new caption content cell. It automatically creates a copy of the existing caption content and splits the timeline of the original caption. Both the copied timeline and content can be edited by clicking into the cell. Note that the plus and trash-can icons will only appear if a caption in the transcript editor has been selected.
To identify speakers, select one or multiple checkboxes next to a caption, then enter a speaker name. Click Add.
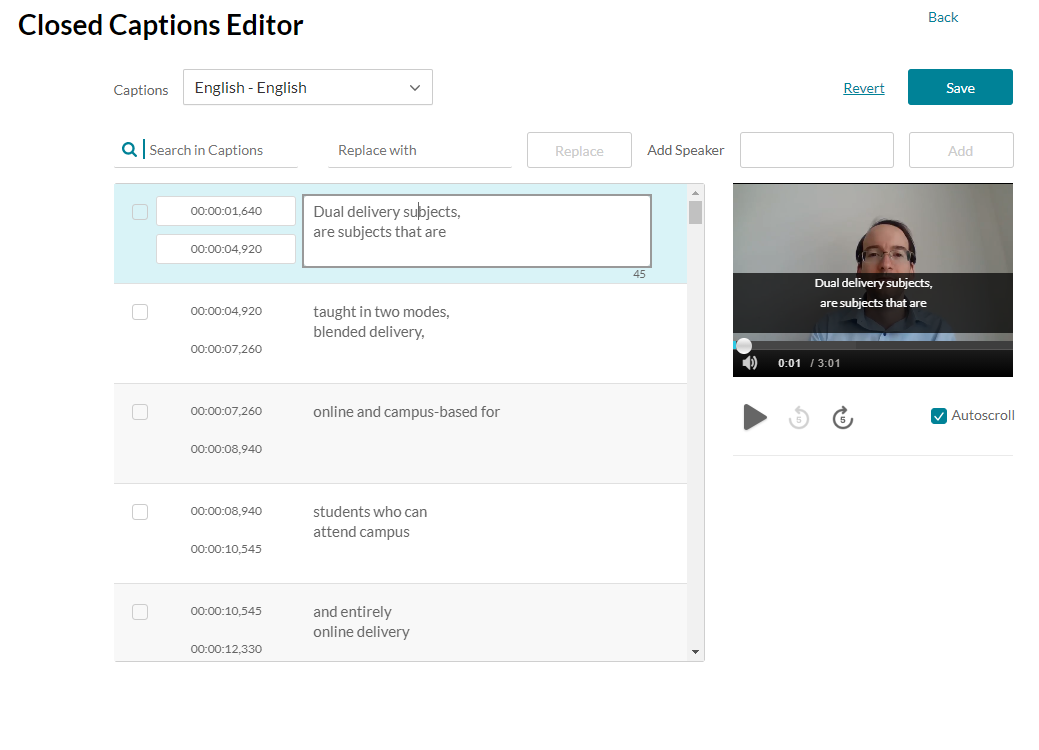
Click Save on the top right of your screen. It will prompt you to confirm this action. Alternatively, click Revert if you wish to revert to the previously saved version.
Click the back hyperlink on the very top right on your web browser to return to the media edit page. Click the Captions tab. In the Actions column, click the tick icon to set the caption file as default for the media, then click the player icon to make captions visible on your media (show on player). You can click the player icon again to hide captions on your media.
Note: The tick icon changes from grey to black once selected. The player icon has a faint strike-through which disappears once enabled, indicating the captions now show on the media. The player icon remains grey.

This guide was last updated 08 Sep 2023.
Please report any errors or omissions in this guide by submitting an LMS support request.