Microsoft Teams Meetings - getting familiar with the interface
This guide explains how to use Microsoft Teams for online meetings from a desktop or laptop computer.
Once you are in your Teams Meeting session, there are options that allow you to:
- Stop/start your video broadcast and access video settings
- Mute/unmute your microphone and access audio settings
- View the participant list
- Select a video layout
- Preview your video when joining a meeting
- Apply background effect – blur background or apply images
- Raise your virtual hand and show other non-verbal reactions
- Send group messages
- Share your screen in a meeting
- Create and join breakout rooms
- Contribute to a Q&A in a meeting.
Main options

See also tips for Teams Meetings.
Video settings
Choose a video layout
When you enter a Teams meeting, you will be able to see other participants who have joined the session. You will see videos for participants who have enabled their videos, and the initials or profile pictures of participants who have disabled their videos or do not have a webcam.
To change how participant videos are shown on your screen:
- Select More Actions (...) .
- Select a layout option (explained below).
Note: Greyed out layout modes will become available as more participants turn on their videos.
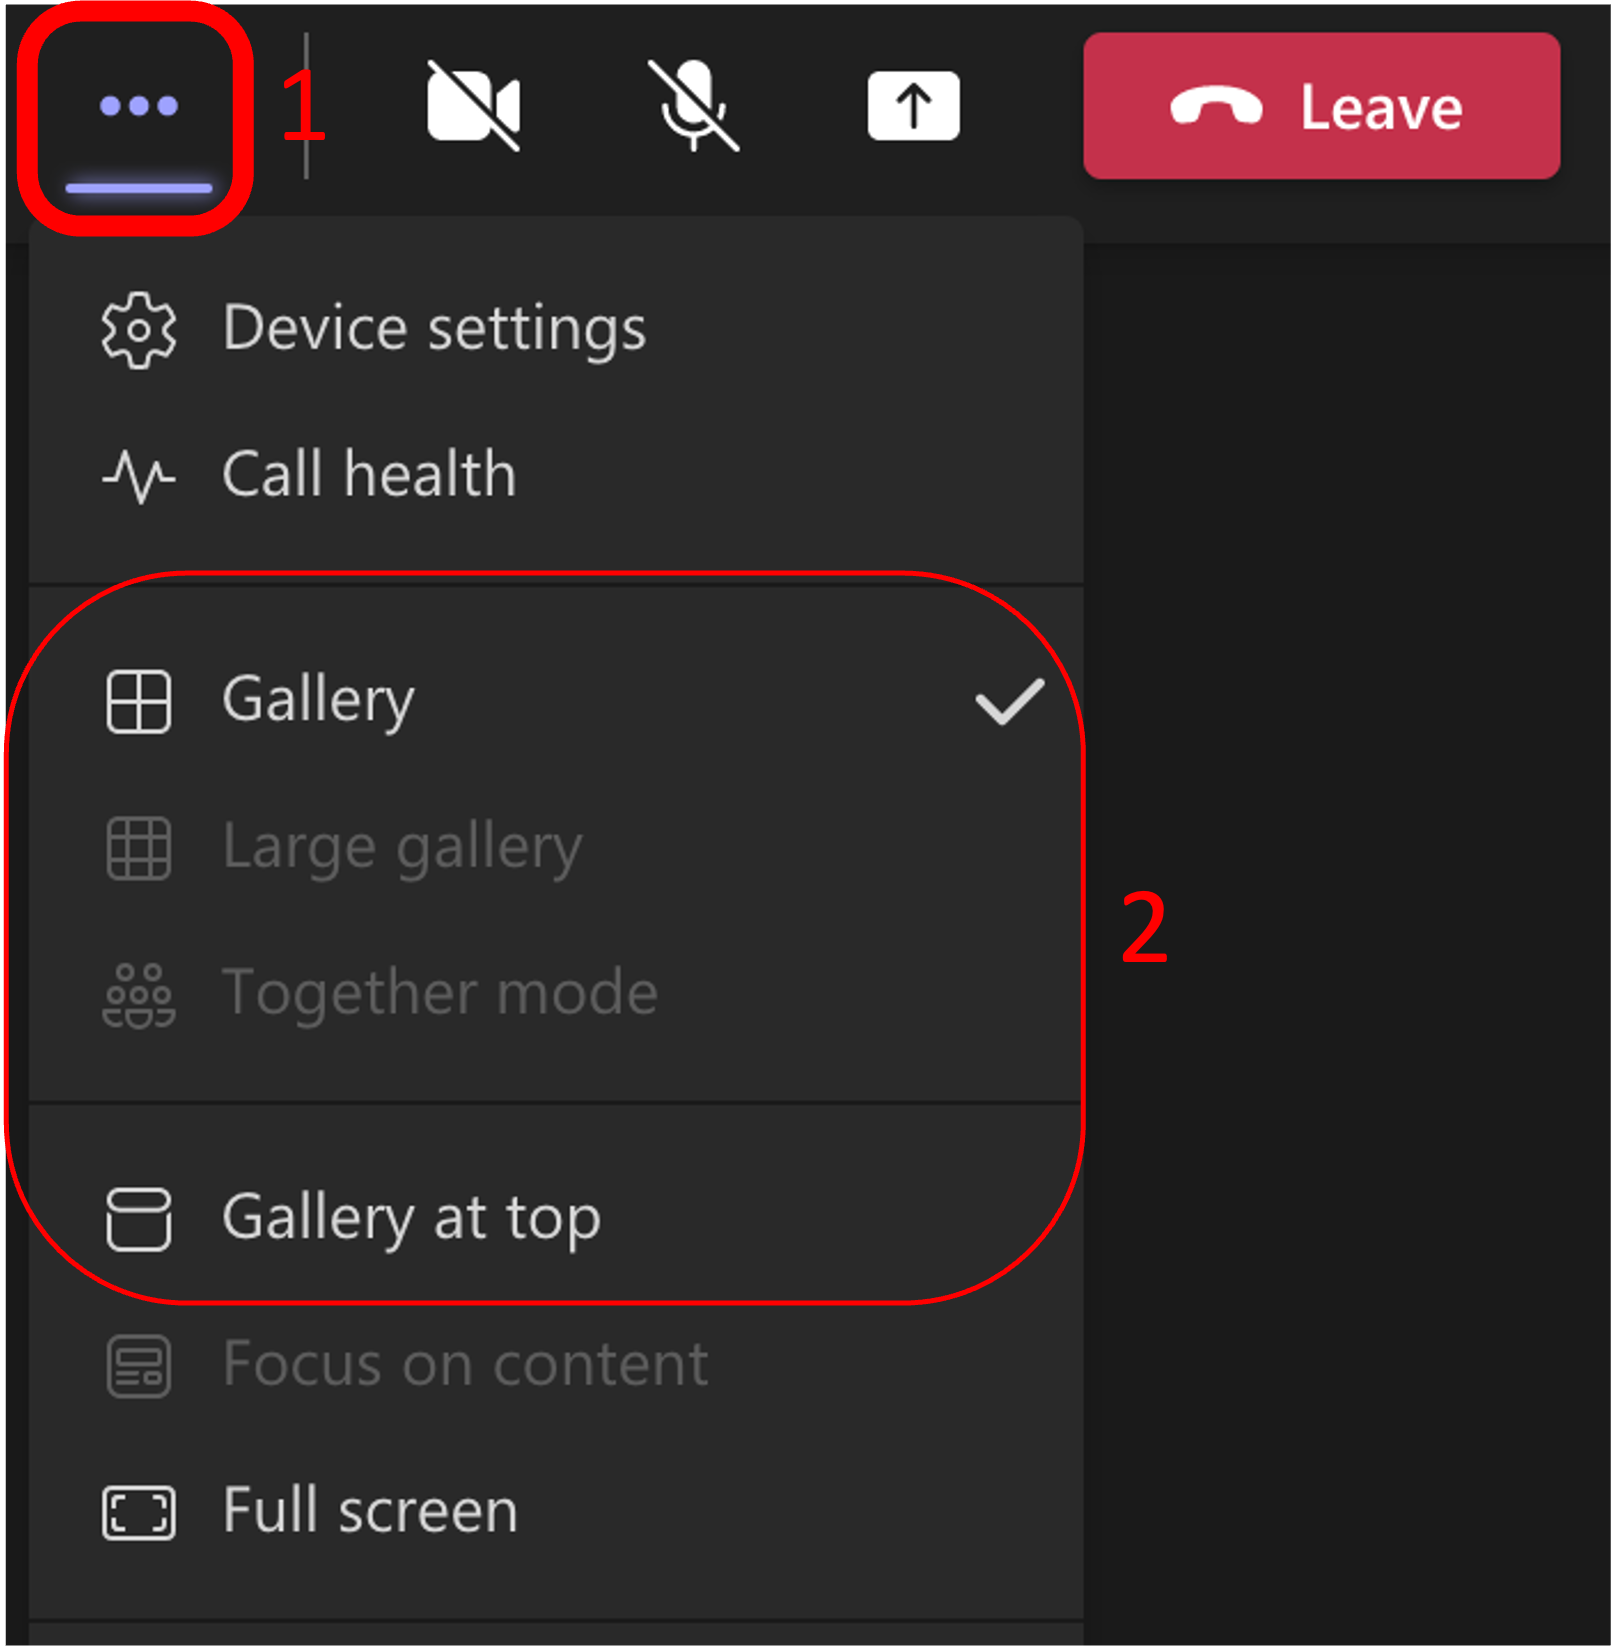
The default view of the meeting is Gallery View. This view allows you to see nine people’s videos including your own. As more participants join, you will notice their videos re-size to fit into the room area. If there are more than nine people, Teams will preferentially show you people with their video turned on, or those speaking the most. In a Gallery view, the speaker’s window is highlighted in purple. This layout is suitable for feeling connected to others in a group learning environment.
The Large Gallery is designed for larger meetings or forums and allows you to see up to 49 other people at once. For this layout to be available, 10 people must have their camera turned on.
In Together mode you can use special backgrounds to feel like you're in the same shared space with others in the meeting. In this view, select Change scene to change the background for everyone. For this layout to be available, four people must have their camera turned on.
Preview your video
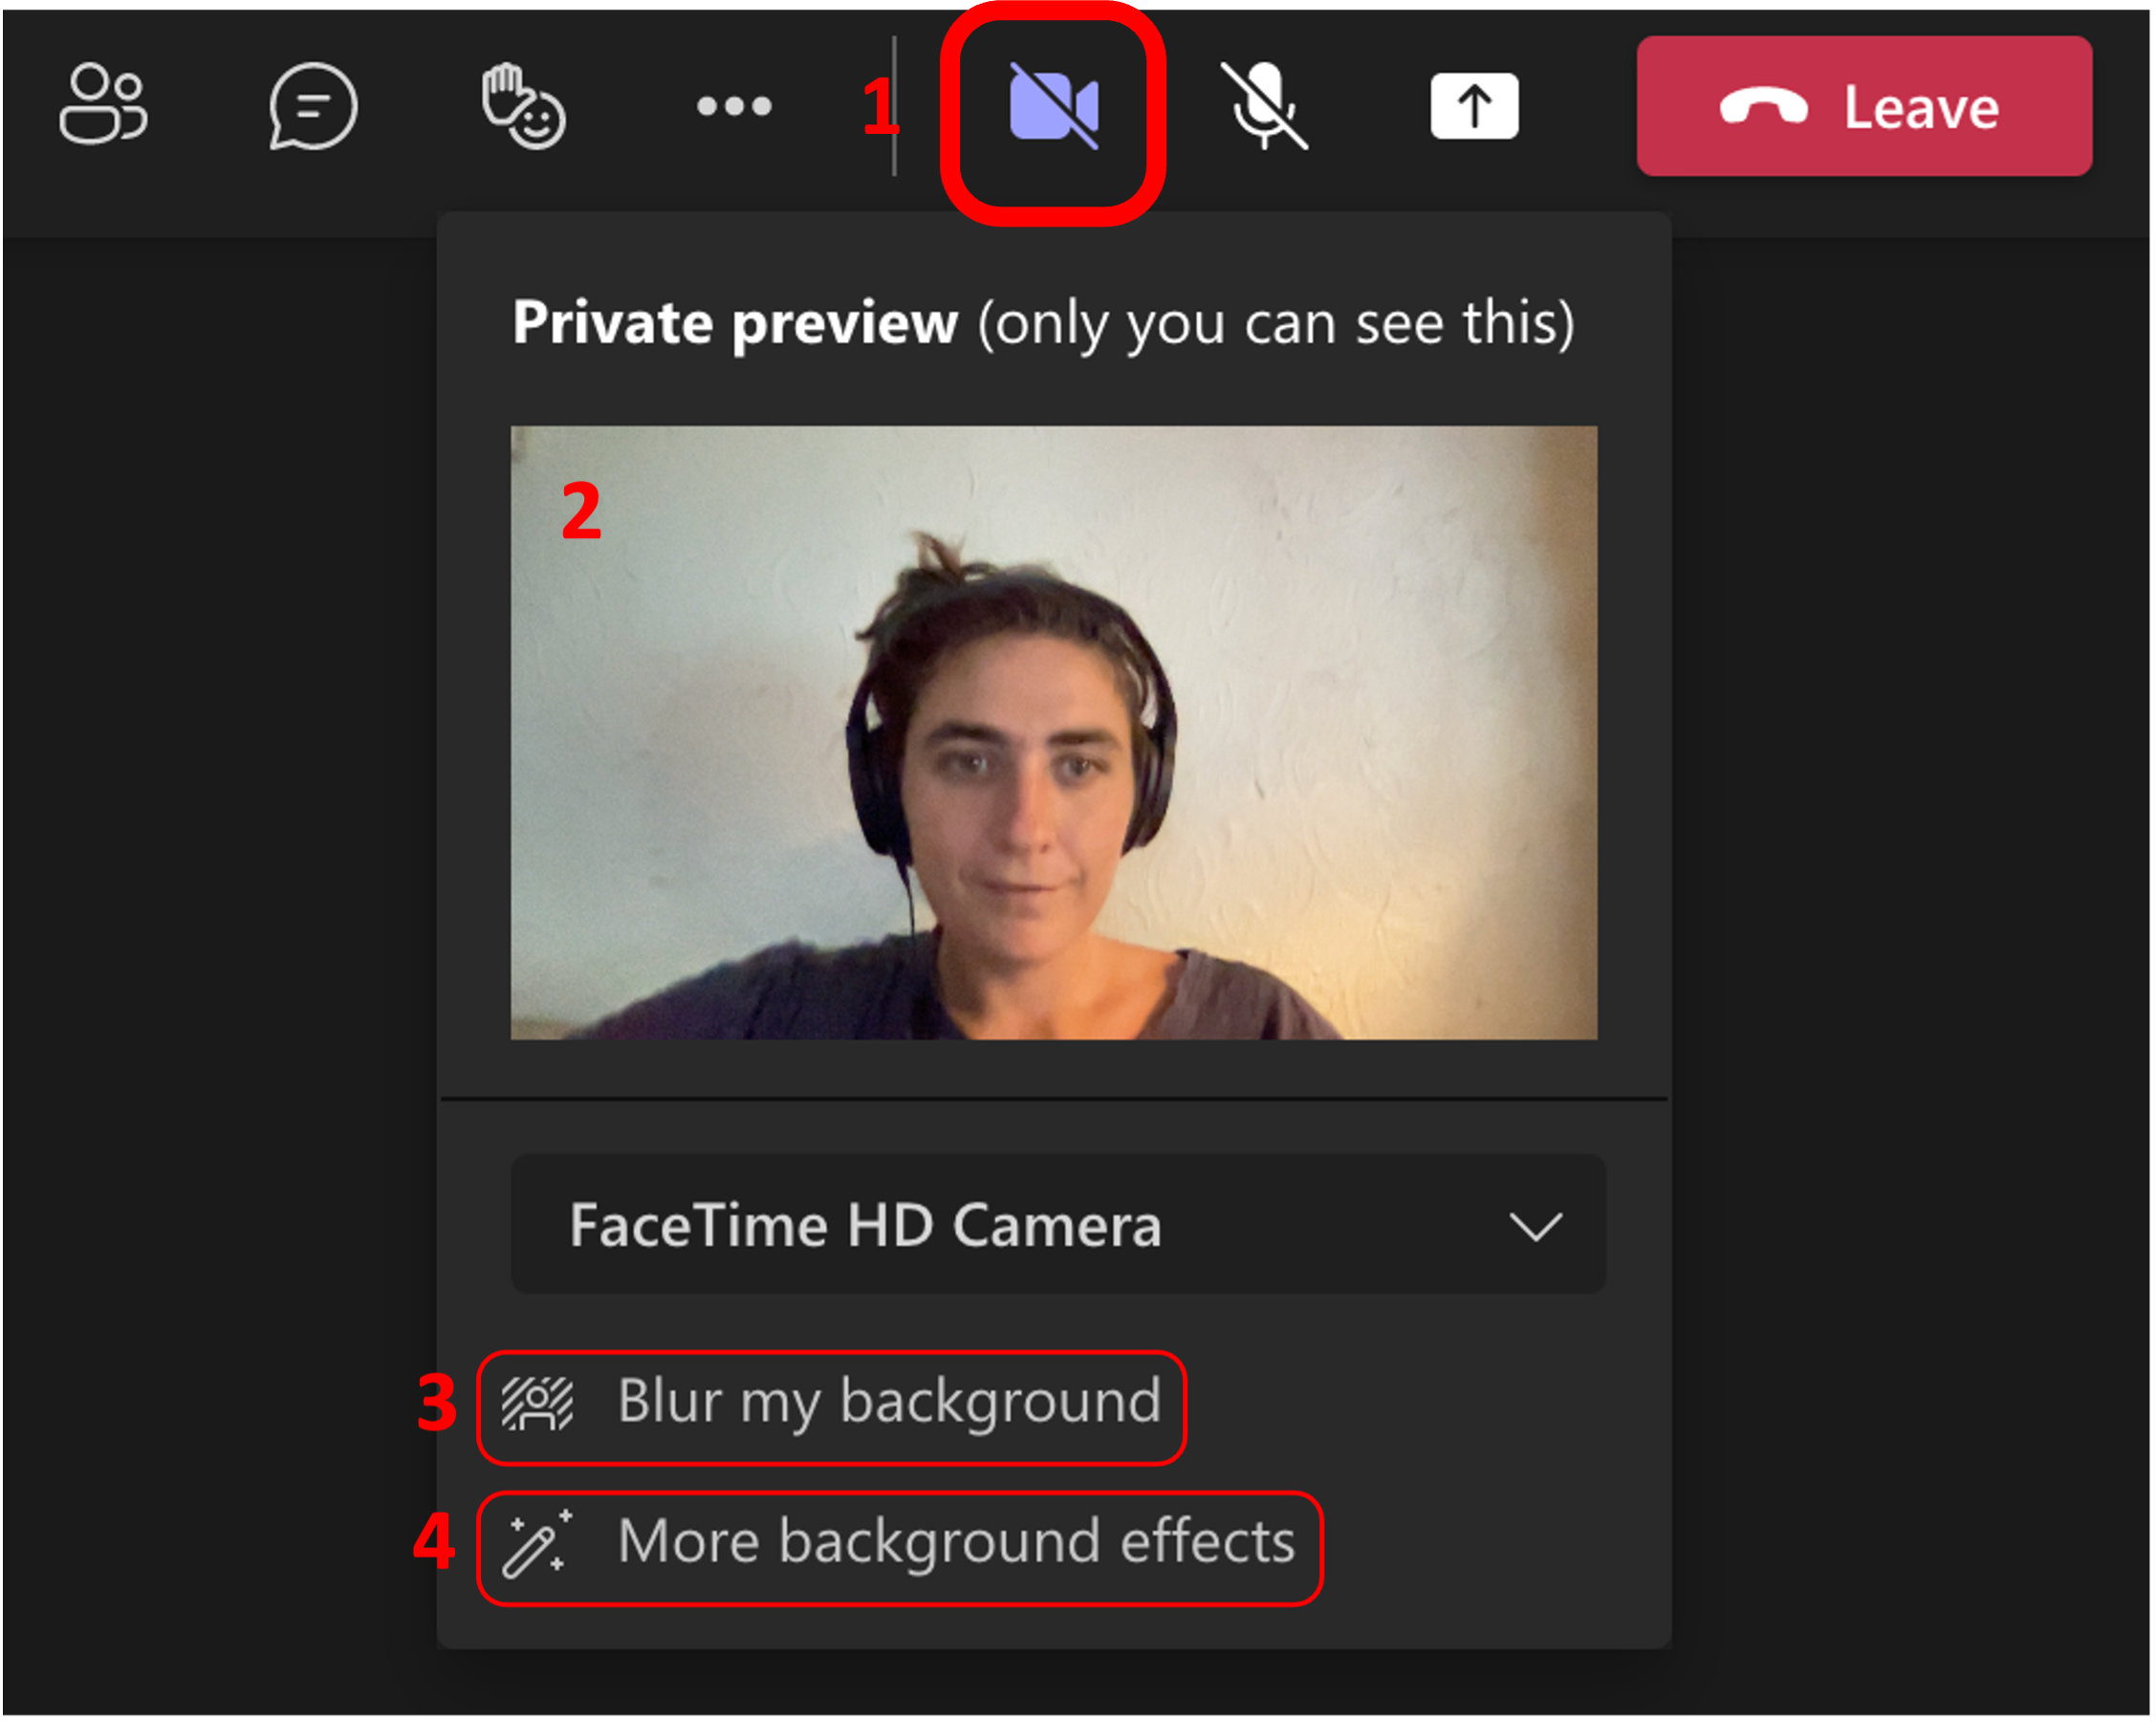
After joining a meeting, you can preview your video before you turn on your camera:
- Hover over Turn camera on to preview your video.
- Preview how you'd like to appear.
- Select Blur my background to blur your background.
- Select More background effects to preview a custom background or add your own.
- When you're ready, select Apply and turn on video.
Spotlight a speaker’s video
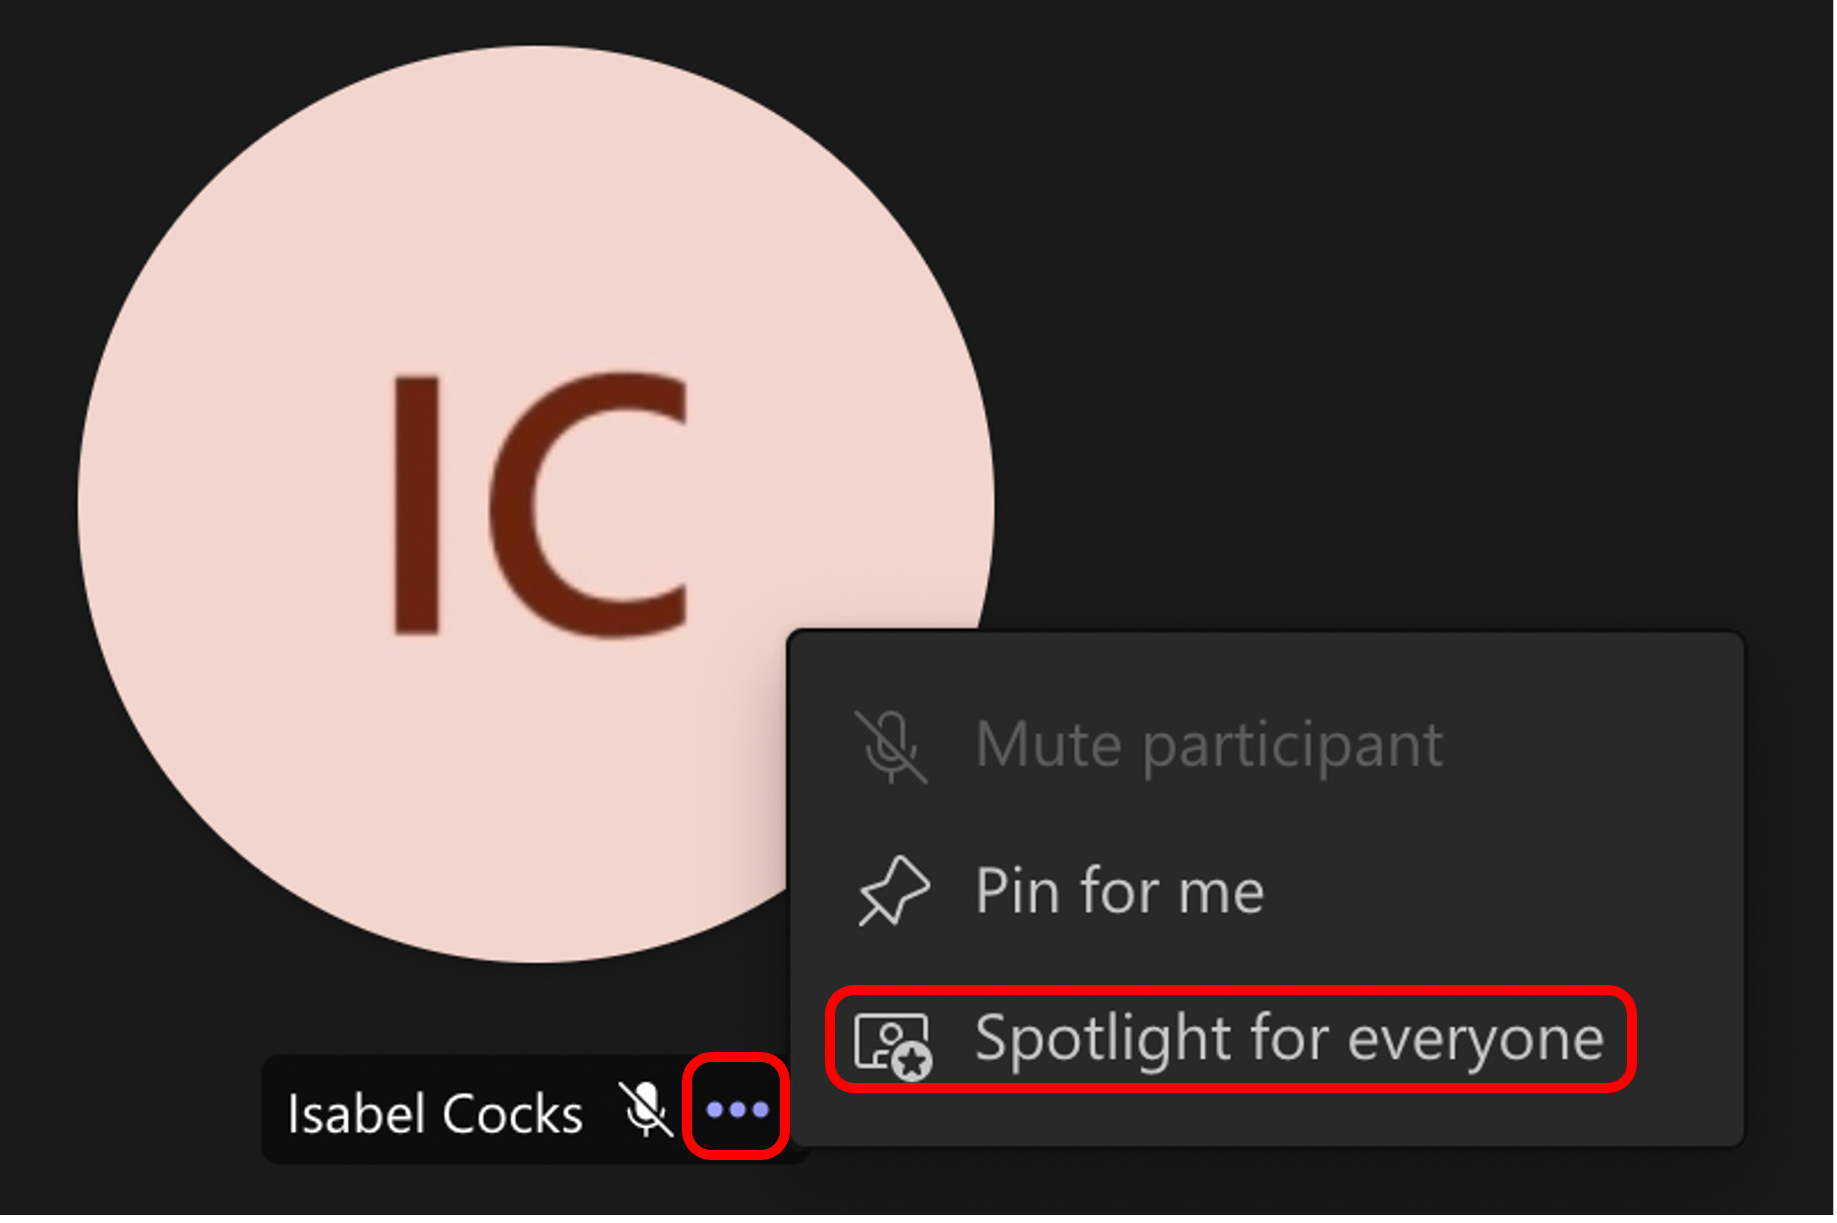
When a featured speaker's talking, spotlight their video so it's the main one everyone sees.
- Right-click the participant’s video that you wish to spotlight.
- Select Spotlight > Spotlight once more to confirm.
Raise hand tool and emoticon reactions
Some of your lecturers, tutors or peers may ask you to use the non-verbal feedback tools such as the ‘raise hand tool’. Emoji reactions are also useful to communicate with the group without disrupting the flow of the meeting.
Under Reactions, use emoticons to engage in a meeting:
- Select Raise hand to let others know you'd like to speak up.
- Select a reaction like Applause or Heart to show how you feel.

Teams Chat
Teams meetings include a chat where meeting participants can share information without disrupting the flow of the meeting. Teams meeting chats include the same features as in regular Teams chats, allowing you to format your text, attach files, and send pictures.
- Select Show conversation. This will open the meeting chat window to the right of the main screen.

- To send a message, compose it in the text box or use the attach file, emoji or GIF options below and then select Send.
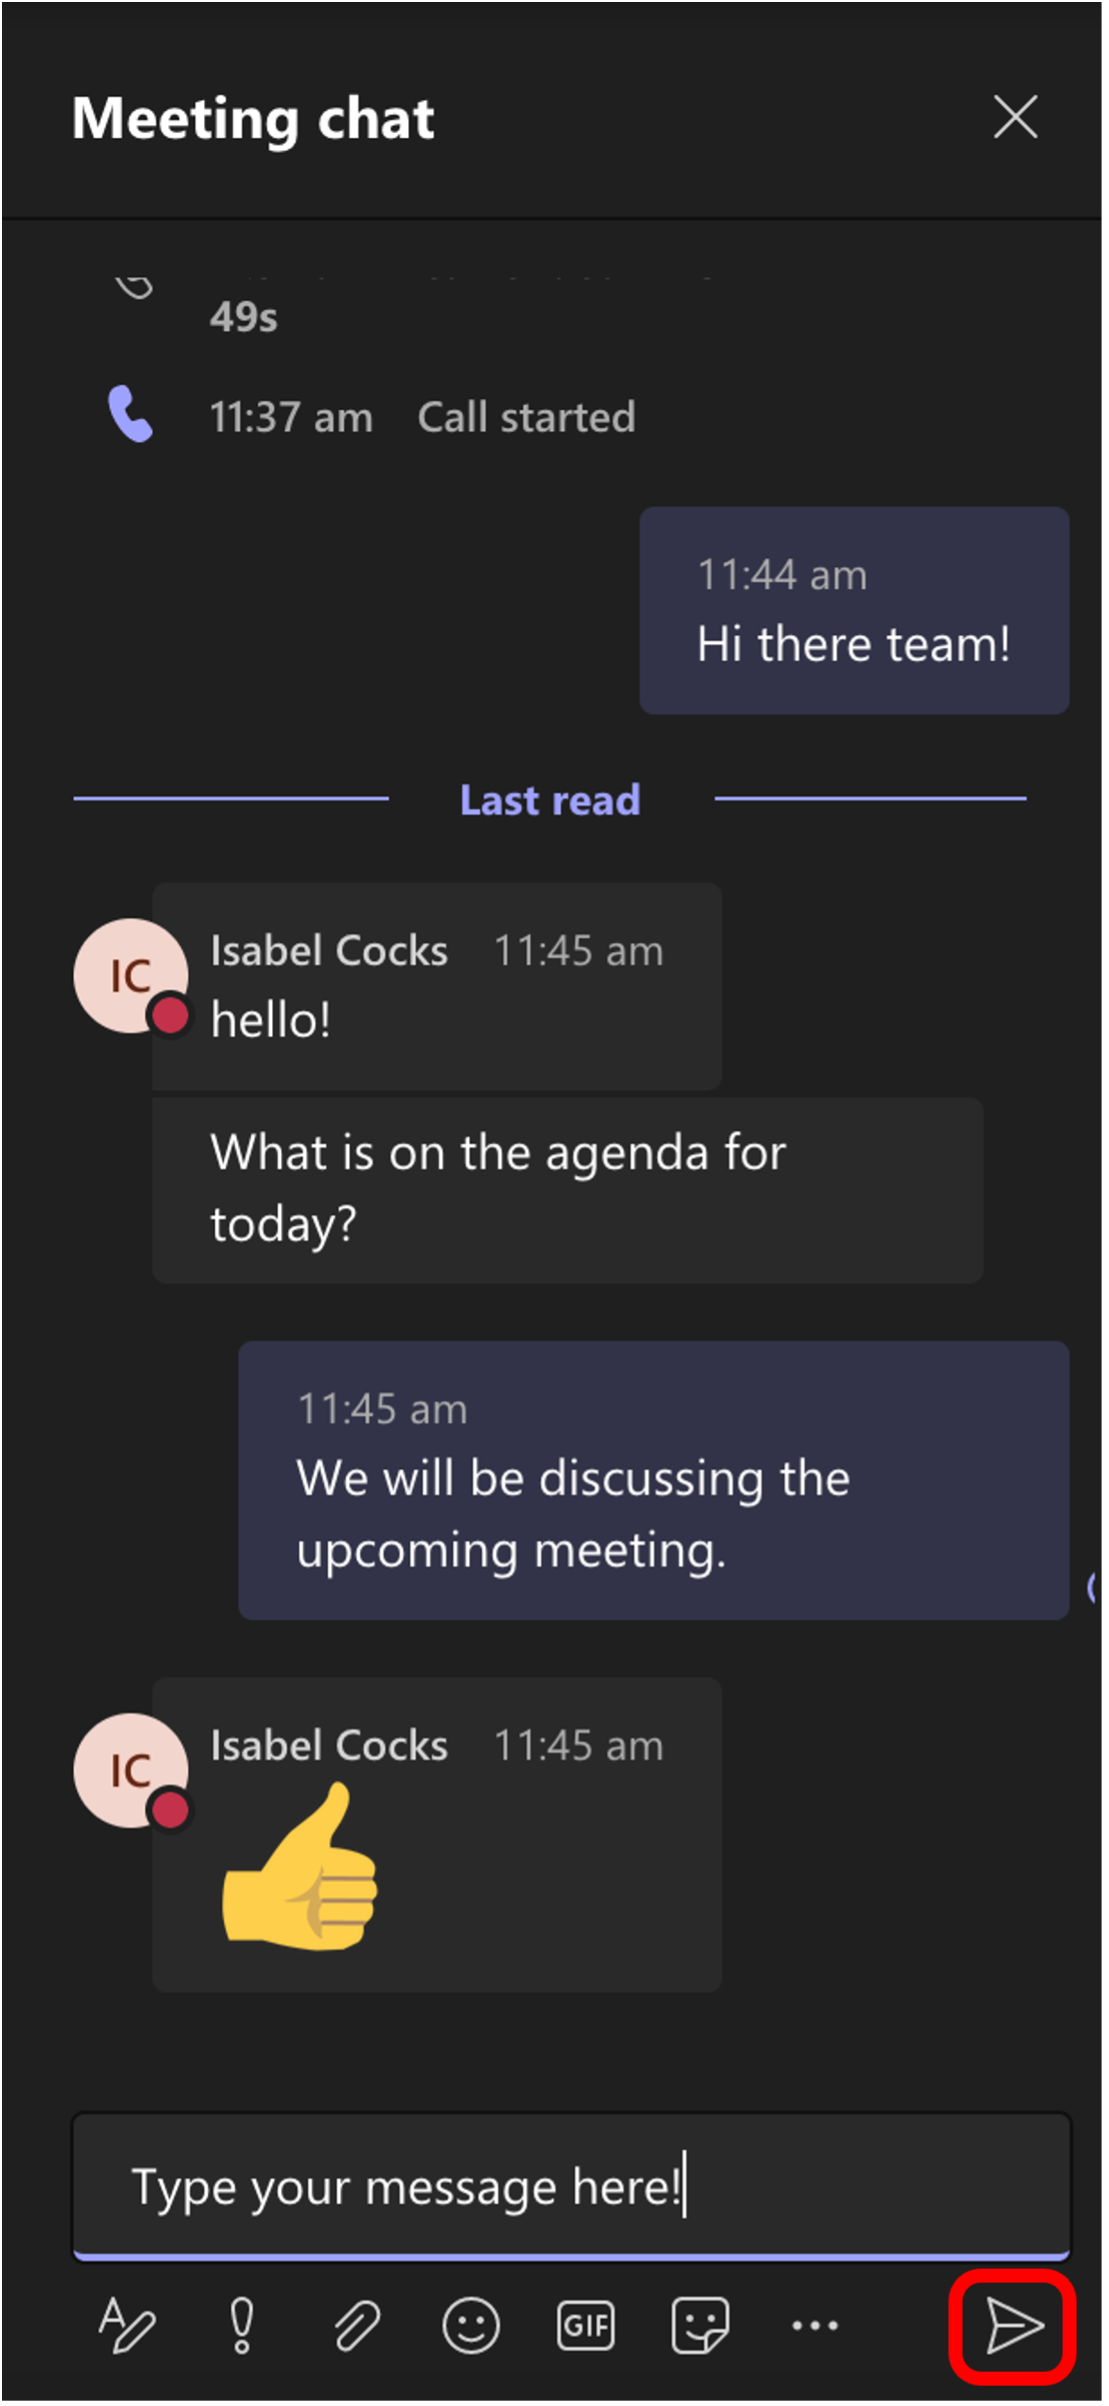
You can then close the chat using the X in the top right corner of the chat window. When the chat window is closed, chats will appear in the main meeting window. To hide chats from appearing in the main meeting window:
- Select More actions (…).
- Select Don’t show chat bubbles from the menu options.
Sharing your screen
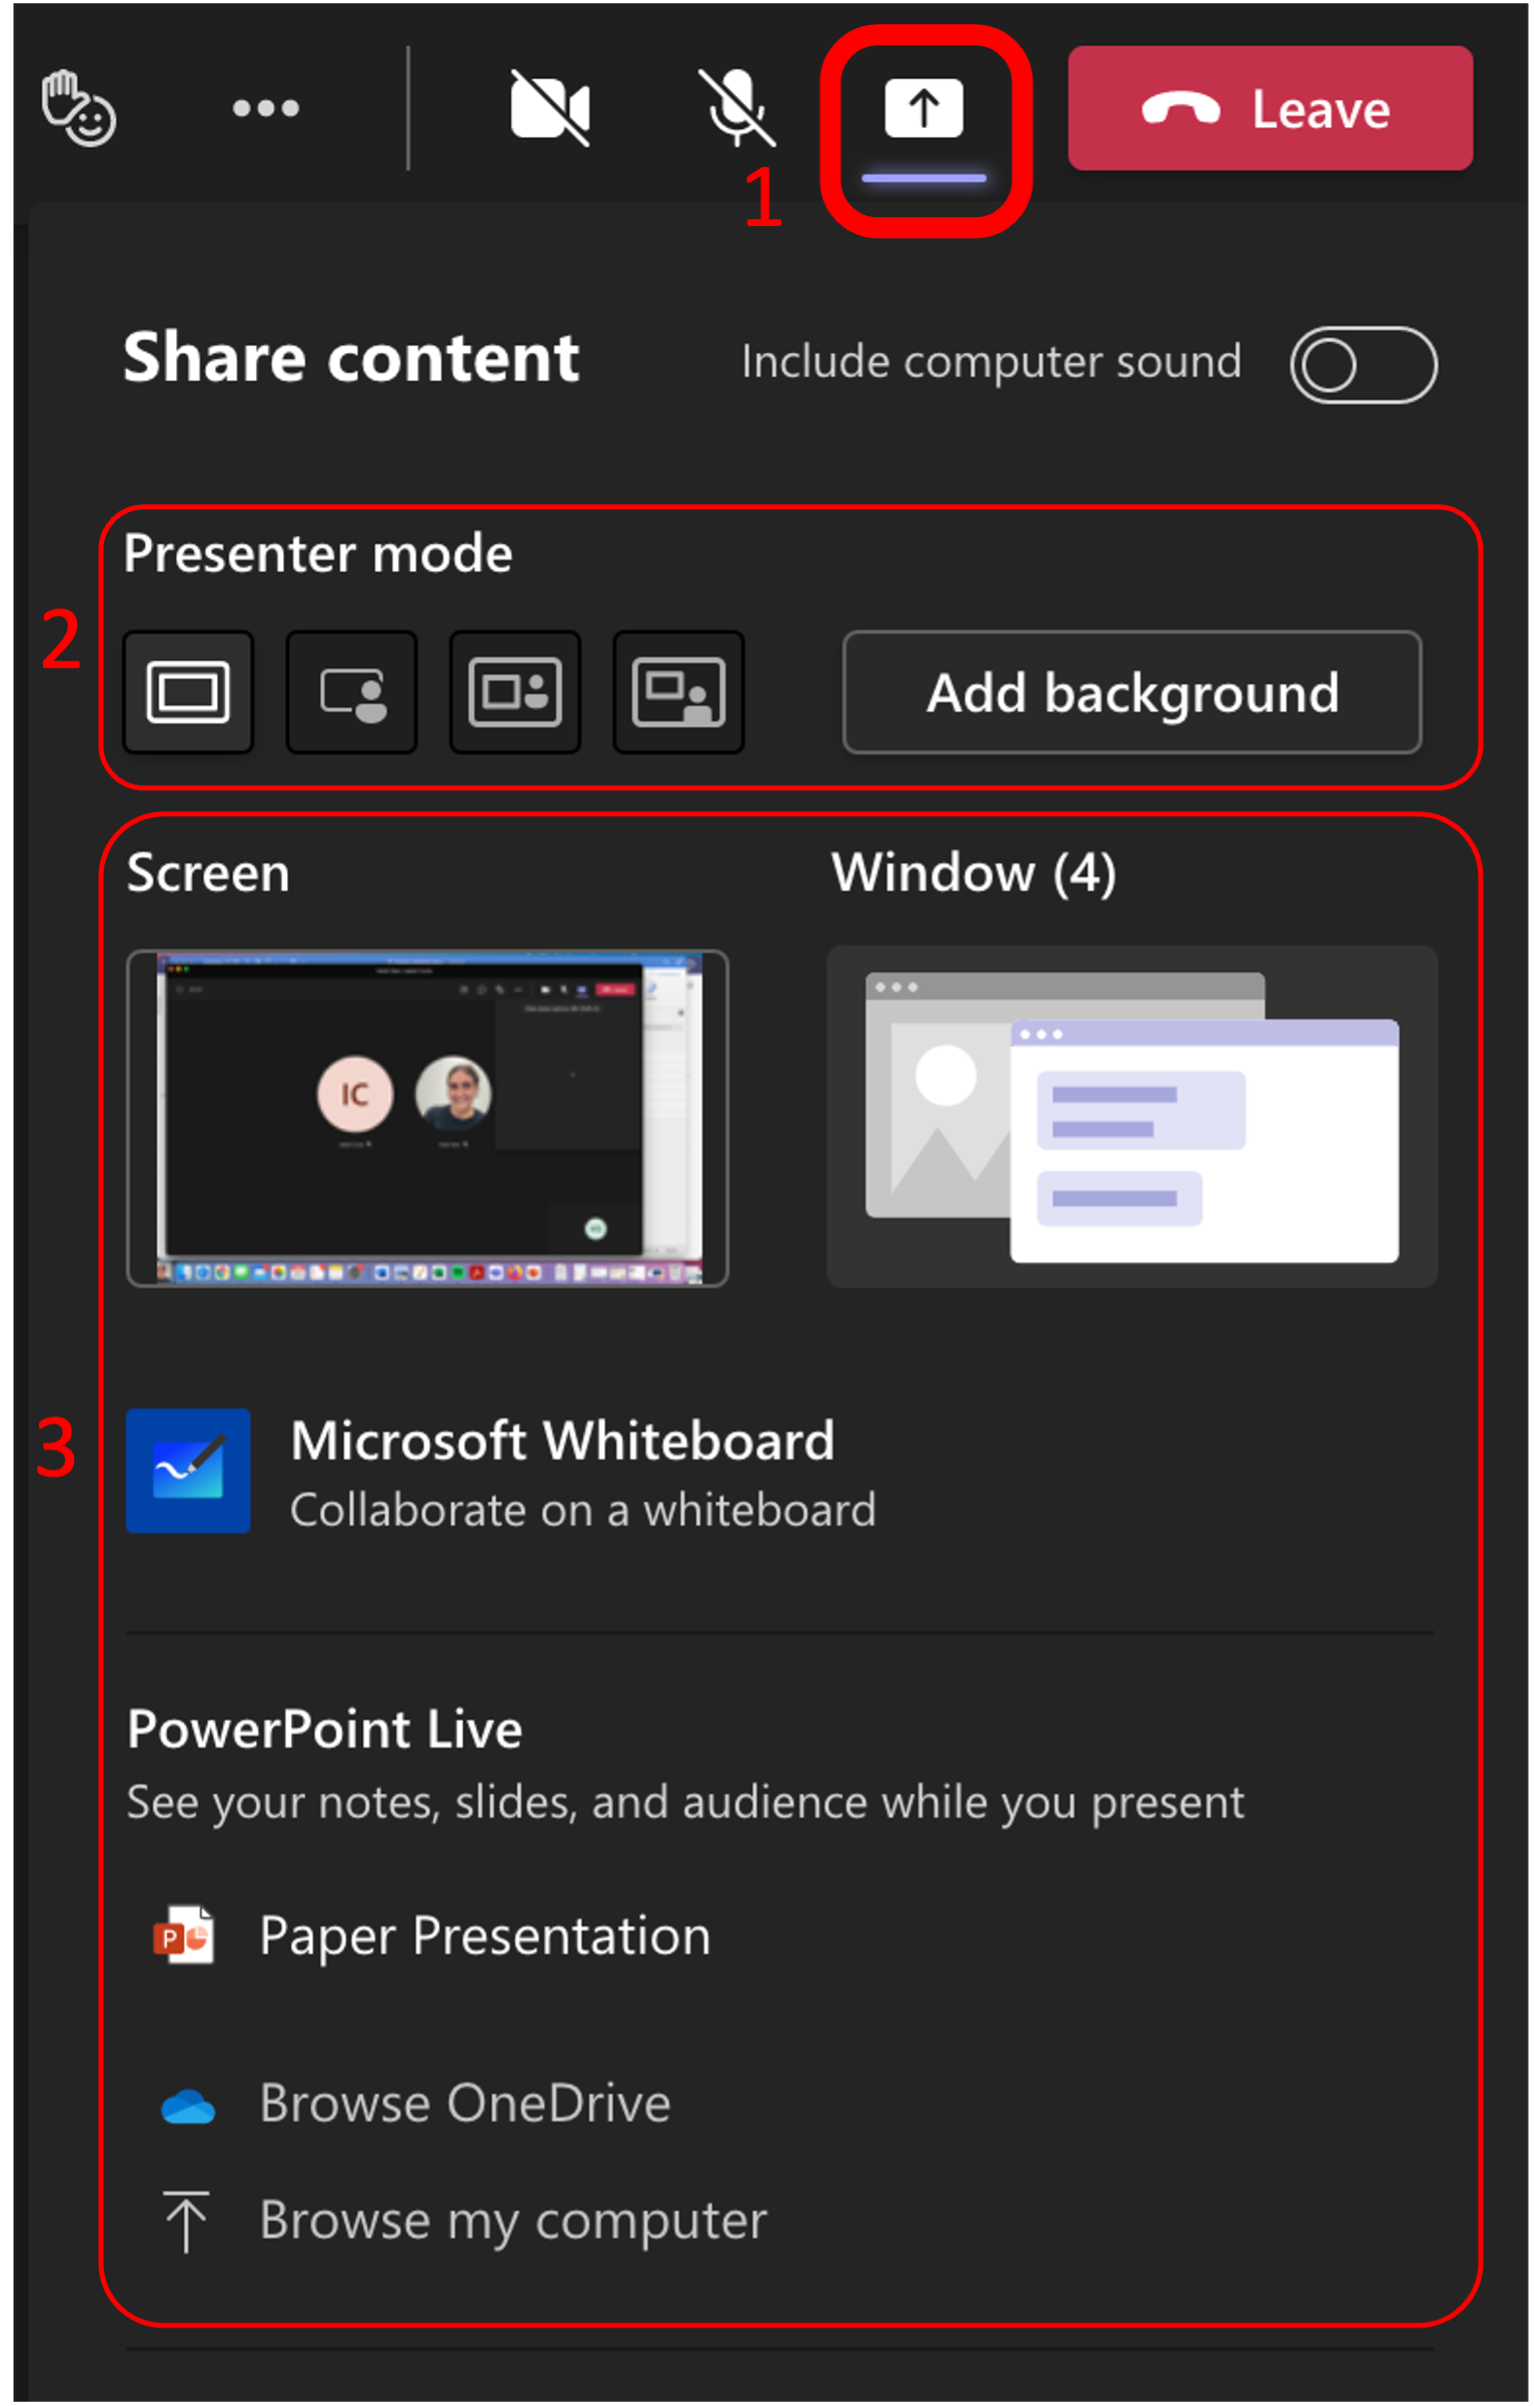
You can use the Share Content option to share your presentation slides, your desktop (computer screen), a specific application, or the whiteboard.
- Select Share content to present your screen.
- Select a presenter mode.
- Select what you want to share:
- Screen lets you show everything on your screen.
- PowerPoint Live lets you share a PowerPoint presentation.
- Microsoft Whiteboard lets you share a whiteboard where participants can sketch together.
- Window lets you share an open window like a specific app you have open
- After selecting what you want to share, a red border will highlight what you're sharing. Meeting participants won't see any notifications that might come in.
- When you're done sharing, go to your meeting controls and select Stop sharing.
Sharing PowerPoint slides
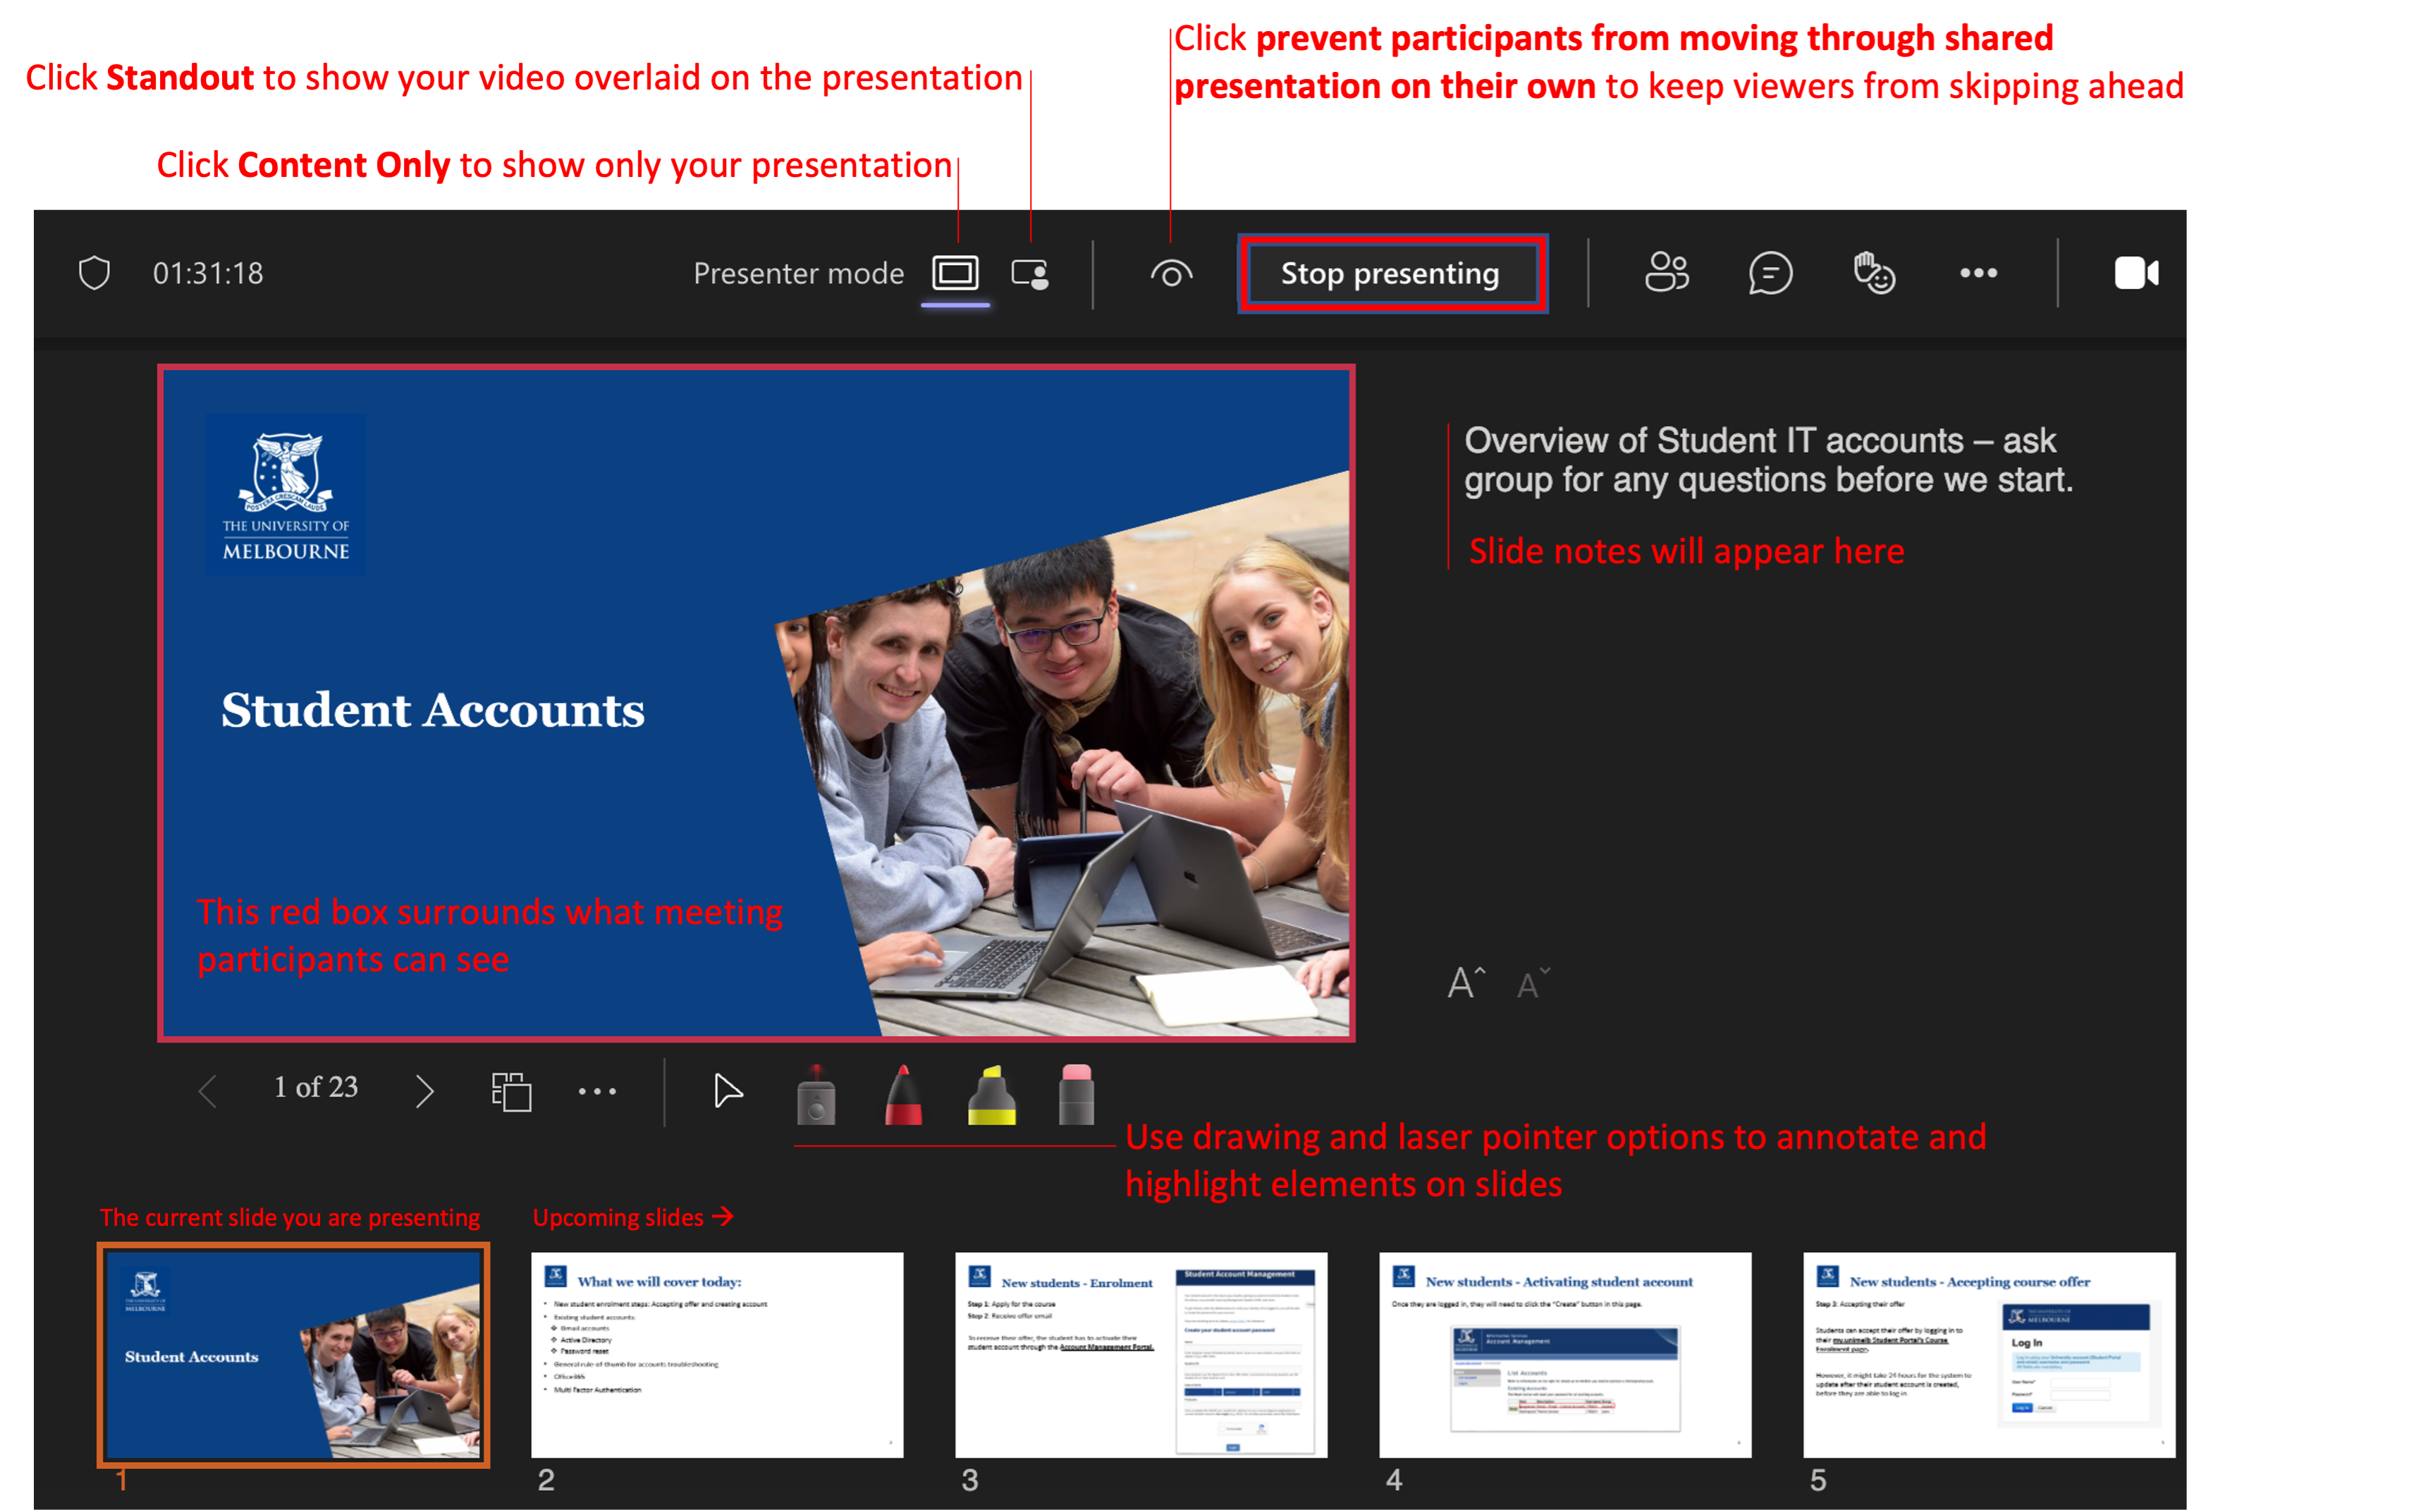
With PowerPoint Live, both the presenter and the participants can move through the slide deck, allowing meeting attendees to take down information from the presentation at their own pace (the presenter can turn off this option, to keep everyone focused on the current slide).
When presenting a PowerPoint presentation, select Share content > PowerPoint, then use the following options:
- Current slide: Shows the current slide you're on.
- Slide notes: Show notes you've prepared in your presentation.
- Thumbnail strip: Select a thumbnail to move to that slide.
Breakout rooms
Breakout rooms allow larger meetings to break off into smaller groups to complete tasks such as brainstorming exercises, discussions, presentations and more. Breakout rooms have audio, video, chat, and screen share capabilities.
- On the meeting controls, select Breakout rooms.

- Choose how many rooms you need and assign participants to each room.
- Select Create rooms > Start rooms.
Engaging with Q&A in a meeting
If your instructor adds a Q&A forum to a meeting, you can post, reply, and react to any question in the Q&A feed.
Teams support
For support downloading, accessing, or using Teams, please submit a support request.
This guide was last updated 21 Jan 2022.
Please report any errors or omissions in this guide by submitting an LMS support request.