Lecture Capture - Presentations, interactive activities and embedded media
This guide outlines how to use the Presentations feature of the Lecture Capture system, including polls, quizzes and embedded media.
Presentations
The Lecture Capture system has an optional feature that enables you to upload a presentation associated with a lecture prior to giving the lecture.
This functionality has several advantages for students using their own device during a lecture:
- It allows students to display the relevant slides and track progress whilst the lecture is being presented
- Students can zoom in on slides if they are unable to see content being displayed in the lecture theatre
- Students now have the ability to take notes on each slide
Uploading a presentation
To upload a presentation for a future lecture, the relevant booking will first need to be scheduled in the Lecture Capture system. Alternatively you can select New Class from the classes tab if the lecture will not be scheduled. Presentations can also be uploaded to recordings that have already occurred.
- Log in to the Lecture Capture system
- Navigate to the required subject via the Dashboard screen or via the Courses menu
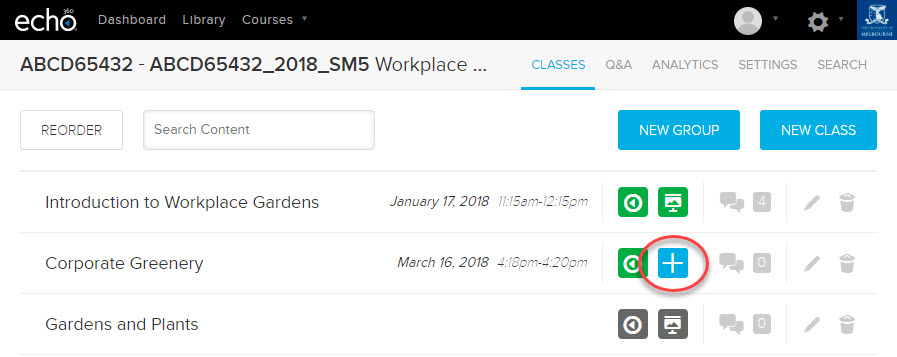
- Select the Add Presentation icon
 adjacent to the recording for which you would like to upload your presentation
- From the new window, select Upload a File to choose a document from your computer, then drag and drop the file or select Choose File to navigate to a PDF or PowerPoint file on your device
- When a file upload is in progress, the greyed Presentation icon
 will be displayed next to the class name. Note: when uploading large file sizes the uploading task can take some time to complete.
 - Once the presentation file has been successfully uploaded, the green Presentation icon
 will display
Important to note:
- Presentation file types accepted are: PDF, PPS, PPSX, PPT, PPTX.
- Only one presentation can be uploaded to each recording.
- On the person who uploaded the presentation can remove it.
- Uploaded presentations do not retain PowerPoint slide transitions or animations when being viewed in the Lecture Capture system.
- Poll Everywhere polls embedded in PowerPoint will display the poll holder frame only, not dynamic responses.
- Please ensure any presentation uploaded adheres to copyright requirements. For more information, see the Copyright Office website.
Editing presentations
The Lecture Capture system provides the ability to edit a presentation once it has been uploaded. Using the presentation editor you can rearrange slides, remove slides, add slides from other presentations, add media slides and add activity slides.
- Navigate to the subject via the Dashboard screen or via the Courses menu in the Lecture Capture system
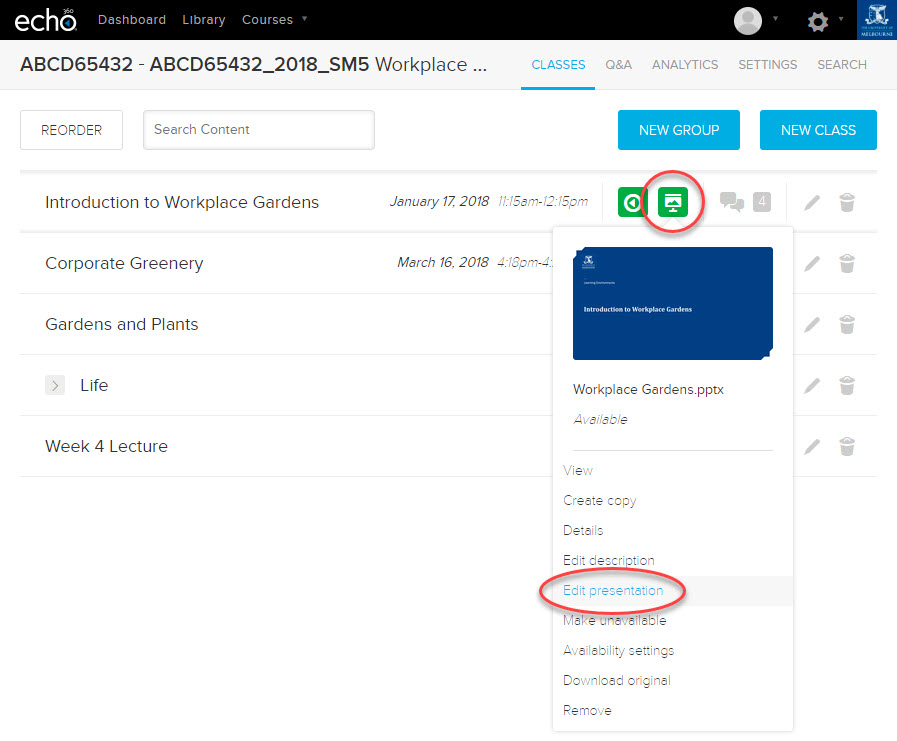
- Click the presentation icon and then select Edit Presentation. A warning will display that editing will affect all published versions of the content; click OK to continue.
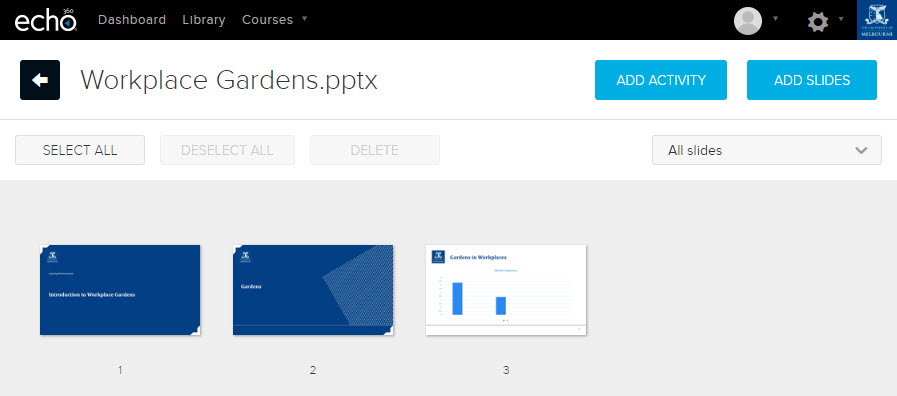
- Drag and drop slides to rearrange them as needed. You can also delete or add additional slides.
- See below for adding activities and adding slides
Remove a presentation from a recording
- Navigate to the subject via the Dashboard screen or via the Courses menu in the Lecture Capture system
- Click the presentation icon in line with the recording, and then select Remove from the options provided
- When prompted, confirm that you would like to remove the content
Important to note:
- Removing a presentation from your recording will also remove any references to the presentation in Analytics, Student Notes and Q&A.
- On the person who uploaded the presentation can remove it.
Interactive activities
The Lecture Capture system's Activity Slide feature allows you to create interactive slides within an uploaded presentation.
This feature can be used in a number of different ways:
- Interacting with students during a lecture to facilitate engagement
- Asking preliminary questions before a lecture to introduce a topic
- Following up after a lecture for feedback or to gauge understanding
As the feature is built into the Lecture Capture system these features can be used alongside Lecture Capture recordings and uploaded presentations.
Creating an activity slide
To create an activity slide you must create a presentation or edit an existing presentation in your Lecture Capture subject.
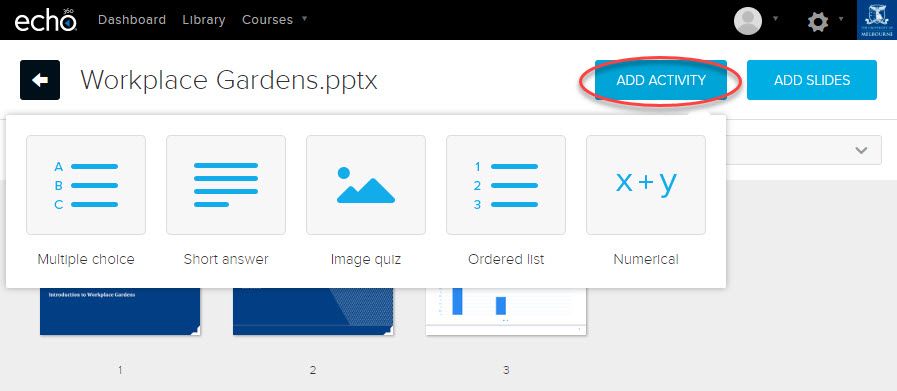
- Once in the Edit section of your presentation, click the blue Add Activity button to add a poll or quiz
- Select one of the available activity types
Activity types
-
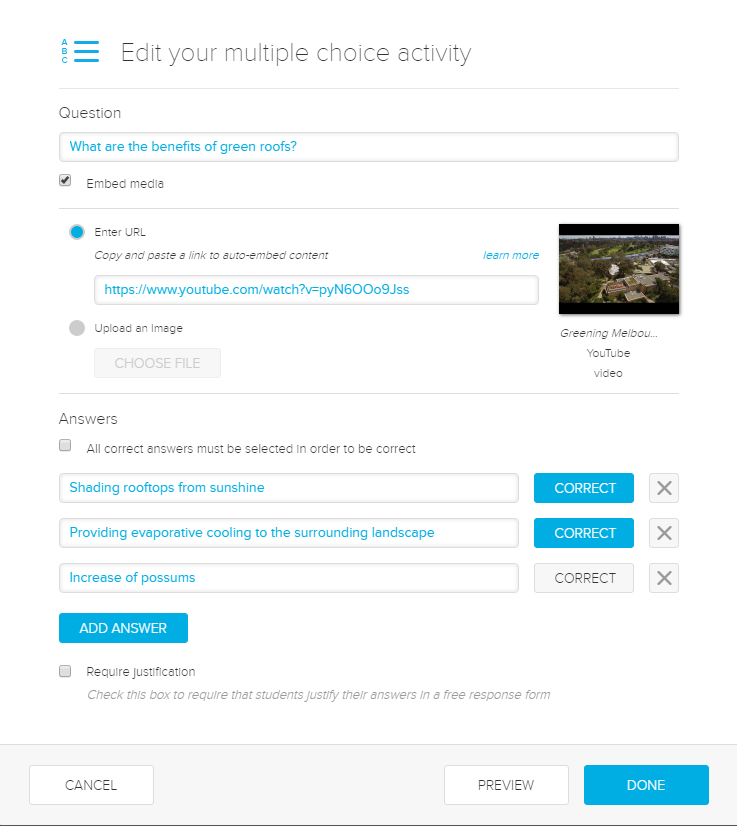
Multiple choice activity
Multiple choice activities let you ask a question with a set number of answers to choose from.
- Choose Multiple choice when creating an activity.
- Enter your question in the free text field.
- Enter your answers in the text boxes underneath Answers. Use the X to remove answers.
- Select Correct next to any correct answers. You may select multiple correct answers or none.
- Select the Add answer button to add any extra answers.
- Check the Require justification box to prompt students to provide a free text explanation of their chosen response.
- Select All correct answers must be selected in order to be correct, if you would like students to only receive a pass mark if they choose all correct answers.
- Use the Preview button to view your activity from a students' point of view.
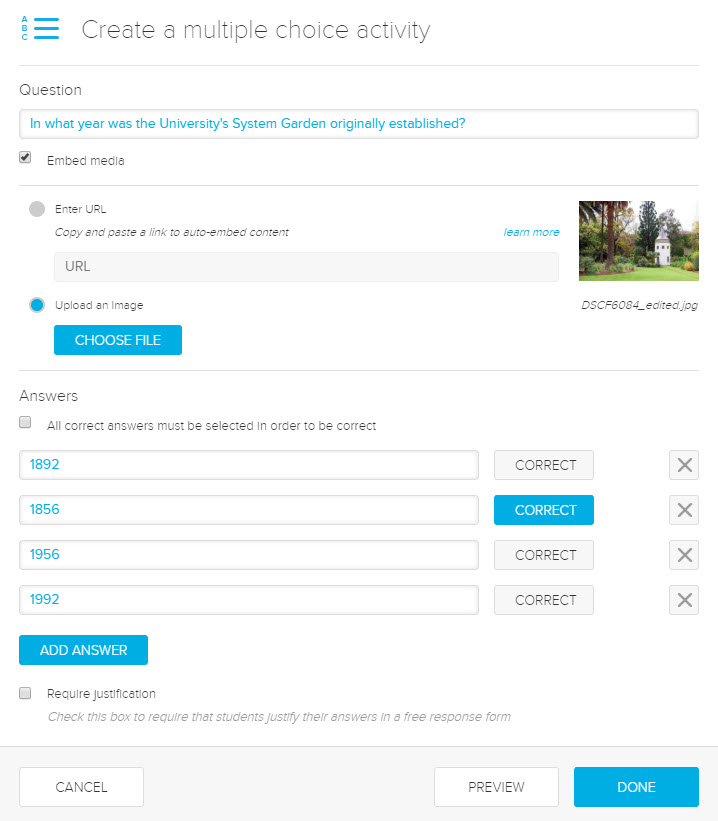
Creating a multiple choice activity -
Short answer activity
Short answer activities can be used to ask questions that require students to input text to respond.
- Choose Short answer when creating an activity.
- Enter your question in the free text field.
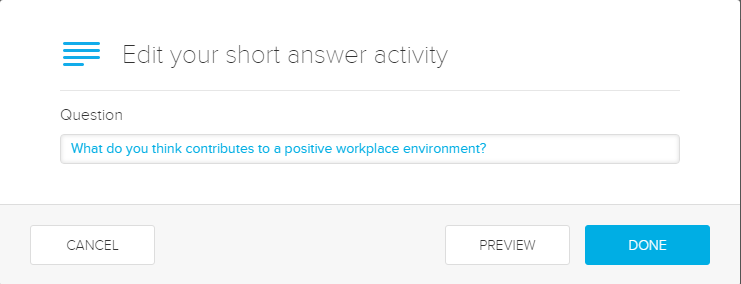
Creating a short answer activity Short answer activities currently have several limitations:
- It is not possible to moderate answers or prevent responses from being displayed in the results screen, however student specific responses are visible to the instructor via the 'analytics' section.
- There is also no word limit, so we recommend if this is used keeping questions short as larger responses can impact the way responses are displayed in the 'results' page.
As an alternative, the Q&A feature in the Lecture Capture system, Qualtrics and Poll Everywhere can be utilised for more in depth questions and extensive moderation functionality.
-
Image quiz activity
Image quiz activities require students to mark a specific location on an image to respond to the question.
- Choose Image quiz when creating an activity.
- Enter your question in the free text field.
- Select Choose Image to upload an image.
- Choose Mark solution if there is a correct location on the image, then draw a rectangular area over the correct area. If there is no correct location, you do not need to mark a solution.
Take care to ensure images are not too large, as this can impact how the image displays to students
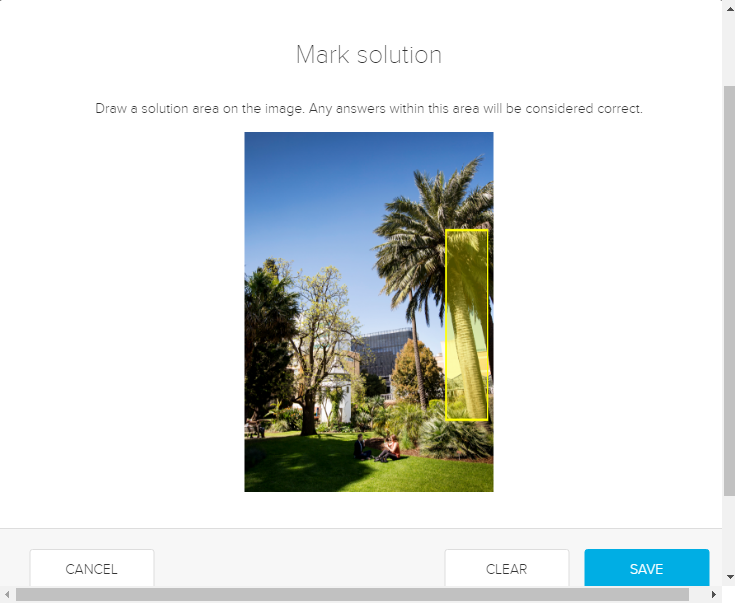
Marking a solution to an image quiz activity -
Ordered list activity
Ordered list activities involve students putting a set of answers into an order.
- Choose Ordered list when creating an activity
- Enter your question in the free text field.
- Add the answers to your question in their correct order (if there is one). The items will be randomised when presented to students.
- Use the Add Item button to add any additional answers as required.
- Choose Require justification to require students to explain their answer. Ensure Has a correct answer is selected if there is a particular order.
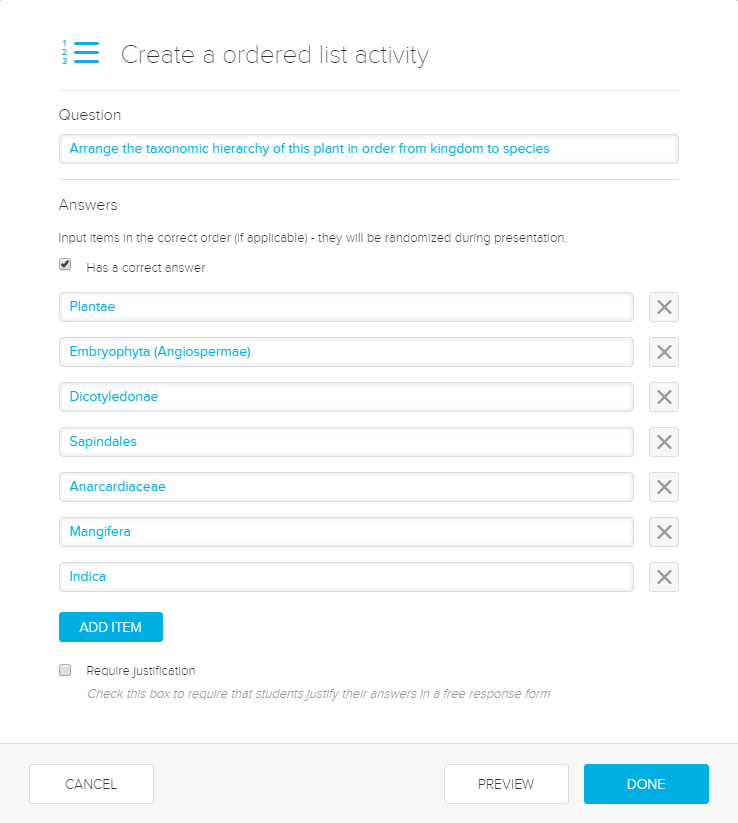
Creating an ordered list activity -
Numerical activity
Numerical activities can be used to ask questions that require a number or range as the answer.
- Choose Numerical when creating an activity.
- Enter your question in the free text field.
- Enter the correct answer in the first box. If you have a range of acceptable values enter the upper value in the second box.
- Choose Require justification to require students to explain their answer.
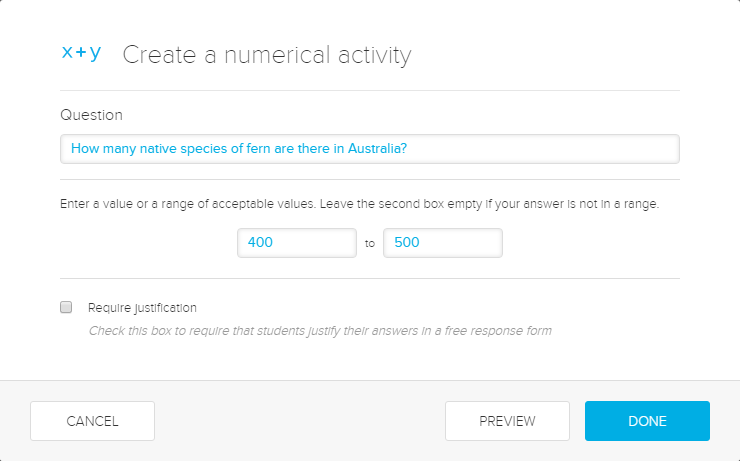
Creating a numerical activity
Presenting activities
Lecture Capture activities can be presented during a lecture, as well as being made available to students before or after the lecture. Students are able to access activity slides by viewing the presentation (if available) in their Lecture Capture recordings list.
There are a number of functions available to you through the presenter interface that allow you to control your activities and presentation. The presentation interface can be accessed by selecting the Presentation icon ![]() and choosing View from the drop down menu.
and choosing View from the drop down menu.
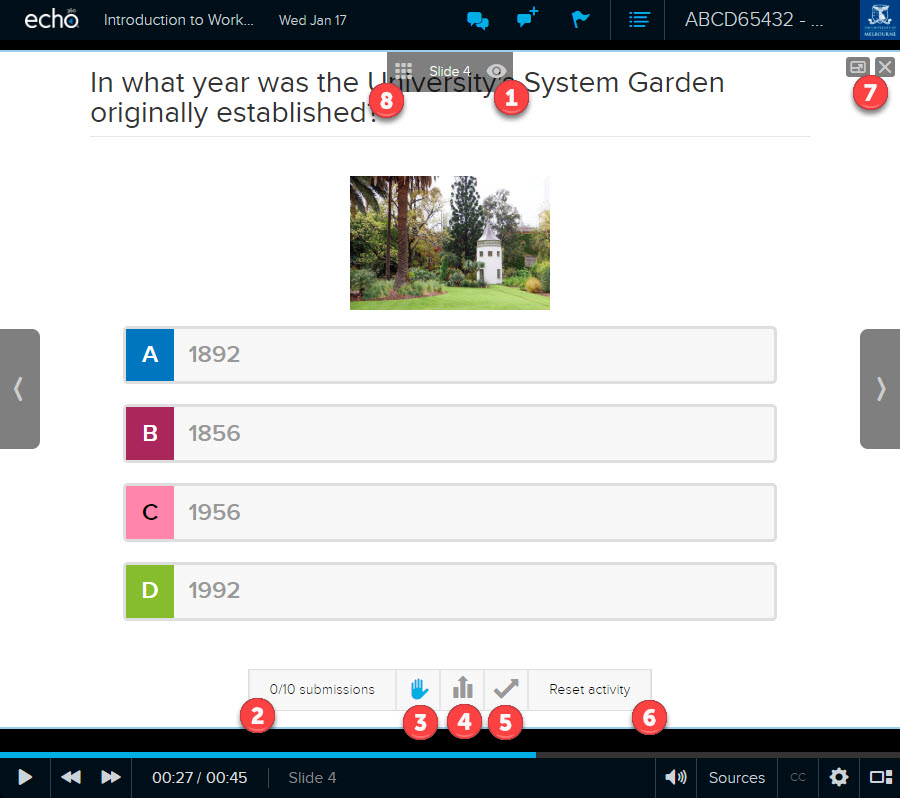
Below is a brief overview of the Lecture Capture presenter interface and its various functions.
| Reference | Description |
|---|---|
| 1. | Slide visibility Toggles whether the selected slide is visible to students. A grey icon indicates the recording is visible, and a red icon indicates the slide is hidden. Slides must be made visible to students in order to enable participation in an activity. |
| 2. | Number of submissions Indicates how many students have responded to the activity. |
3. | Open an activity to responses The 'hand' icon at the bottom of an activity slide toggles whether students can submit a response to an activity. A blue hand indicates the activity is closed to student responses. When an activity is closed students will see at the bottom of the slide a notification that the poll is closed. Once a poll is closed they will not be able to edit their answers or submit a response. Activities can be opened and closed as many times as required. |
| 4. | Show activity results Display audience responses to the question. A blue icon |
| 5. | Show activity solution Display the correct answer(s) to an activity. A blue icon Note: activities must be closed in order for the solution to be activated. |
| 6. | Reset activity Resets the responses to an activity. This will remove all submitted responses and any references in student analytics. |
| 7. | Open in fullscreen Displays the presentation in fullscreen. |
| 8. | Open slide deck Opens the slide deck to change between slides. |
Student activity analytics
Student activity analytics enable you to track participation in activities and also monitor progress of individual students.
To view student activity results:
- Navigate to your list of recordings and select the Analytics tab
- Select the Students tab from the side menu.
- Choose the relevant lecture/recording from the All Classes dropdown menu to see percentage of activity participation and percentage of correct responses per student.

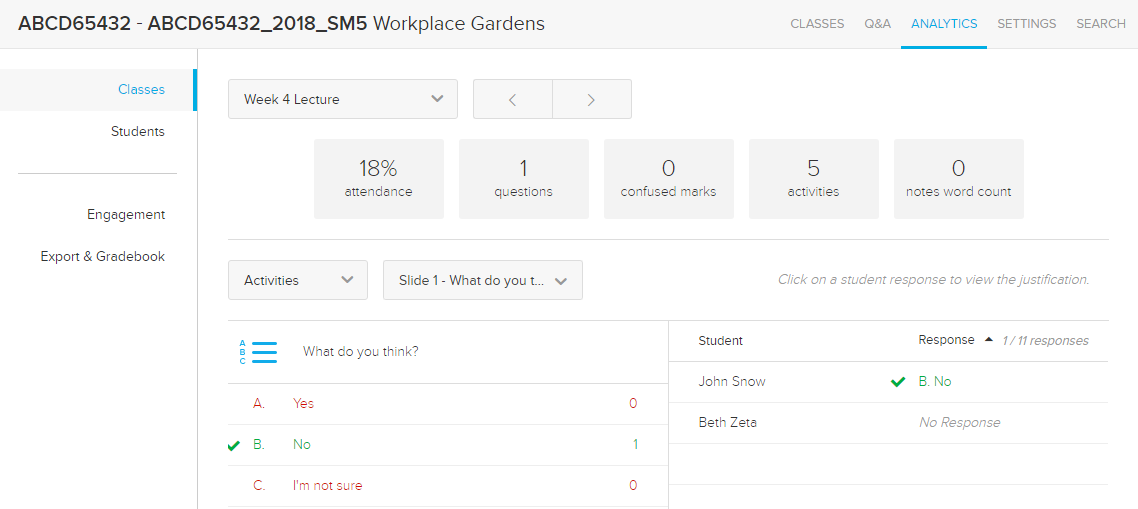
To view student responses:
- Navigate to your list of recordings and select the Analytics tab
- Select the Classes tab from the side menu
- Choose the relevant lecture/recording from the All Classes dropdown menu above the participation graph
- Choose Activities from the dropdown menu below the participation stats.
- Navigate to the relevant slide from the drop down menu. Student responses will appear in a list to the right of the slide.
Embedded media and web content
Embedded media can be useful if you plan on showing content such as a YouTube clip during a lecture. By embedding the content in an attached presentation, students can review any web material that was presented during class.
To embed web content in a Lecture Capture presentation:
- Once in the Edit section of your presentation, click the blue Add Slides button followed by Create a media slide
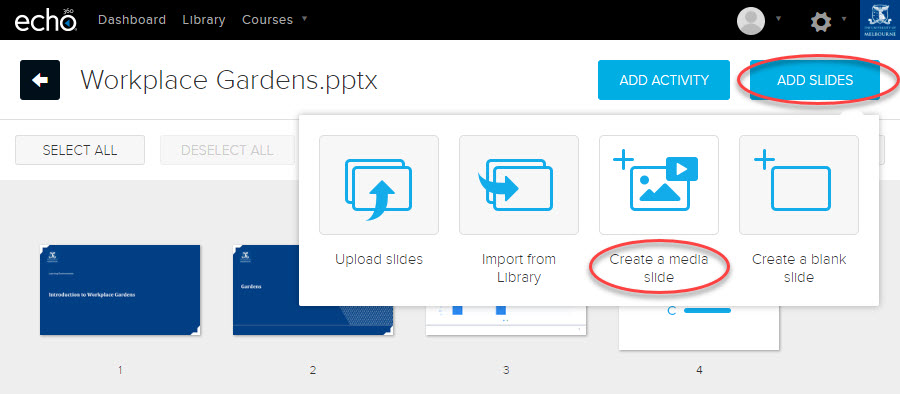
- Enter the URL of your web content.
- Note that standard HTML embed codes will not work in media slides. You must enter the original URL of the content from an enabled content provider. Information on available content providers can be found here: https://embed.ly/providers

To see a preview of your content click on the top left corner of the slide in the slide deck editor. The preview will display what students will see when viewing the slide. If the content has been successfully embedded you will be able to stop, pause, play as if you were viewing from the original website (eg. YouTube).
Embedding media in an activity
You can also embed media in an interactive activity slide to encourage engagement with the content. Currently media can be embedded in 'multiple choice' style activities.
To embed media in a multiple choice activity select Embed media when creating your activity and enter the URL of your web content.
This guide was last updated 25 Nov 2022.
Please report any errors or omissions in this guide by submitting an LMS support request.