Lecture Capture - Managing recordings
How to use some of the extended functionality of Lecture Capture, including managing, editing and copying recordings.
Trim or cut recordings
The Edit Video feature in Lecture Capture provides a basic video editing function where cuts and trims can be applied to video content from either the Library page or from the Class List page. This interface allows for basic post-production tasks on recordings such as the removal of copyright material, sensitive information or private conversations.
To access the Web Editor:
- While in the Lecture Capture system, navigate to the subject via the Home page or the Courses menu. Note: When accessing via the LMS you will be taken directly to the Class List.
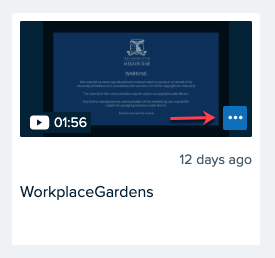
- Click on the Recording icon
 and then select Edit Video, then click OK.
 - The Web Editor screen will display.
Details on how to edit a video can be found in the Echo360 editing video guide

Add closed captions
If you have generated your own closed caption files, you can manually upload these to a recording in the Lecture Capture system. Only .VTT and .SRT file types are accepted as valid caption uploads.
- From the Classes page, click on the Recording icon then select Details from the dropdown.
- Alternatively, find the recording that you have uploaded in the Library page, then click on the file to open it.
- On the right side of the details panel (below the capture preview), find the Captions information and click Add, then select Upload.
- Drag and drop the file from your system into the upload pane, or use the browsing option to select the file, then click Upload.
- Note: Only .VTT file type is accepted at this time.
- Once the file is uploaded, it is applied to and synced with the recording video. This processing should take a very brief period of time.
Important to note:
- If a user edits the video, the captioning file may need to be re-created and re-uploaded to the edited video.
- Timestamped Closed Caption files must account for the fourteen-second copyright information attached to the beginning of lecture recordings.

Upload videos from other sources (eg Zoom)
Video content recorded outside of the Lecture Capture system can be uploaded directly to a course or added to your library. For example, you might want to upload recordings of tutorial sessions that you have conducted in Zoom. Additional content can be added either before a class or after a class has taken place.
Note that only one video file and one presentation file can be added per class, so you will need to make a new class if you wish to upload a second video file (such as a tutorial) as part of a particular week’s learning materials.
To create a new class and upload your video while in Canvas:
- Navigate to the Lecture Capture page in Canvas and select New Class. Give your class a Name and click OK.
- Find your new class in the Lecture Capture page and click the Add content
 icon and choose Add Video.
 - Select Upload a file and find the video file required using the options provided. Once selected, click Upload.
- The file may take a moment to publish. Once the Recording icon has turned green , you can view, copy or edit the file just like any other Lecture Capture recording.

Any content that is uploaded to a class automatically appears in your Library under My Content. Follow the steps below to publish a recording from your library.
Please ensure any video content uploaded adheres to copyright requirements. For more information, see the Copyright Office website.
Further details on how to upload content to your Library can be found in the Echo360 uploading media guide.
Republish content from a previous semester
Republishing material from a previous semester can be useful in the case a lecture was missed or a hardware issue prevented the recording of a lecture. All courses that you have access to, including semesters that have already concluded, will appear in the Courses tab of your Home page.
To make content from a previous semester available in the current subject:
- Step 1: Copy the required recording to your library
- Step 2: Publish the recording from your library to the current subject
Tip: If a large number of recordings from a previous semester are required, please submit a support request to the Lecture Capture team to publish recordings in bulk from a previous semester into the current semester Lecture Capture page.
Copy recordings
Copying recordings can be an effective way to reuse or repurpose your material from previous semesters or other courses.
To copy a recording to your library:
- Navigate to the Classroom for the class containing the content that you wish to copy
- Click on the Recording icon or Presentation icon
 to access the options for that content
 - Select Create Copy, then OK
The recording will now be available for viewing, editing, sharing and publishing in your library.
Publish a recording from your library
Recordings saved in your library can be published to any courses you have access to in Lecture Capture.
- While in the Lecture Capture system, navigate to the Home page (also referred to as the Echo360 Content Library)
- Select the My Content tab and locate the required recording
- Hover your mouse over the content tile to reveal the dropdown menu and select the Share option

- In the Share Settings pop-up window, select the Class tab
- Select the course, term and section (subject) where you wish to publish the recording
- Choose whether you wish to publish the recording to an Existing Class or a New Class.
If publishing to an Existing Class, choose the desired class from the drop down menu. - If publishing to a New Class, use the provided fields to set the Class Name, Date, Time and Duration. Note that Classes must have either a Name or a Day/Date/Duration, although most have both. Class Description is optional.
- Choose whether you wish to publish the recording to an Existing Class or a New Class.
- If necessary, change the Available and Unavailable settings. Note that recordings will become available/unavailable at midnight on the specified date.
- Click Share. The selected recording will now be published to the subject you have chosen.

Make a recording unavailable
The Lecture Capture system allows for staff to control availability of content to students.
- While in the Lecture Capture system, navigate to the subject via the Home page or the Courses menu. Note: When accessing via the LMS you will be taken directly to the Class List.
- Click the Recording icon and then select Make unavailable
- When prompted, confirm that you would like to make the selected content unavailable to students.

The selected content will no longer appear to students and will have the grey Recording Unavailable icon ![]() displayed.
displayed.
Note: The recording will still appear to students in the class list, however there will be no content associated with the session.
Set availability of recording based on date
- While in the Lecture Capture system, navigate to the subject via the Home page or the Courses menu. Note: When accessing via the LMS you will be taken directly to the Class List.
- Click the Recording icon and then select Availability settings
- Choose On a specific date and enter the dates in which the content is to be made available and unavailable, then click Update.

This guide was last updated 12 Mar 2024.
Please report any errors or omissions in this guide by submitting an LMS support request.