Submitting media to a LMS discussion using Echo 360 Universal Capture
This guide steps through uploading media recorded with Echo 360 and submitting it to a Discussion in Canvas (LMS).
There are a variety of reasons you may be asked to submit a video or audio file to a Canvas discussion. These can include:
- Informal opportunities to get to know your teaching staff or fellow students, like posting a video introducing yourself
- Visually or orally responding to questions or tasks set by your lecturers or tutors
- Providing a visual demonstration that you can perform a physical task or technique
- Illustrating how you solved a problem using a screencast
- Submitting a more complicated video, presentation, pitch, promo, podcast or audio-visual essay
In every case, it’s important to read the instructions and expectations of what should be submitted in a discussion so that your media submissions meet the requirements of the discussion or task at hand.
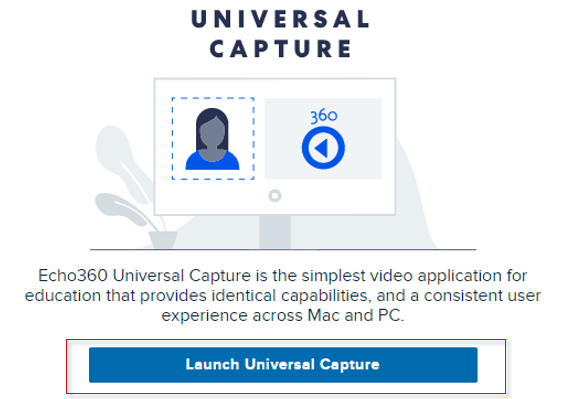
Once you’ve carefully read the requirements of the discussion the next step is to choose your recording method. This guide features instructions on how to upload media recorded in Echo 360 Universal Capture. For the full guide on how to record media with Universal Capture please see the Universal Capture for Students guide.
Replying to a Discussion post with the Rich Content Editor
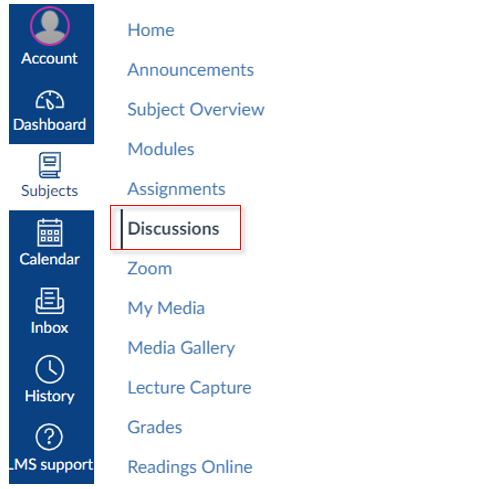
- Go to the Discussions heading in your subject’s navigation menu
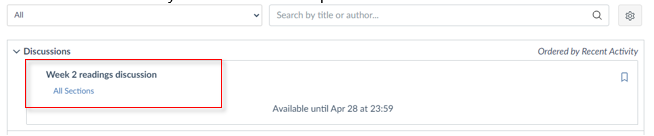
- Choose the Discussion you would like to respond to
- Click in the Write a Reply text box
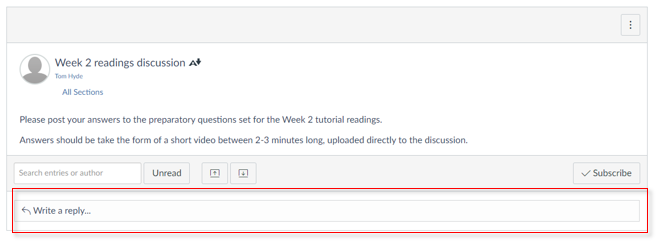
- This will open the Rich Content Editor where you can write your response and upload media
- To upload media with Echo 360, click on the Echo icon to open a drop down menu
Upload Echo 360 media to a Discussion post using Create New Media
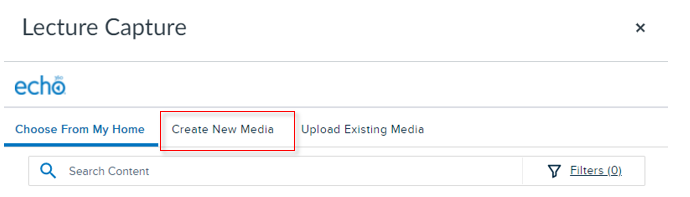
- From the Lecture Capture menu, select Create New Media
- From the Create New Media screen click on the Launch Universal Capture button. This will open a new tab in your browser and prompt you to open Echo 360 Capture

- If you haven’t already installed Echo 360 Capture you can do so at this screen. Once installed you will need to restart your computer or mobile device. The next time you open Echo 360 Universal Capture will open automatically.
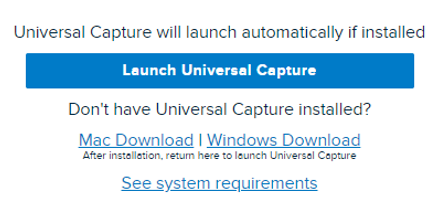
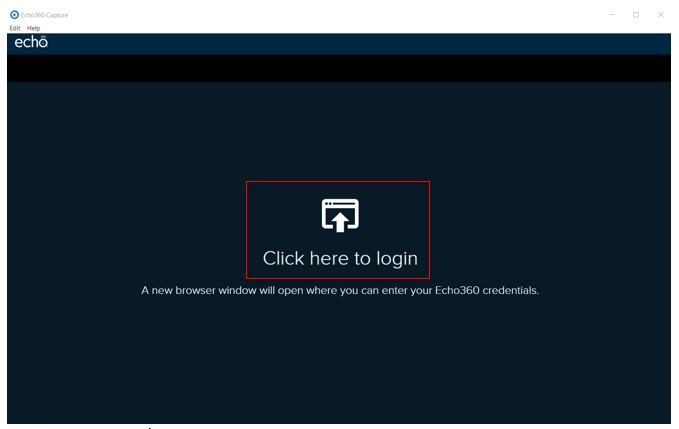
- Once you’ve installed Echo 360, click on the Launch Universal Capture button. This will open the Echo 360 Capture application outside of your browser where you will be asked to login.
- Once you have logged in you will be taken to the Echo 360 Capture screen. Here you can choose which screen or webcam input you would like to record from and your audio source. You can also rename the recording.
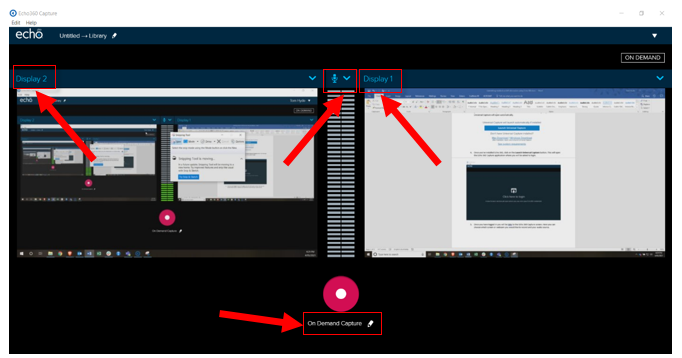

- Once you have chosen which screen and/or webcam you would like to record from you will see a preview of what will be recorded. When you’re ready to start recording click on the red/pink record button.
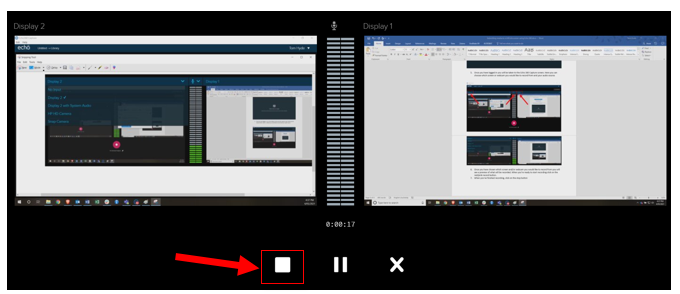
- When you’ve finished recording, click on the stop button
- Your recording will be saved to your Echo 360 cloud account where you can access the recording next time your open Echo 360 Capture from Canvas. To do this follow steps 1-5 in the Replying to a Discussion post with the Rich Content Editor section above.
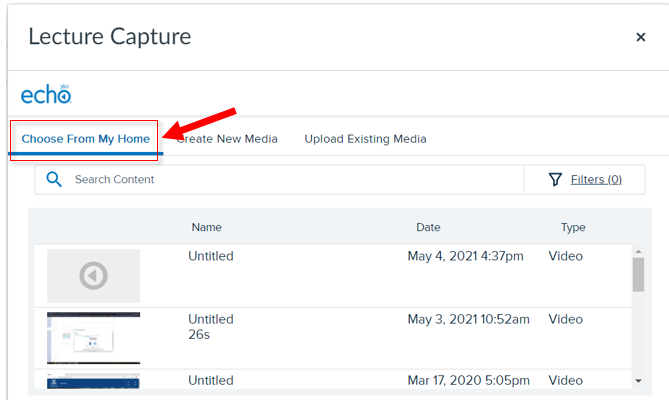
- Click on Choose from My Home and select the recording you would like to add to the discussion.
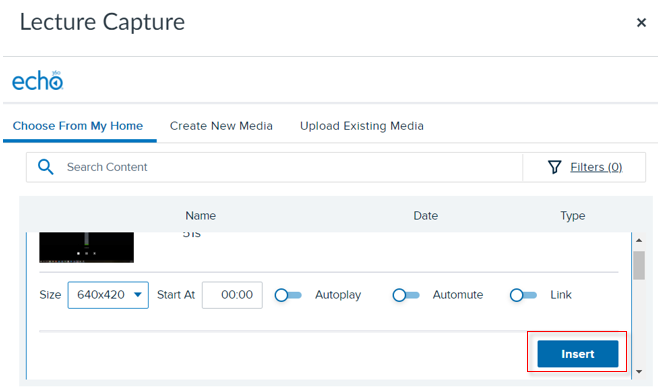
- Once selected you can specify the size of the video, what time stamp to start it at, autoplay, automate or if you would like it to play in a separate browser window (listed as the term ‘link’). When you’re ready to add the video to the discussion, click Insert.
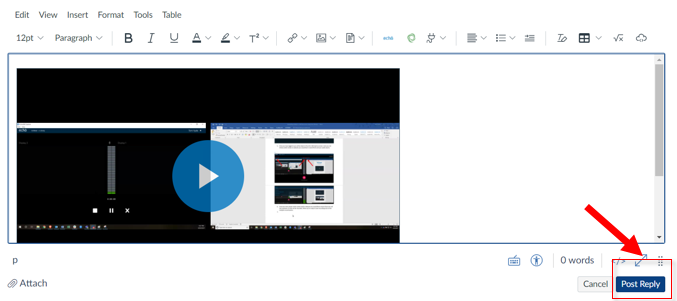
- Once your video is added in to the Rich Content Editor click Post Reply to add it to the Discussion.
This guide was last updated 17 May 2021.
Please report any errors or omissions in this guide by submitting an LMS support request.