Submit a video in Canvas using EchoVideo
This guide steps you through accessing a Canvas assignment, uploading a video to your Echo360 (Lecture Capture) library, then embedding it into an assignment submission.
Upload and submit your video
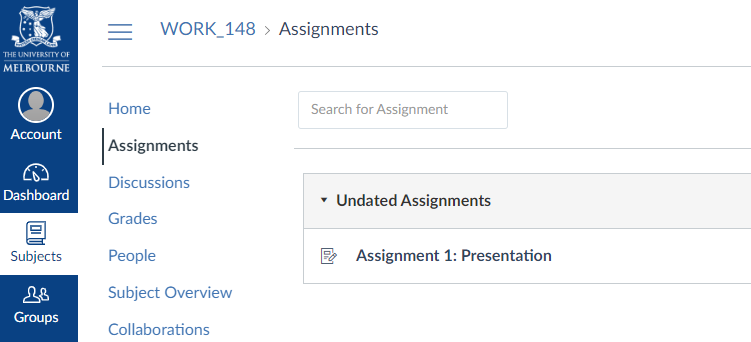
- Go to Assignments in your subject navigation menu.
- Click on the relevant Assignment to open it.
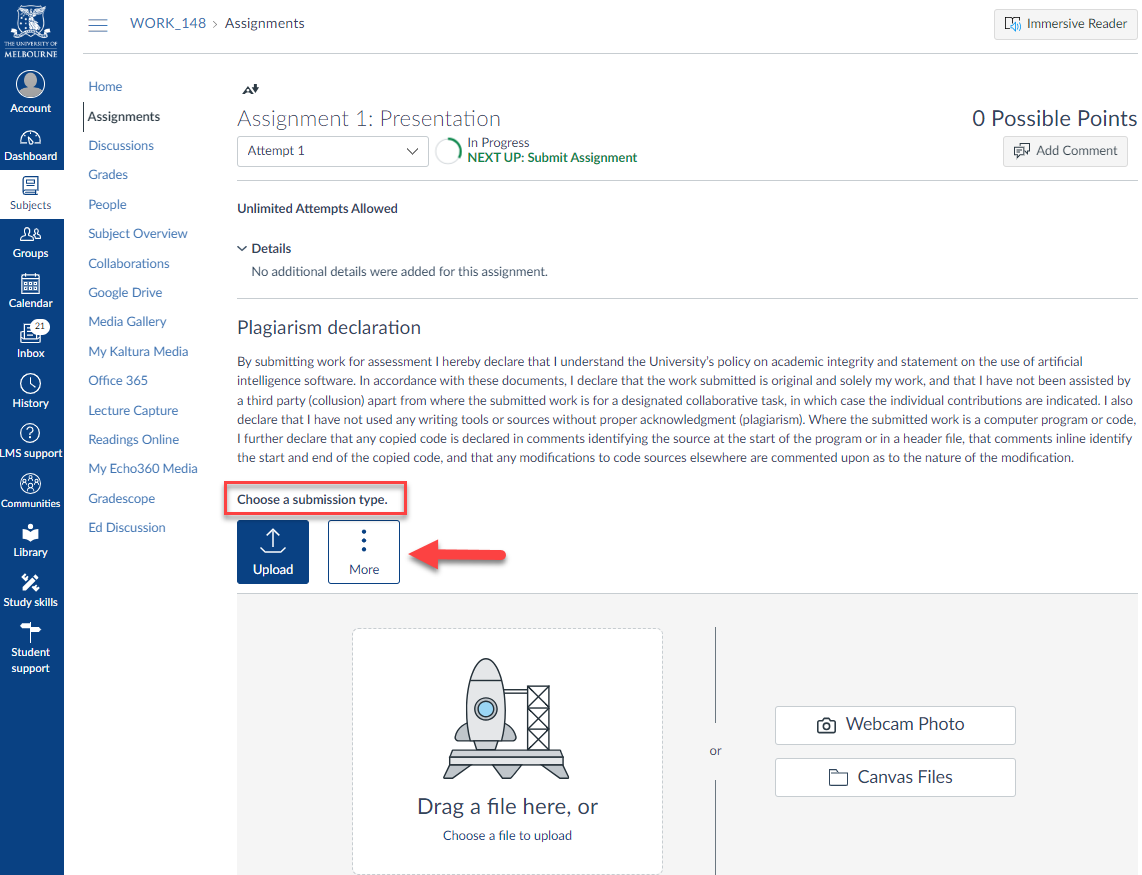
- Click More to Choose a submission type.
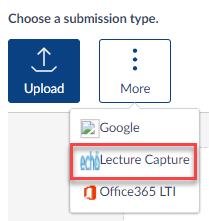
- Select EchoVideo Lecture Capture from the drop down list.
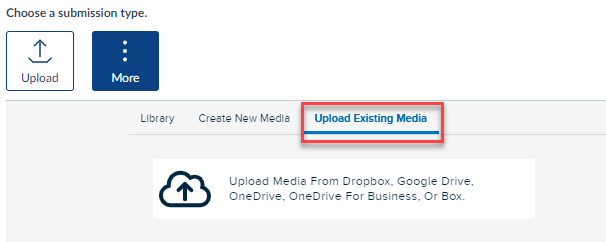
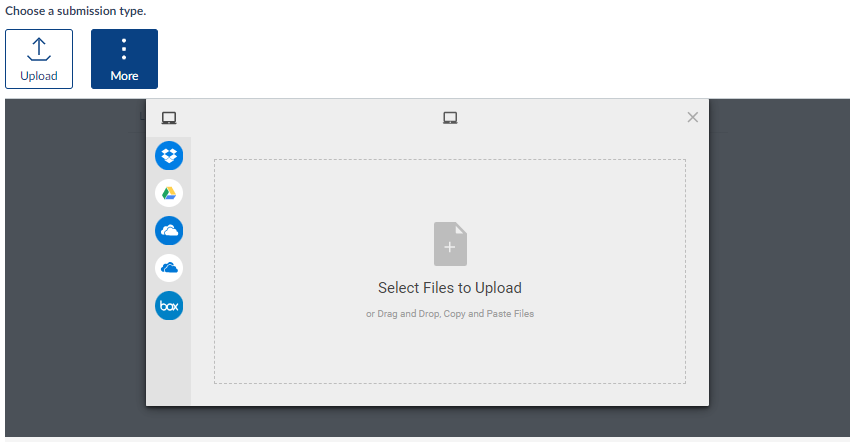
- A media selection dialog box will appear. Select the Upload Existing Media tab, then click Select Files to Upload.
If you need to edit your media before submission, please visit this EchoVideo guide on uploading media into EchoVideo.
- Follow the options to find and select your video file to upload to your EchoVideo library. When ready, click Upload.
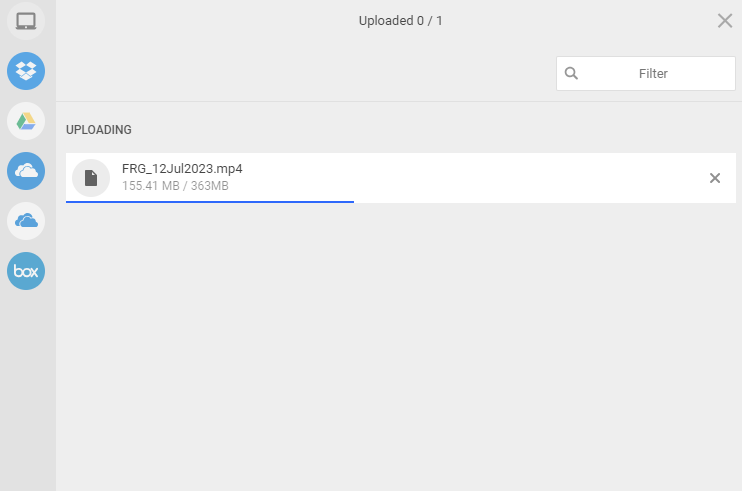
- Your upload progress will be tracked in the upload window. Do not close the submission window until the upload is complete.
- Once the file is uploaded, you will be returned to the media selection dialog box in the Library with the newly uploaded video selected by default.
The preview may not display a thumbnail; this is because the video is still being processed by EchoVideo. How long this takes is partially dependent on the size of the video.
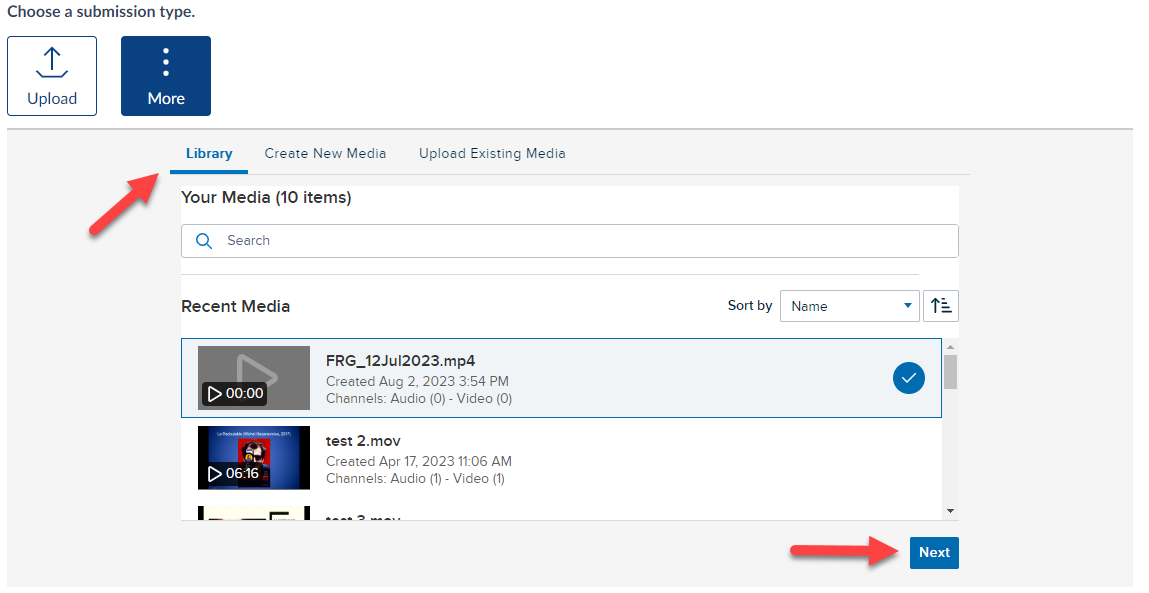
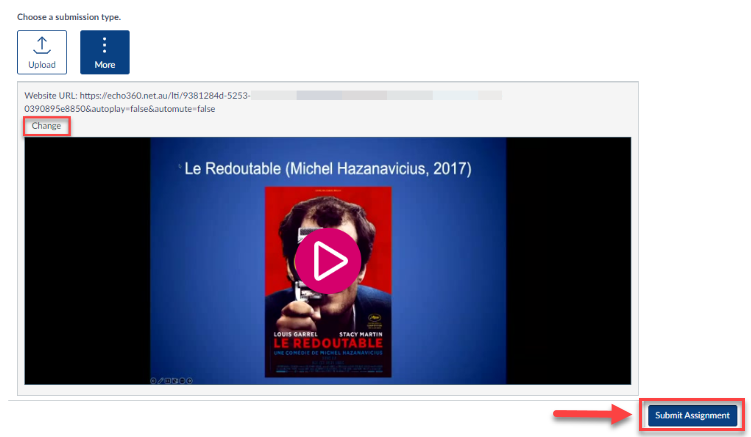
- Click Next to submit this video for the assignment. Your uploaded video will appear here as a URL to your video.
If you wish to upload a different video instead, click the Change button located to the right of the URL and you will be returned to the media selection panel.
- When finished, click Submit Assignment.
IMPORTANT: Once a video is submitted for an assignment, it is locked in EchoVideo. You cannot edit or delete the video. You can make a copy of it if you need an editable version.
Review your submission
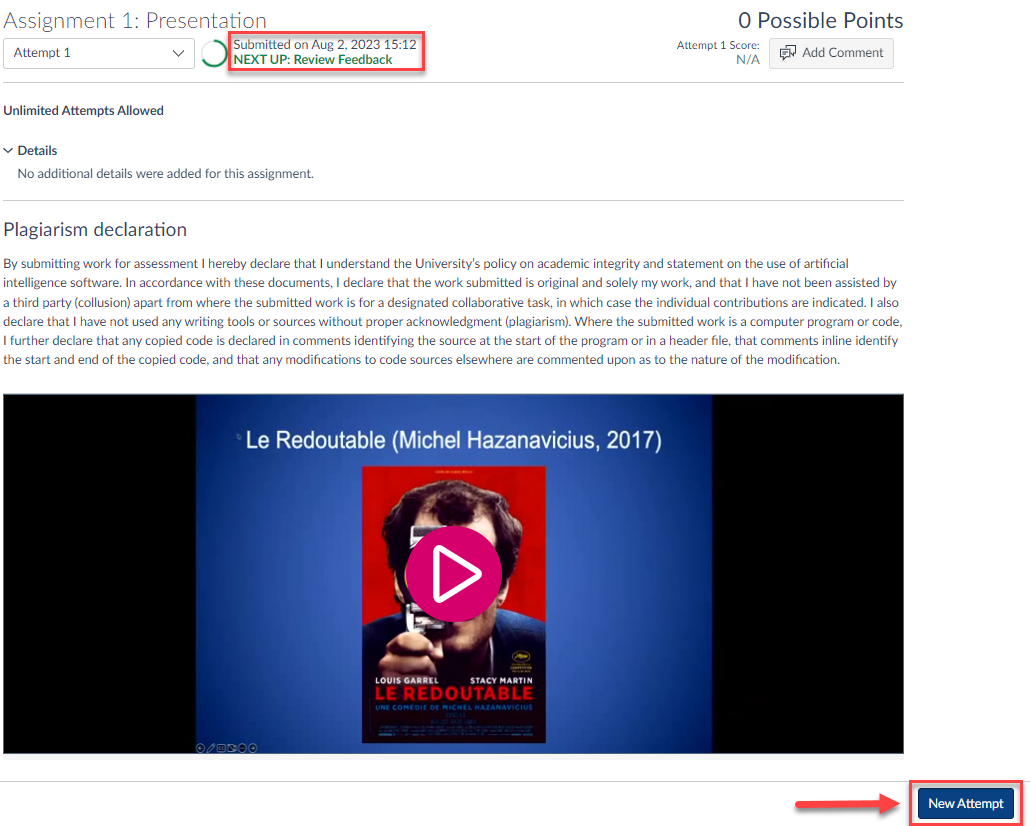
After submission, you can review your video from the Assignment page to check that you have submitted the correct file. Alternatively, you can submit a New Attempt (if the instructor has allowed more than one attempt).
This guide was last updated 11 Mar 2024.
Please report any errors or omissions in this guide by submitting an LMS support request.