Share your work in PebblePad
This guide will walk through the many options to share your assets in PebblePad. You may be required to share to collaborate with others, make your work publicly accessible and also for assessment to the ATLAS system for assignment grading by your teaching staff.
There are three key ways to share in PebblePad and this guide will cover the following topics:
- Share with others - to share with an individual, either another staff/student within the University, or another individual via their email address
- Share with the Web - generates a public link (URL) you can copy and distribute, anyone who has the link can access the asset
- Share with ATLAS - to submit an ATLAS assignment for assessment, grading or feedback purposes.
Share with others
- Open the PebblePad asset in edit mode. If you are in preview mode, please switch to edit mode.
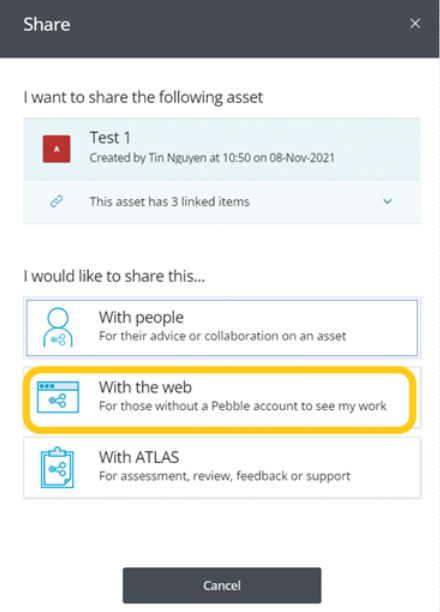
- Select the ‘I want to...’ button from the top right corner of the screen (next to the properties or ‘i’ icon) then choose ‘Share’.
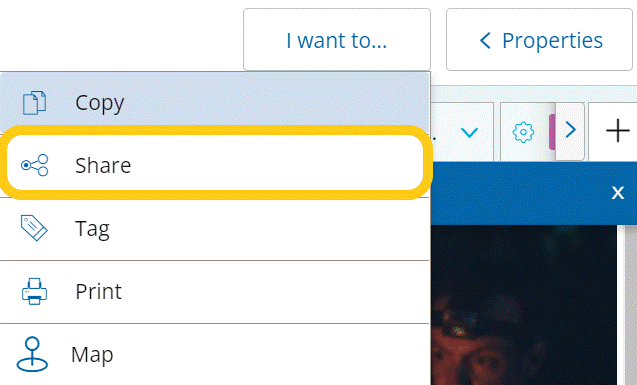 />
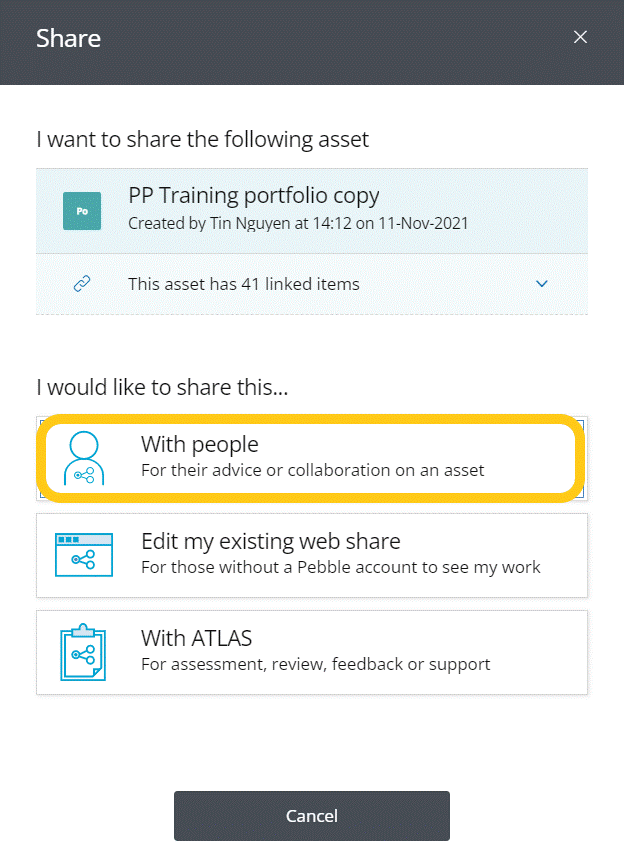
/> - Select the first option ‘With people’
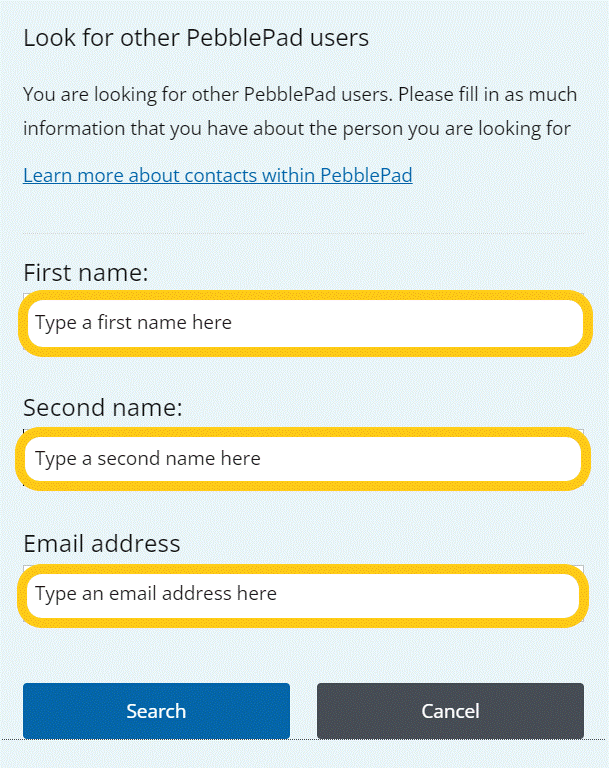
- Type in the user’s email address or full name to search up the person you would like to send the collaboration to.
- If you are struggling to find the person in PebblePad, you have two options:
- Option 1: Look for other PebblePad users
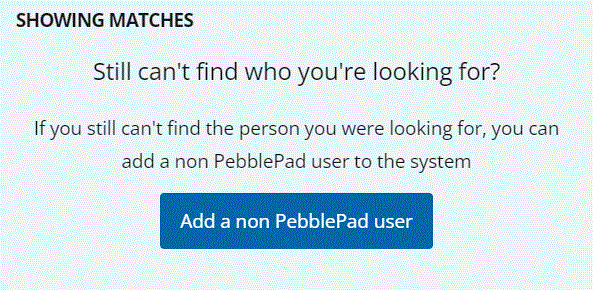
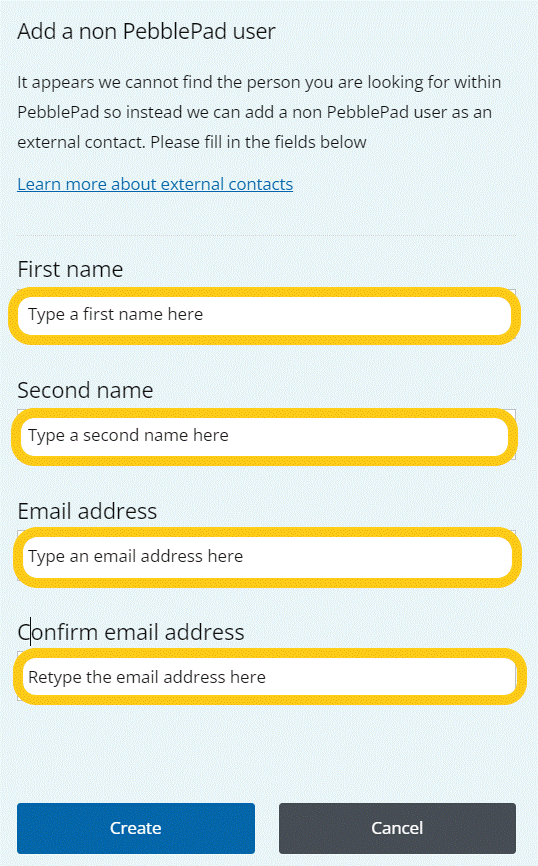
- Add a non PebblePad user
To look for an existing PebblePad user, please fill in the fields for First Name, Second Name, and unimelb email address.
If you are unable to find the person, you can add them as a non PebblePad user by filling in the same details once you select ‘Add a non PebblePad user’
- Tick the boxes based on how you would like the user to interact with the share collaboration:
- Allow recipients to leave a comment: Users will be able to provide a comment which will not be anonymous
- All recipients to take a copy: The asset you are sharing will be available to the person to be able to duplicate. You will still retain the ownership of the original asset.
- View for a specific amount of time: The asset will expire after the time period specified by you.
- Collaboration: This allows multiple people to work on the asset with the same edit rights. However, you will still have ownership of the asset. Note: only one person can work on the asset at a time.
- You can add a message that is sent to the recipient as part of the email from PebblePad.
- Select Close. PebblePad will send an email to the recipient with a link to the asset including any message you provided.
The user must already have a PebblePad account for them to access for a collaborations share. For any non-PebblePad users, please use the generic public share function. External users will be marked with ‘(External User)’ against their name.

Share with the Web
This option makes the asset public on the internet and generates link that you can provide to others.
- Open the PebblePad asset in edit mode.
- Select the ‘I want to...’ button from the top right corner of the screen (next to the properties or ‘i’ icon) then choose ‘Share’.
- From the list of share points, choose ‘With the web’.
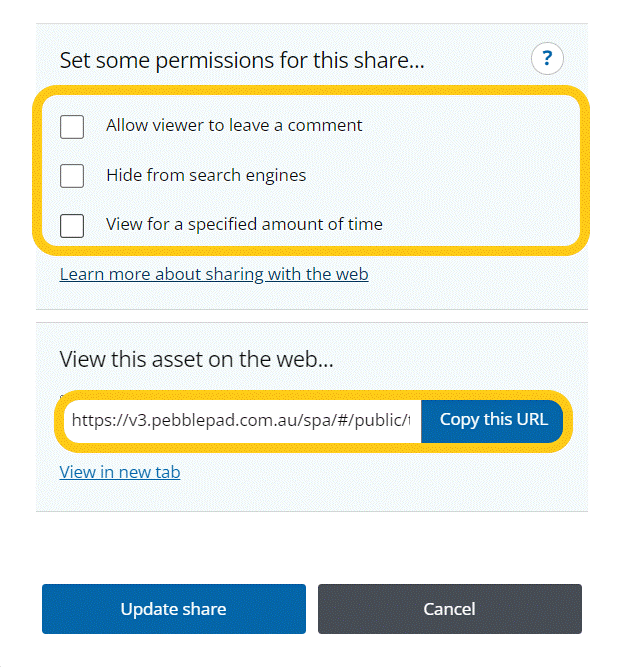
- You have three settings on how you would like to share your asset via a web link:
- Allow viewer to leave a comment (Note: the viewer will be anonymous when leaving a comment but you can delete these comments if you wish).
- Hide from search engines (recommend this is checked)
- View for a specified amount of time (set an expiry date for the share link, after this time it will no longer work).
Important: Sharing on the web means your PebblePad asset is a public web link and accessible and available to anyone with the link. Be cautious about what information you include within your asset and who you share the link with. Avoid including any highly personal information and ensure that any data of others is anonymised or you have permission/consent to use. Don’t forget copyright considerations.
Learn more about sharing with the web
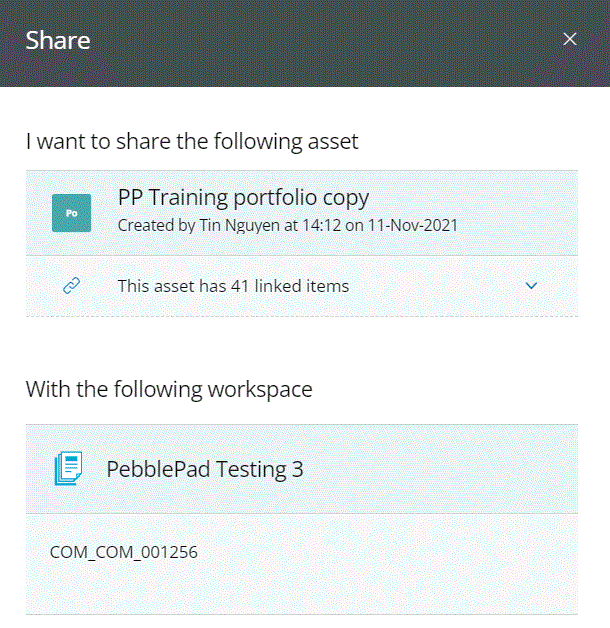
Share with ATLAS
Share with ATLAS is the method of submitting an assignment for grading.
- Open the PebblePad asset in edit mode. If you are in preview mode, please switch to edit mode.
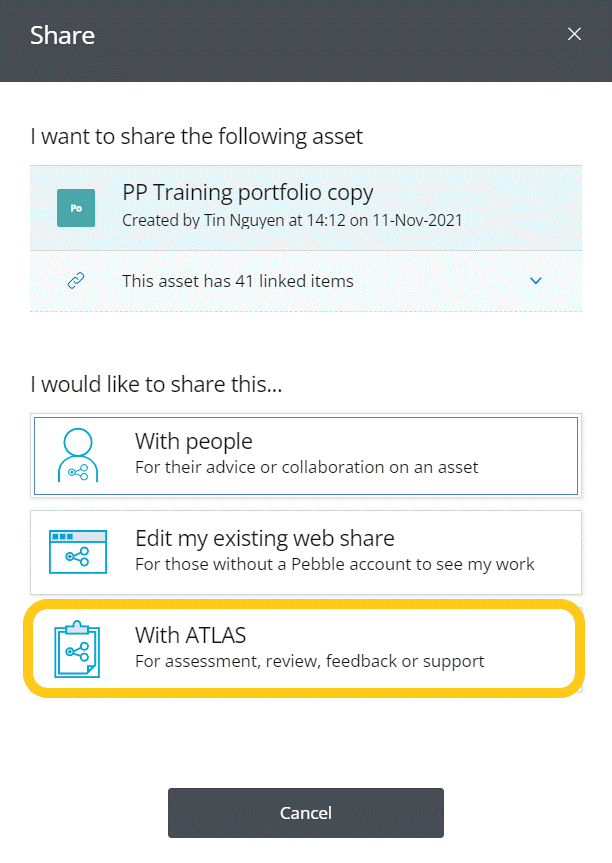
- Select the ‘I want to...’ button and choose ‘Share’
- Select ‘With ATLAS’.
You must have access to the subject ATLAS workspace to be able to share it with the right assignment.
- Select the subject you wish to share the asset to.
- Select the correct assignment you wish to share to submit the assignment.
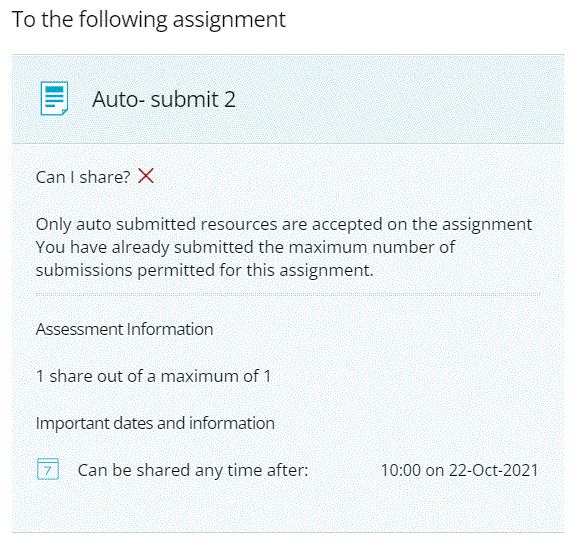
- There will be ticks for which assignments spaces you are able to share to.
- There will be crosses for the assignment spaces which you are unable to share to.
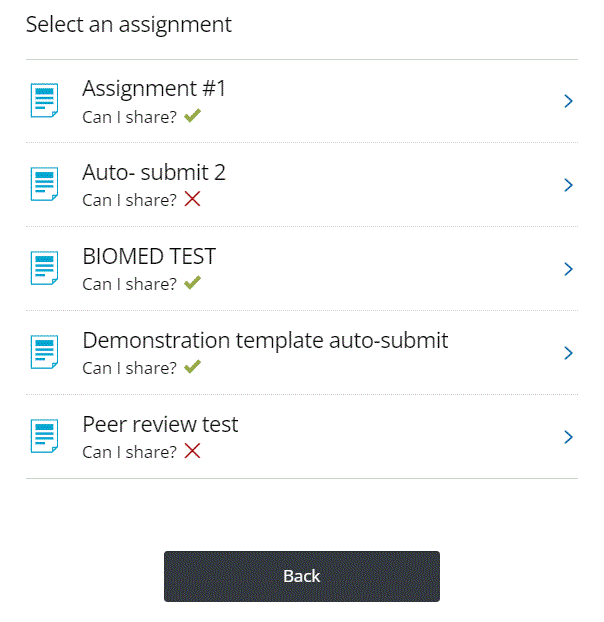
Based on the assessment settings, you may not be able to submit an assignment based on the following reasons:
- The asset is only accepting a specific type of asset (eg. Workbook, portfolio, activity log)
- The assignment is set to auto-submit where you have already submitted due to the automatic submission. The assignment does not allow for multiple submissions.
- The submission deadline window has passed (i.e it has been past the due date) and is not accepting late submissions.
If you experience difficulties locating or submitting to a workspace/assignment, contact your subject coordinator in the first instance. Refer also to the troubleshooting ATLAS submissions guide for further advice and common issues when submitting to ATLAS.
This guide was last updated 19 Jul 2023.
Please report any errors or omissions in this guide by submitting an LMS support request.