Grades and feedback in ATLAS
This guide is suitable for teaching staff who are using PebblePad ATLAS to assess student submissions.
This guide demonstrates the process involved for grading in ATLAS using Submission Viewer 2. We are phasing out support for Submission Viewer 1. If your view is different to the images here, please check that the assignment has been set up for Submission Viewer 2 (as listed in assignment settings) or contact Learning Environments for support. If you are using Submission Viewer 1 for a specific reason and require support for Submission Viewer 1 instead, please contact Learning Environments for assistance.
Before you start
Before staff can grade assessments in ATLAS, subject coordinators must ensure that:
- The correct ATLAS workspace is set up for the subject
- The assignment has been created via the LMS and imported into ATLAS.
- Teaching staff have the right permissions in ATLAS (Lead Tutor, Tutor or Moderator).
If you work through the following steps and encounter a problem, such as a missing assignment or missing options on your screen, check with the subject coordinator to make sure that the workspace, assessments, and permissions have all been set up.
Open the submission in ATLAS
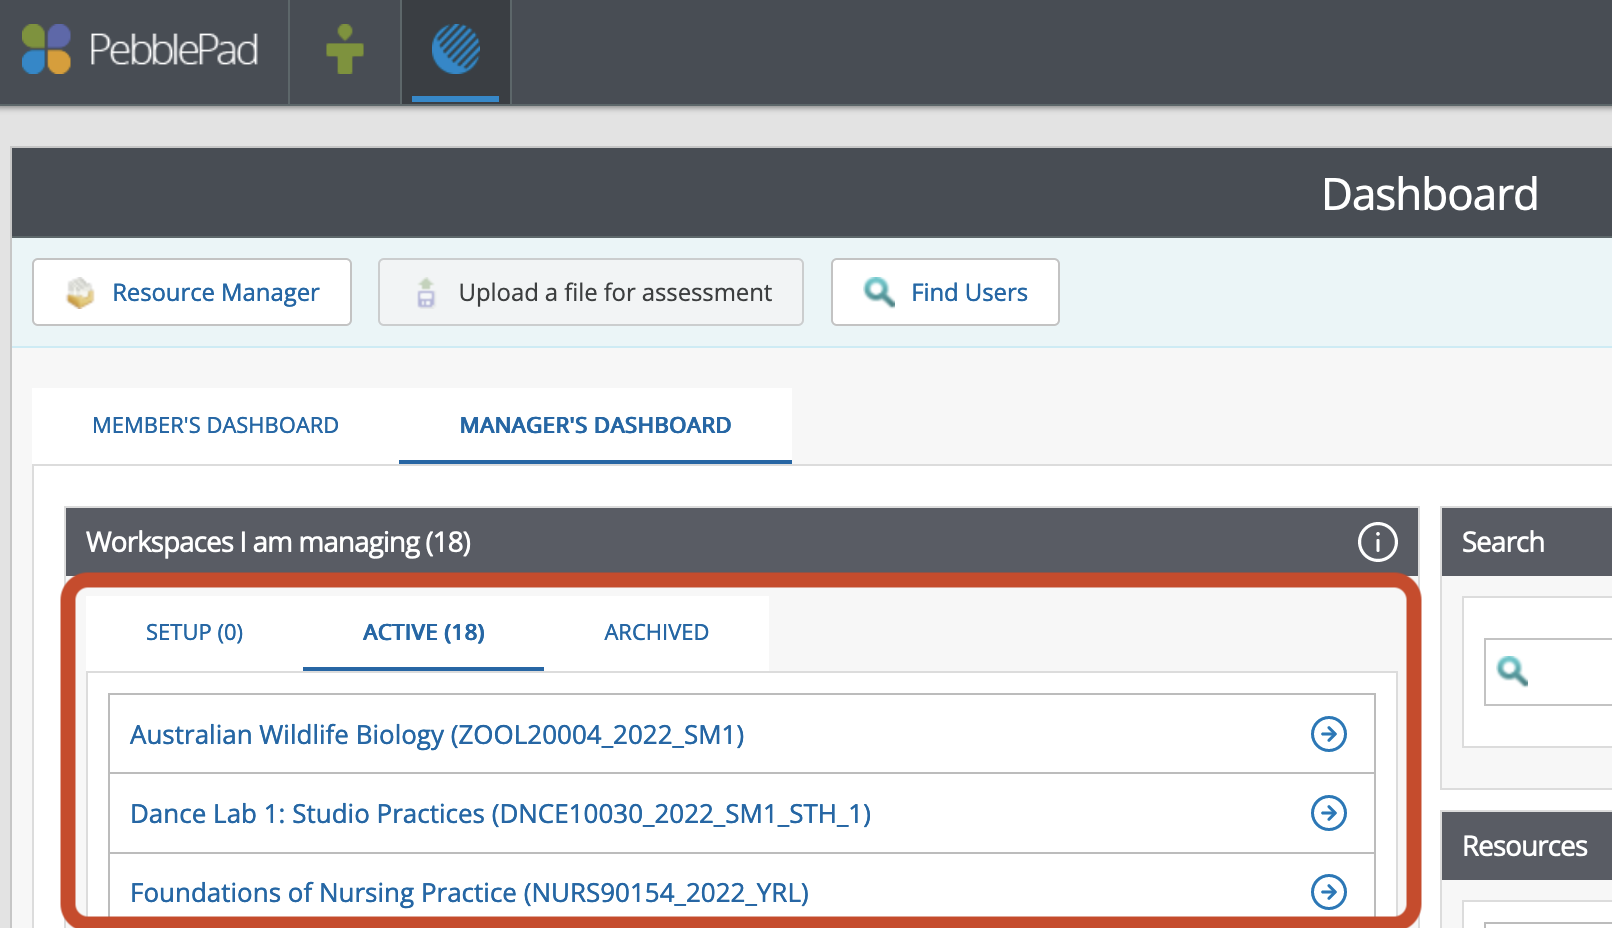
- Log in to PebblePad with your university login or access PebblePad via the PebblePad link in your LMS subject navigation.
Click on the ATLAS icon (the blue globe) in the top banner.

Open the ATLAS ‘workspace’ with the subject’s name and the current term.
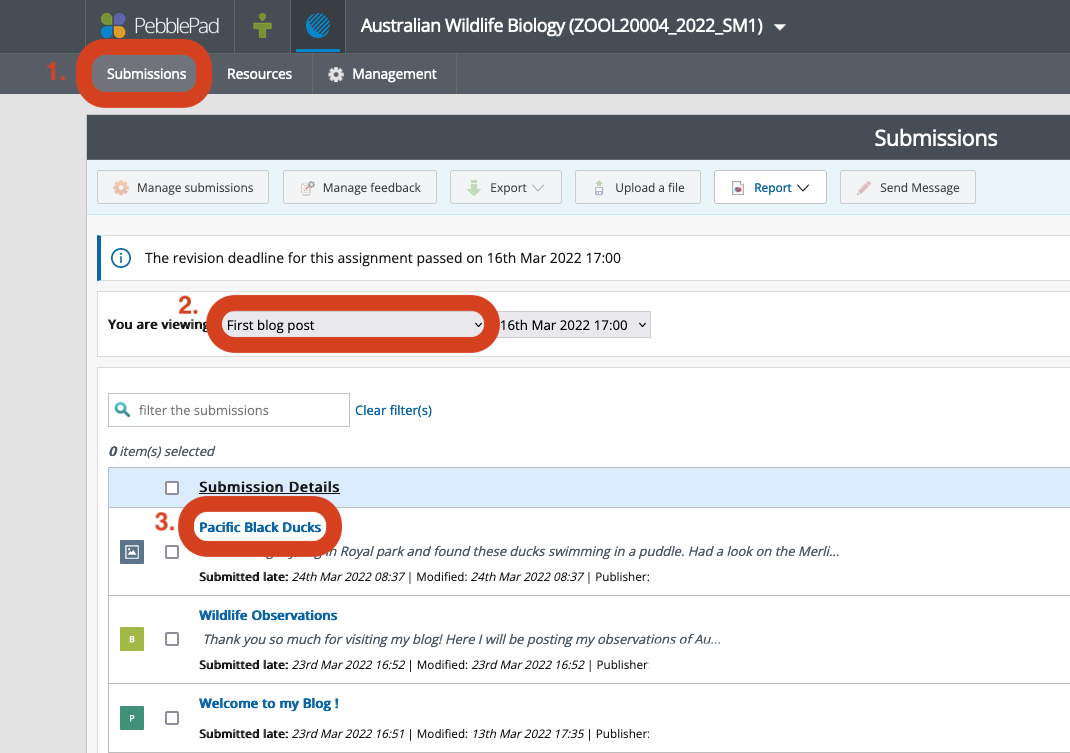
- In the menu, click on ‘Submissions’ (at top left).
In the dropdown, select the relevant assignment. If there is only one assignment, you may see the word ‘Live’ instead of an assignment name.
In the table, click on the submission you wish to grade. ATLAS will open a new tab for you to view and assess the submission.
Add grades and feedback
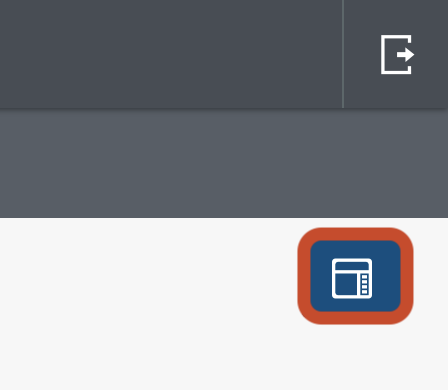
- In the new submission tab, click the ‘Open sidebar’ button (the blue button in the top right-hand corner) if needed.
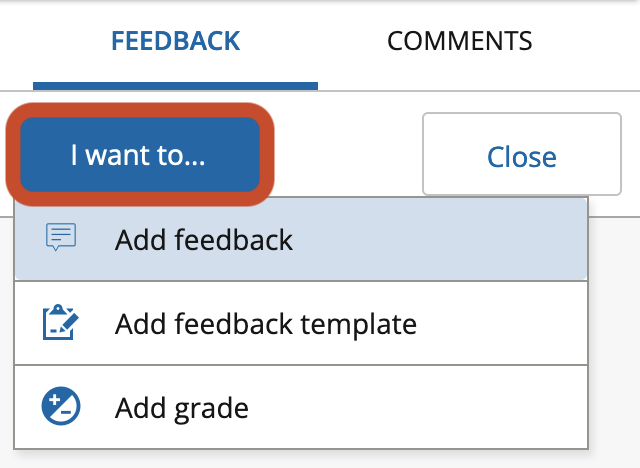
- To provide feedback, click ‘I want to…’ and select either:
- Add feedback, or
- Add feedback template.
Select ‘Add feedback’ if you wish to add comments. You can add comments to the overall submission, or to individual pages. A rich text editor is available to you, and you can add attachments as part of your feedback.
Select ‘Add feedback template’ if your subject coordinator has set up a feedback template. Subject coordinators often choose to set up feedback templates if the assessment uses a structured rubric. If you are a subject coordinator and you would like assistance in setting up a feedback template, contact Learning Environments.
Note: When the grades and feedback are released, grades will be copied to the LMS Gradebook, but feedback will remain in PebblePad only. For more information, see the PebblePad Comments and Feedback guide.
- To provide a numeric grade, click the ‘I want to…’ button and select ‘Add grade’.
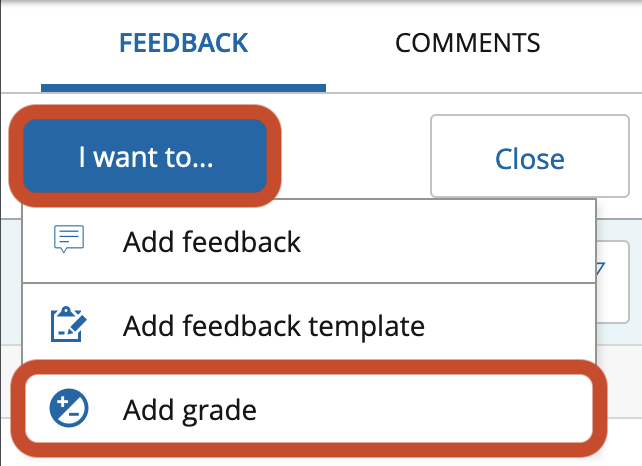
Note: The Add grade option can be turned on and off in the assignment settings. If you do not have Add grade available, the subject coordinator may have disabled this setting. Please check with the subject coordinator or contact Learning Environments if you require support in changing the assignment settings.
Add the overall numeric grade and click ‘Save & Hold’.
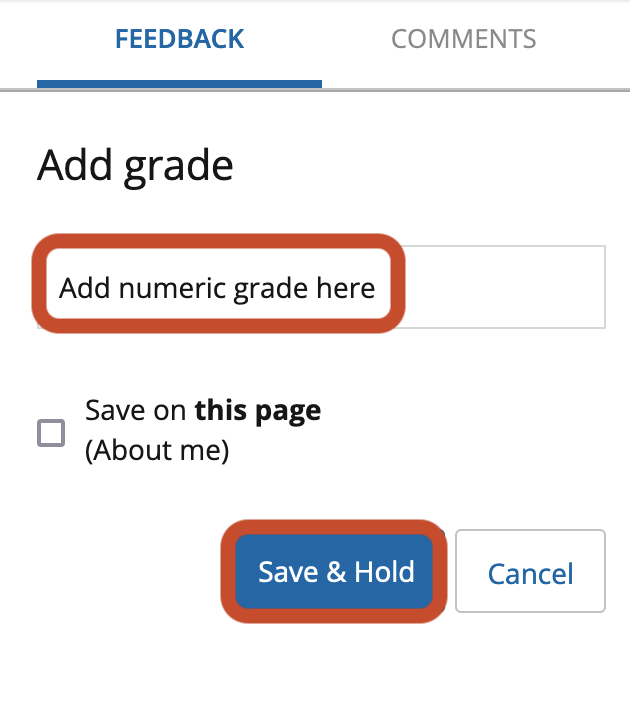
Usually, you will add the grade to the overall submission, not the individual page, so you will usually leave the ‘Save on this page’ tick box blank.
Note: Once the grades are released, the overall numeric grade in this field will be passed to the LMS Gradebook.
Grading pass/fail assignments
The process for grading pass/fail assignments is almost identical to the process for adding any other grade, with two minor differences:
- When you set up your Canvas Assignment, use the following settings:
- In the 'Points' field, enter 1 point.
- In the 'Display Grade as' dropdown, select 'Complete/Incomplete'.
- When you enter your grade in ATLAS, enter:
- Zero (0) for 'fail' or 'incomplete', and
- One (1) for 'pass' or 'complete'.
When you release the grades from ATLAS, Canvas will interpret a 0 as 'incomplete' and a 1 as 'complete', and display in Gradebook accordingly. Place the Assignment in an Assignment Group worth 0% if you don’t want the 1-point assignment to affect students’ overall grade average.
Release grades and feedback
If your subject is using the default ATLAS manager settings, then the Lead tutors (equivalent to Subject Coordinators in the LMS) have permissions to release grades and manage them for moderation purposes. Usually, other tutors can only save and hold their grades.
Note: In general, it is recommended to hold grades until all submissions have been graded and moderated as necessary. Follow the agreed process for your faculty, school, or subject.
If you are releasing grades for a cohort all at once, navigate back to the workspace in ATLAS.
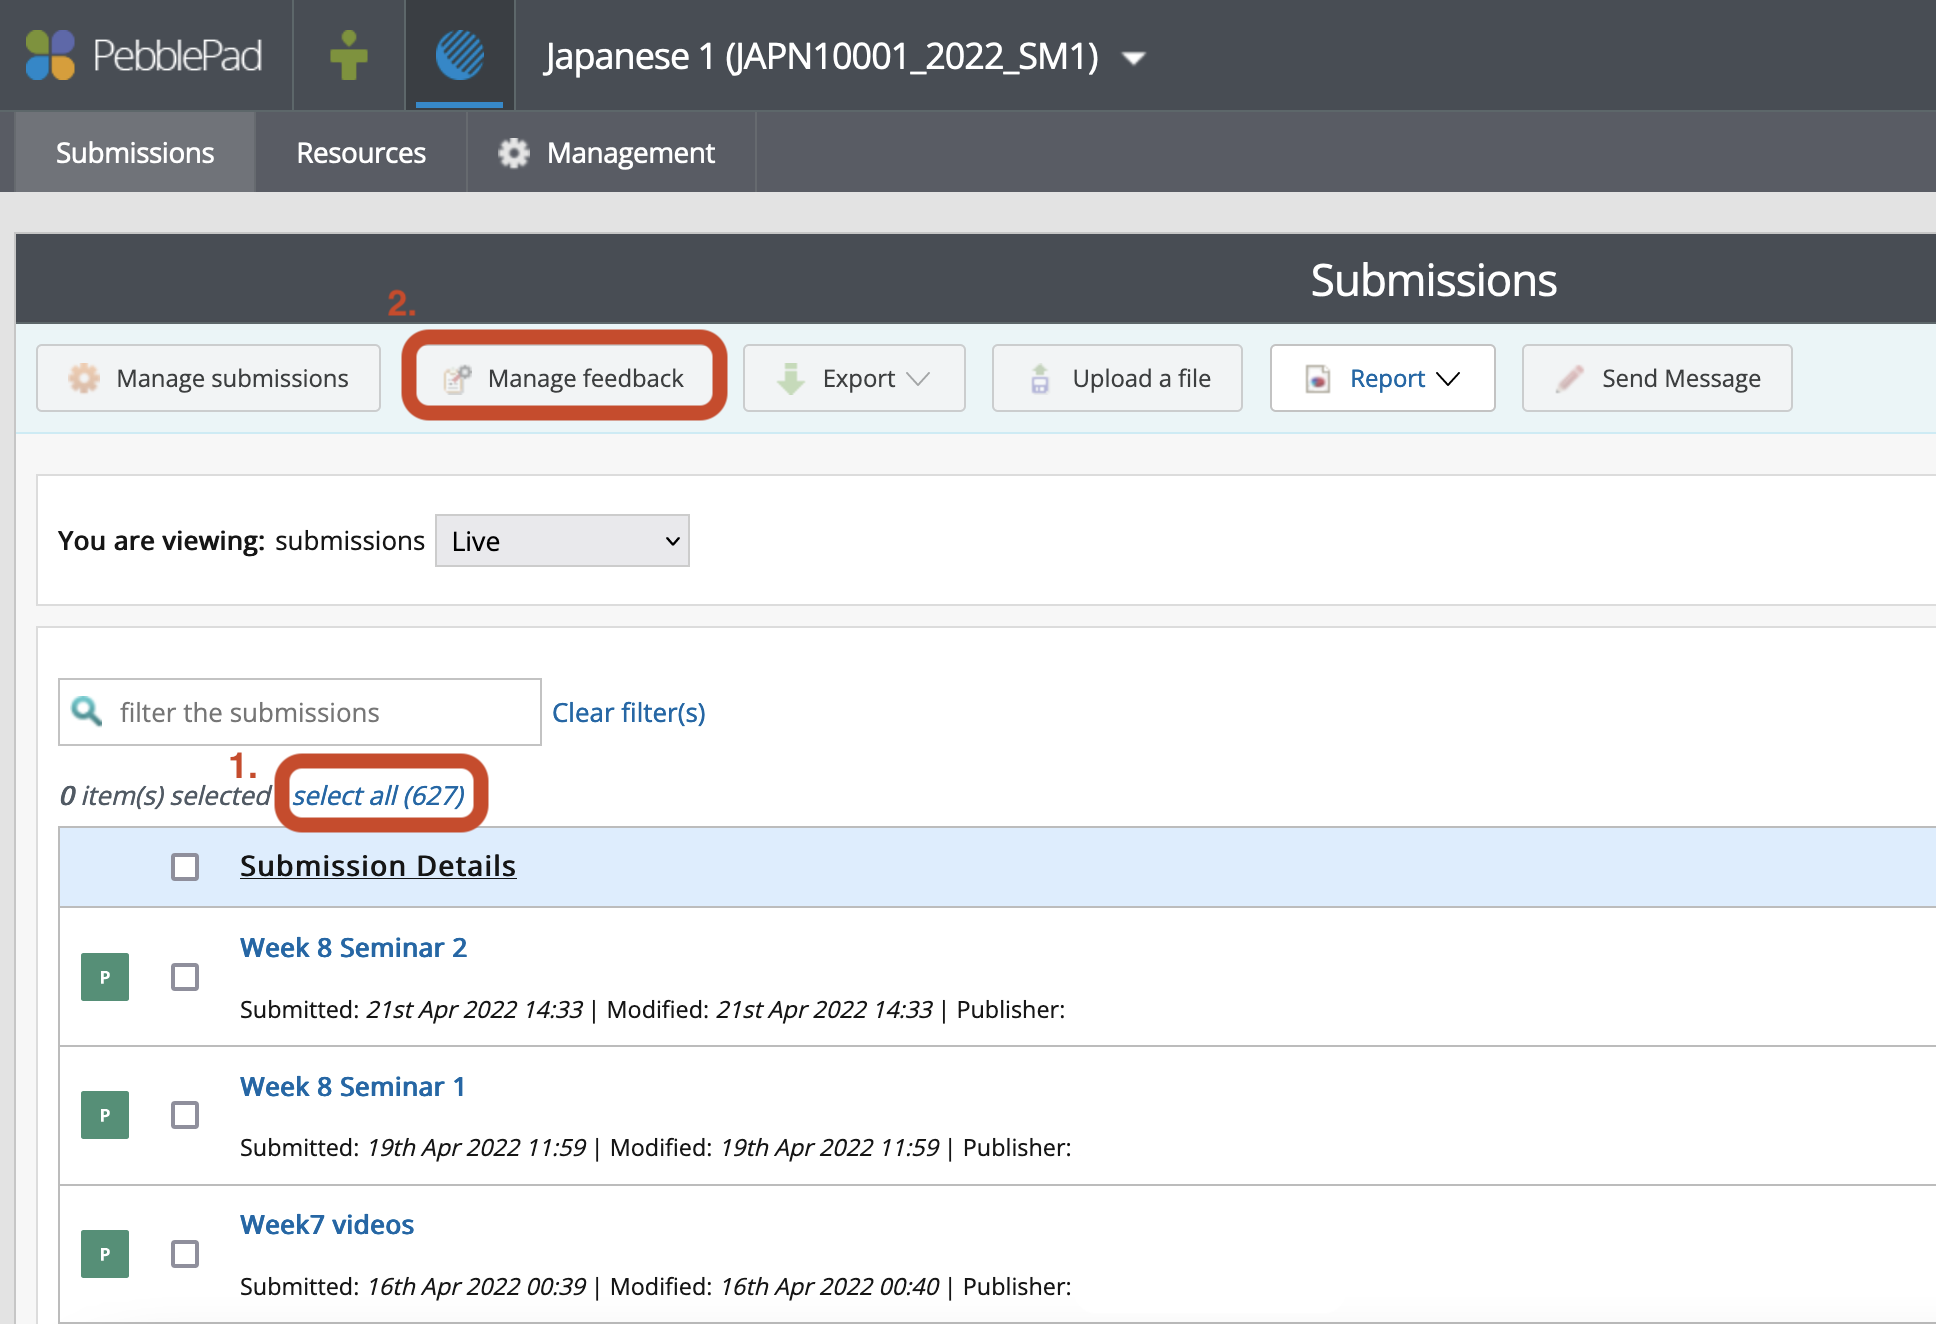
In the ‘Submissions’ tab, select all the submissions you wish to release, and then click 'Manage feedback'.
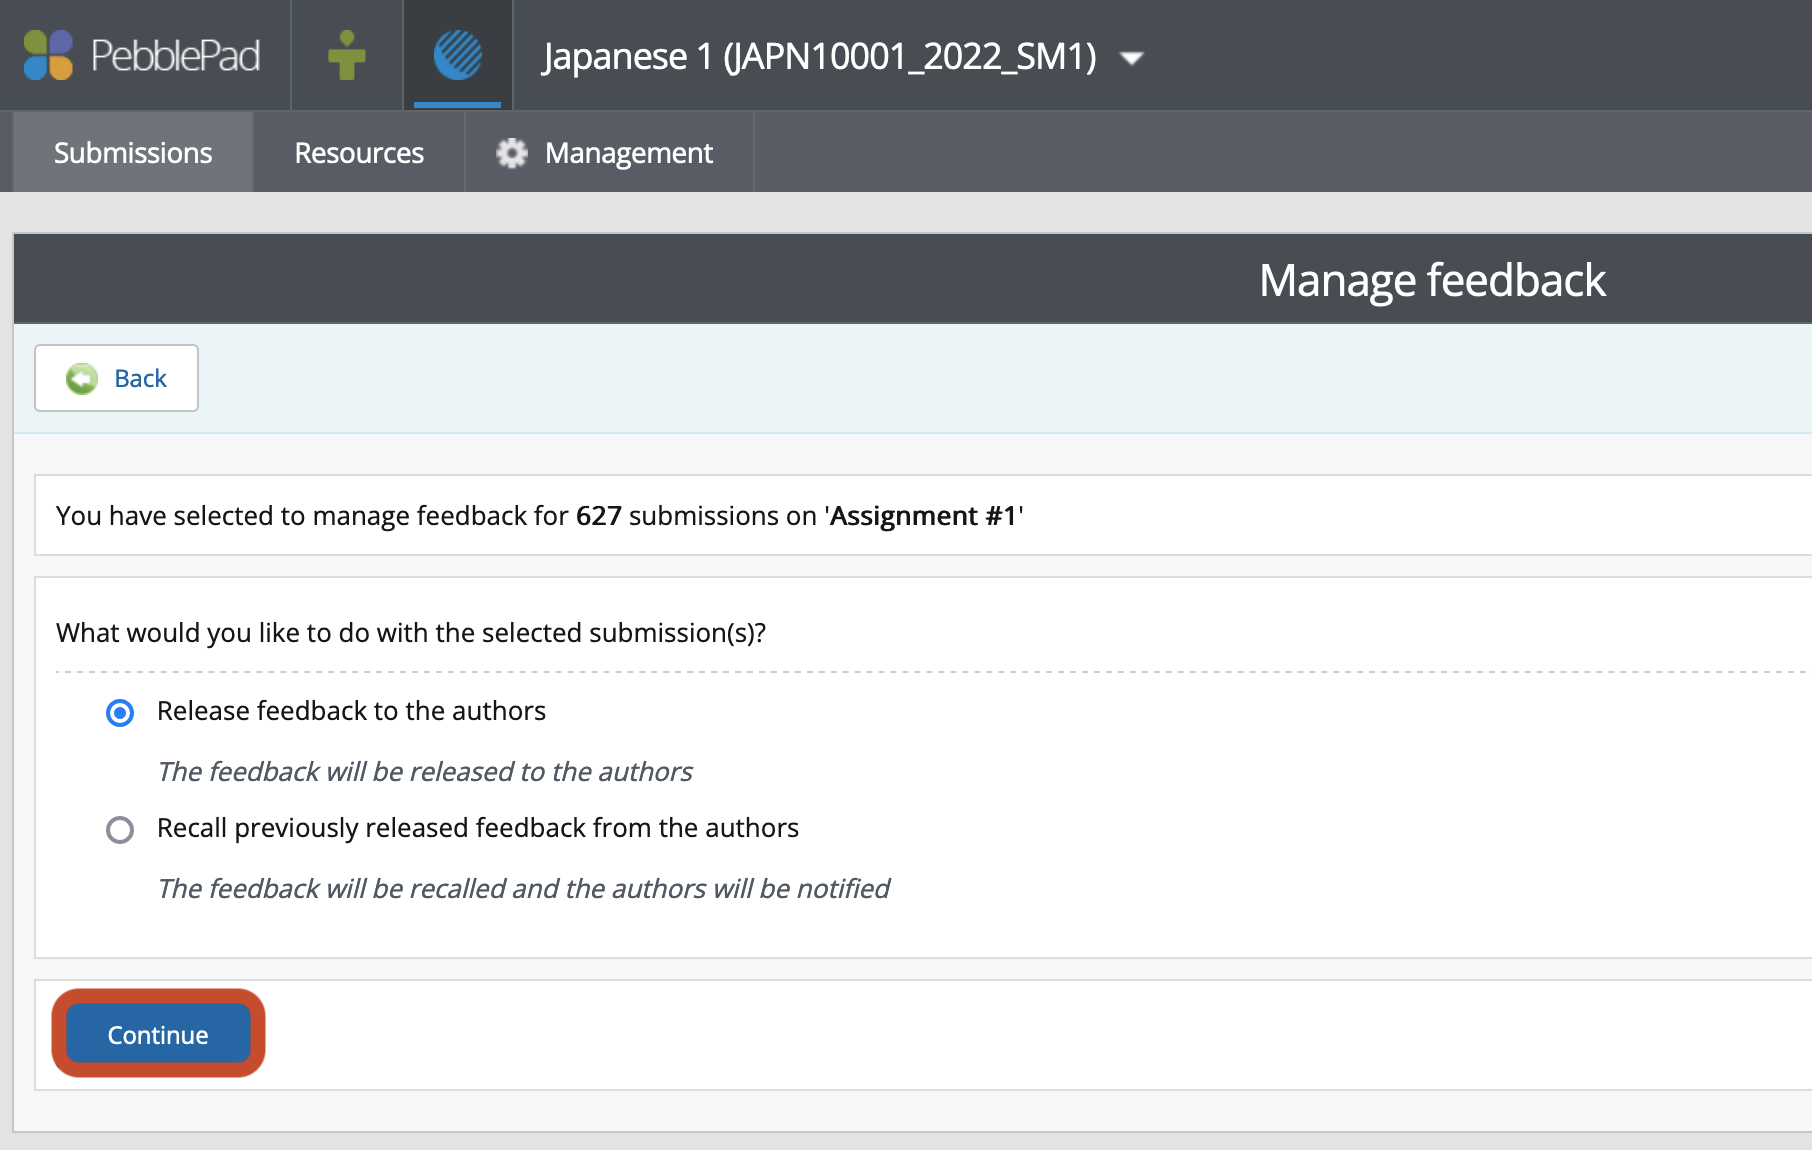
In the Manage feedback screen, the radio button for ‘Release feedback to authors’ should be pre-selected. Click ‘Continue’.
If feedback has been saved for those submissions, ATLAS will show the available feedback to release. Select the feedback you wish to release – in the example below, there are grades and feedback comments – and then click ‘Release feedback’.
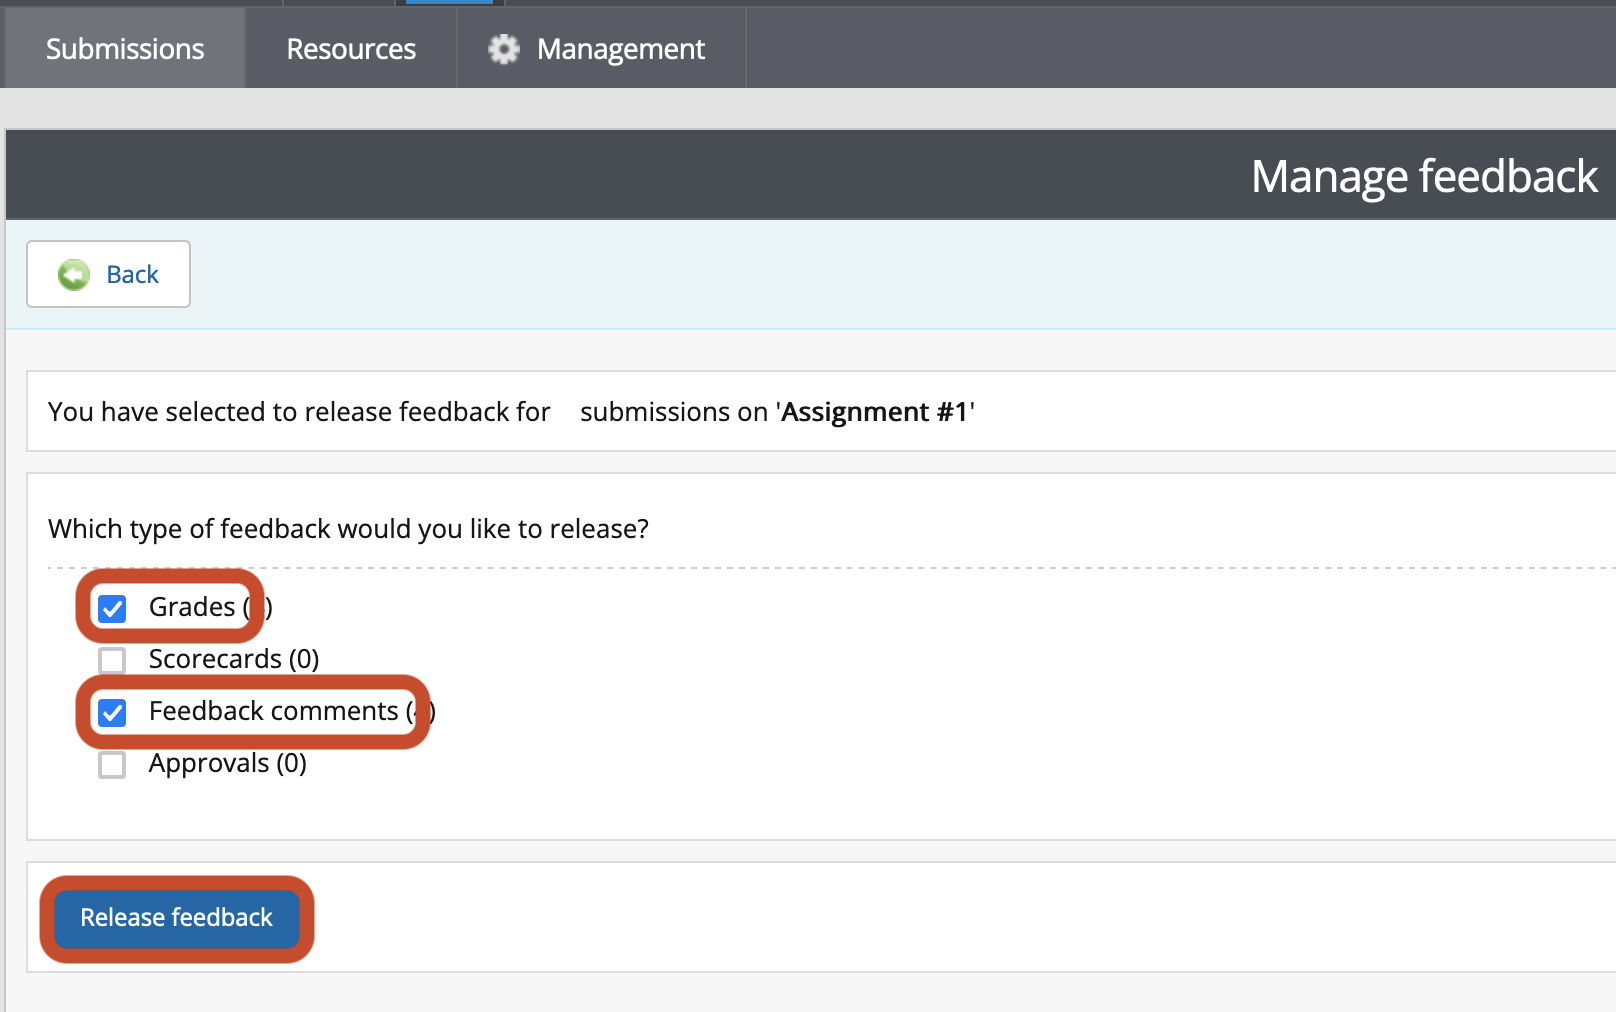
Note: Grades will be copied to the LMS Gradebook. Feedback comments, Scorecards and Approvals will be available for students to view, but it will remain in PebblePad only.
FAQs
-
How will students access the grades and feedback comments?
Once grades have been released, students will receive an automated email from PebblePad with the link to the asset to view the grades and feedback via the PebblePad Asset Store. Students can also view the numeric grade in the LMS Gradebook.
Note: Feedback comments will not be transferred to the LMS and are only viewable in PebblePad. Students will not be able to delete any feedback comments attached to their assets.
-
Can I have a 'comment bank' for commonly used feedback?
Yes! PebblePad refer to this function as Feedback statements. You can only create Feedback statements inside an ATLAS workspace, but it is easy to copy them from one workspace to another.
-
Is it possible to release grades for individual students?
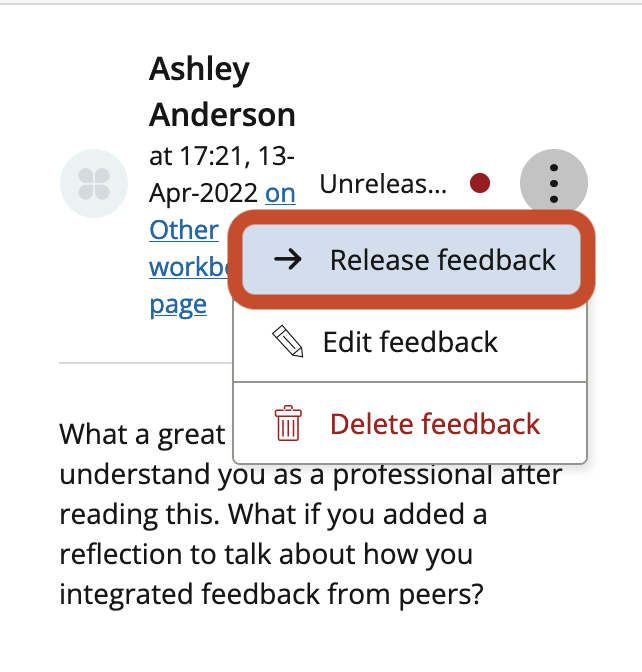
Yes, as long as you have permission to release grades. In the feedback sidebar, click on the Options menu (the three dots) and select ‘Release feedback’ or ‘Release grade’ as appropriate.
This guide was last updated 08 Feb 2023.
Please report any errors or omissions in this guide by submitting an LMS support request.