External User Tool: Managing external users in the LMS
As a staff member with the role of Subject Coordinator or Enroller in the LMS, you can add users who are not seeking academic credit to a subject, using the External User Tool. This tool is useful for staff members wishing to add a guest lecturer to a subject; or non-University of Melbourne users to a community of shared interest for communication and collaboration. External users are granted student-level access to materials within a given subject or community. Note: You cannot add internal users who have a @unimelb.edu.au or @student.unimelb.edu.au email address.
Using the external users tool to add a user to your subject or community will create a new LMS account for that user, with a username that begins with "ex." To view the subject or community, the external user must log into the LMS with their "ex.name" username and password via the LMS Alternative login link: https://canvas.lms.unimelb.edu.au/login/canvas
Note that opening your subject to non-university users is subject to copyright compliance. More information about copyright and educational purposes is on the Copyright Office website.
The following guide will step you through:
- How to add External User Tool to a subject or community.
- How to add external user(s) to a subject or community.
- How to manage External users.
Role type enrolment permission table
The External User Tool can only be used by the following role types in subjects and communities.
| Role type (authorised users) | Can enrol |
|---|---|
| Subject Coordinator |
|
| Instructor |
|
| Enroller |
|
Access validation
New users that are created with the External User Tool will be enrolled into the selected subject or community and will retain access to it for one year. You can extend access for a further six-month period. Refer to Extend Activation Period for instructions.
How to add the External User Tool to a subject or community
The process to add external users to subjects and communities is the same. Before you can use the External User Tool, you will need to add it to your Subject navigation menu.
- In your Subject go to the Settings area in the Subject navigation menu.
- Click the Navigation tab.

Navigation tab - There are 2 lists under the Navigation tab. Find the External User Tool and drag it from the bottom list to the top list.
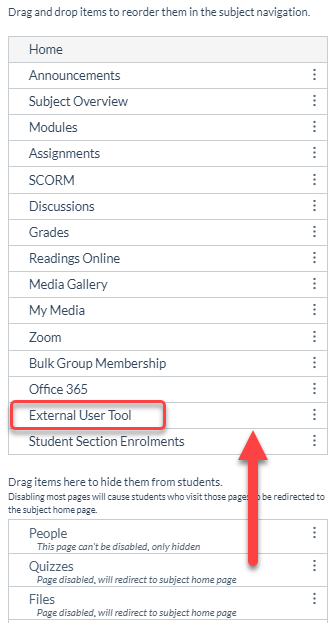
Subject navigation list - Click Save at the bottom of the page.The External User Tool has now been added to your Subject navigation menu.
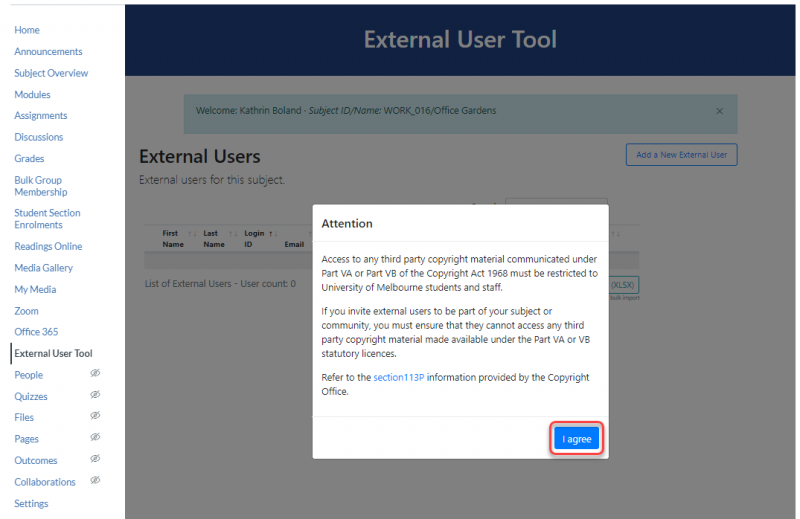
- When you use the External User Tool, you will be prompted to read a third-party copyright notice to which you will need to agree to before proceeding. Click I agree to continue.
How to add external user(s) to a subject
The External User Tool gives you two options to add external users to a subject. You can either add individual users or bulk upload multiple external users using the provided Excel template file.
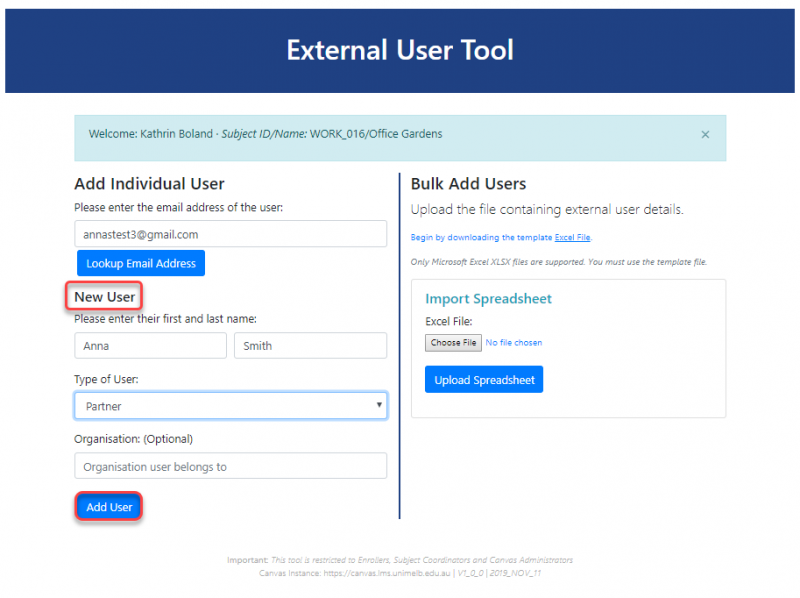
Add an individual external user
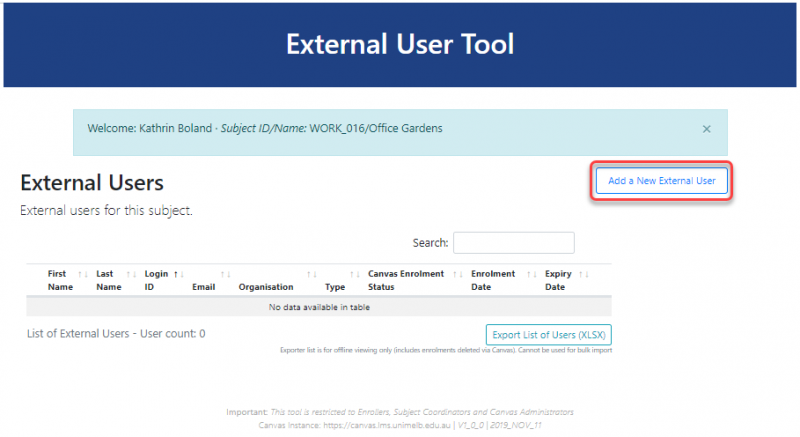
- In your Subject click External User Tool in the Subject navigation menu.
- Click Add a New External User.
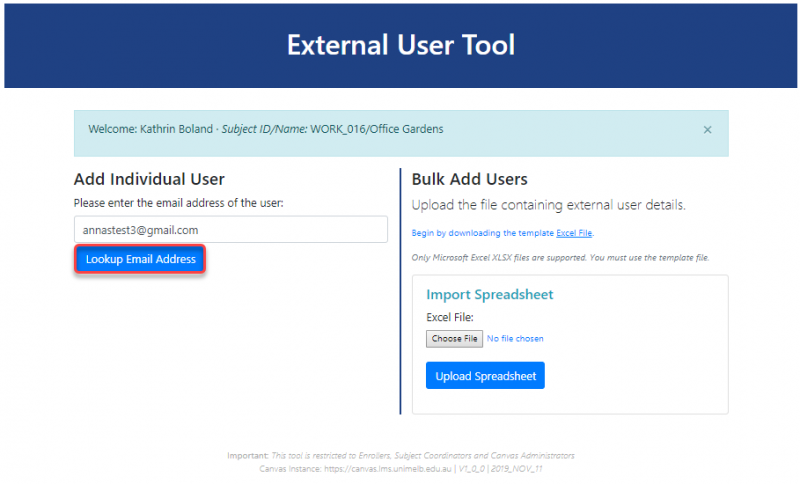
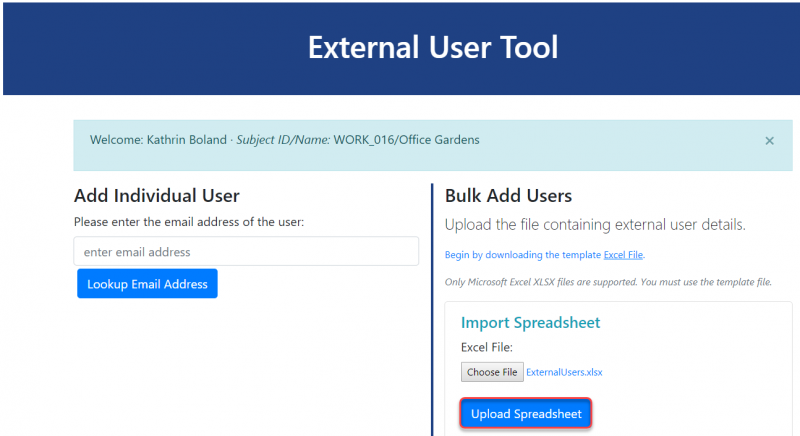
Add a new external user - In the Add Individual User section, enter the email address of the external user, then click Lookup Email Address.
External user email address - Enter New User details, then click Add User. This starts the new user account creation and enrolment process in the LMS.
- First Name
- Last Name
- Type of User (e.g. Partner, Alumni, Affiliate & Subsidiary, College Tutor)
- Organisation (optional)
New user details - A pop-up window appears informing you that the new user account has been created and enrolled. You can obtain the external username and the expiry date (1 year from enrolment). Click Close.
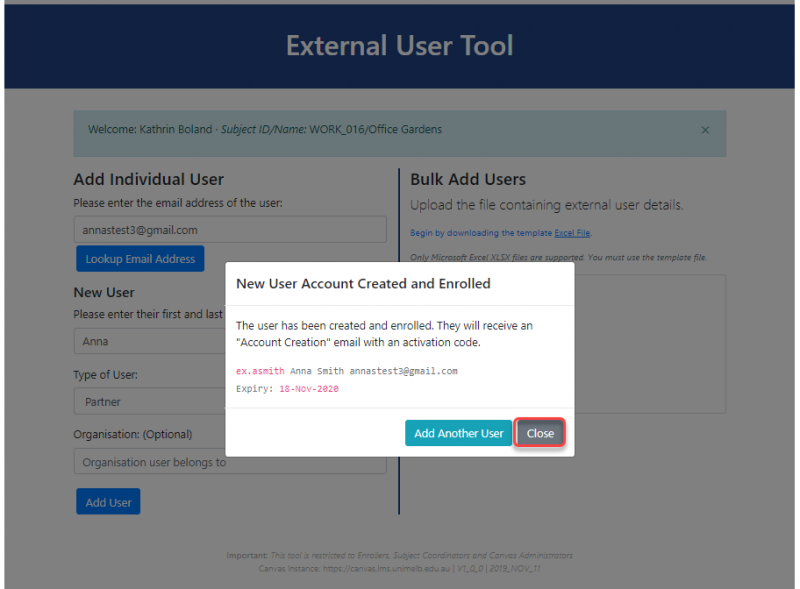
New user account created and enrolled This action will send a one-off account creation email with their username and an activation code to the newly added user. The new user will need to activate their Canvas account only once to have their Canvas account login created. This means for subsequent subject or community enrolments; they will receive a subject Enrolment confirmation email for each new subject or community they have been enrolled in.
- If you wish to add another user, click Add Another User and repeat steps 3 to 5.
- Once you completed the add individual user process, new users appear on the External Users screen.
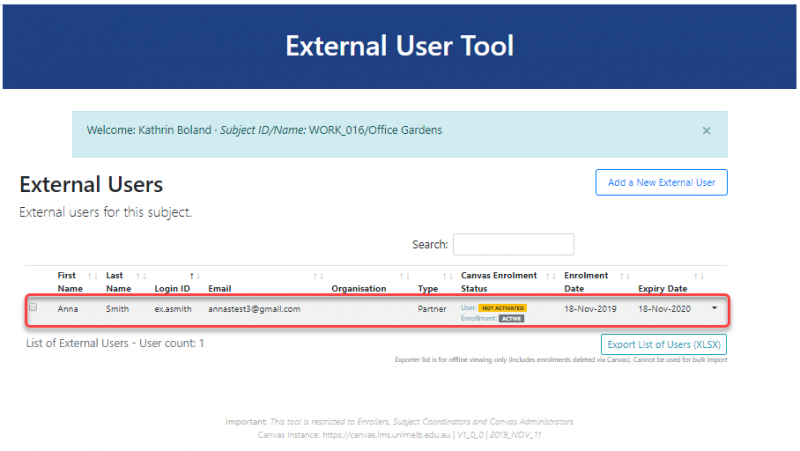
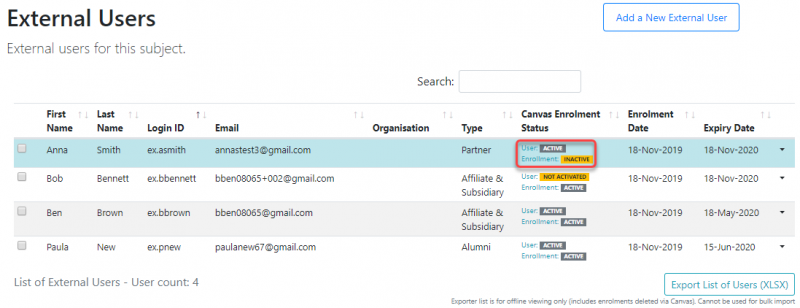
External Users Scenario 1
Added new user appears with User: NOT ACTIVATED. This means the user has received the account creation email, however, has not yet activated their LMS External User account.
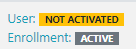
Canvas Enrolment Status before account activation Scenario 2
Added new user appears with User: ACTIVE. This mean the user has activated their LMS External User account and will be able to access the subject/community that they have been enrolled in.
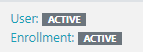
Canvas Enrolment Status after account activation - You can add the same external user to as many subjects and communities as required. When you add an already existing user to a subject or community via the Add Individual User option, the LMS notifies you upon clicking Lookup Email Address. An already existing external user in the LMS, will receive a subject enrolment email, confirming they have been granted access to a new subject.
Note: You cannot add the same user twice to a subject.

How to add external users in bulk
- Click Excel File link to download the template Excel file. The ExternalUsers.xlsx file downloads.
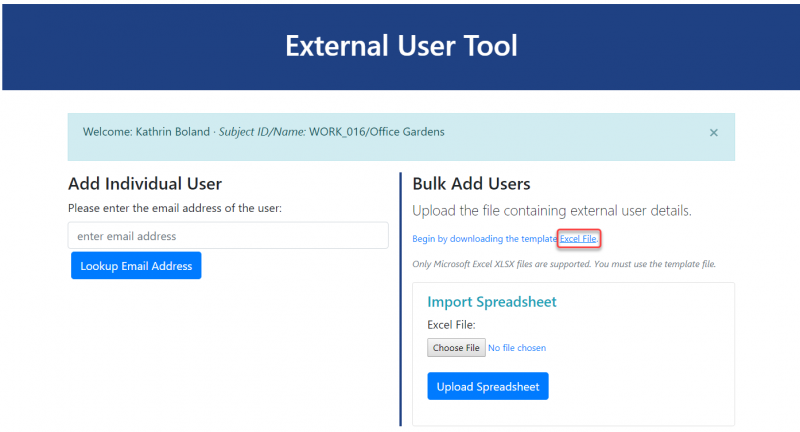
Download template excel file - Open the ExternalUsers.xlsx file and manually enter correct new user details. Ensure to also select User Type.

Enter new user details into ExternalUsers.xlsx file Important: In the spreadsheet you can select from all possible User Types regardless of your role and permission level in the LMS. If you accidentally selected a user type that is not linked to your role, e.g. you are a Subject Coordinator and accidentally selected ‘College Tutor’ as User Type, you will receive an error (image below) upon uploading the spreadsheet into the LMS. Follow Step 7 to correct the User Type.
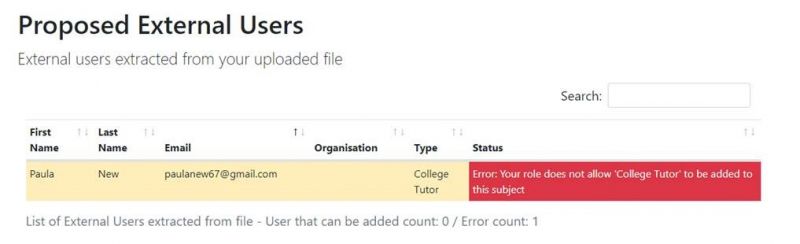
Error message upon uploading spreadsheet into the LMS. - Save the file to your desktop. Close the excel spreadsheet and return to the LMS.
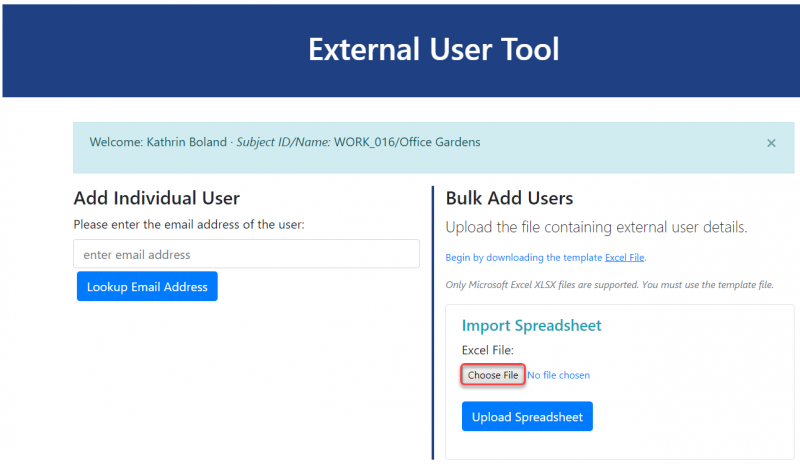
- Click Choose File and select the ExternalUsers.xlsx file from your desktop.
Choose file - Click Upload Spreadsheet.
Upload Spreadsheet - Review proposed external users, then click Save Changes.
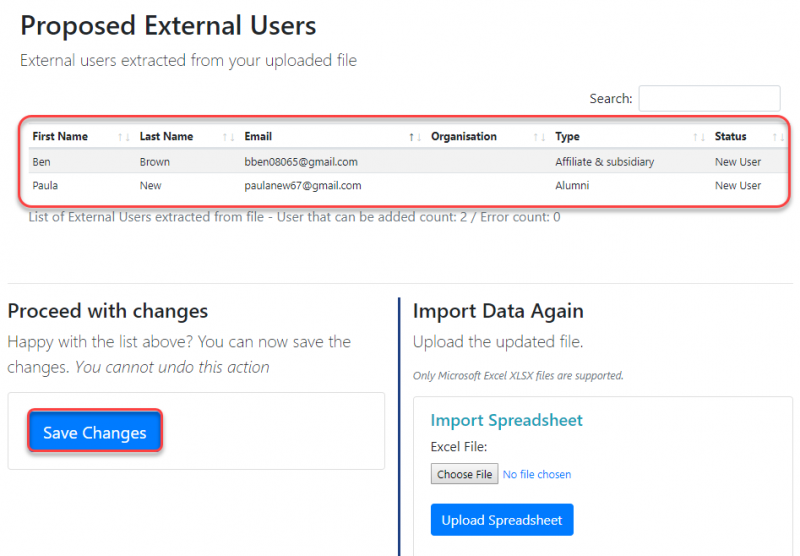
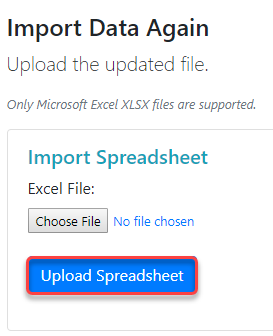
Proposed external users - To make changes to the proposed external users list (e.g. you received the error), you will need to open the ExternalUsers.xlsx on your desktop and save the changes as required. Then upload the updated spreadsheet in the Import Data Again section.
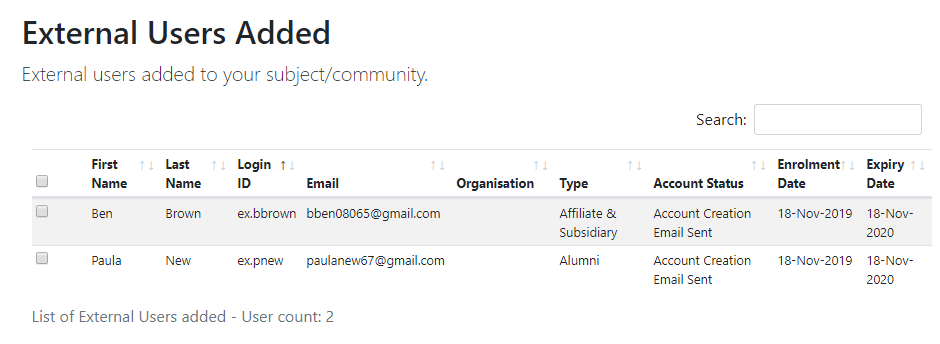
Import Data Again - Upon saving changes, external users are added to your subject or community.
How to manage external users
The External User Tool allows you to search and sort external user lists, manage activation periods, resend activation emails and deactivate users. You also have the option to export the external user list into an Excel file.
If the user activation is expired or is close to being expired, the activation status is represented with colouring:
- Red for expired
- Orange for 30 days to be expired
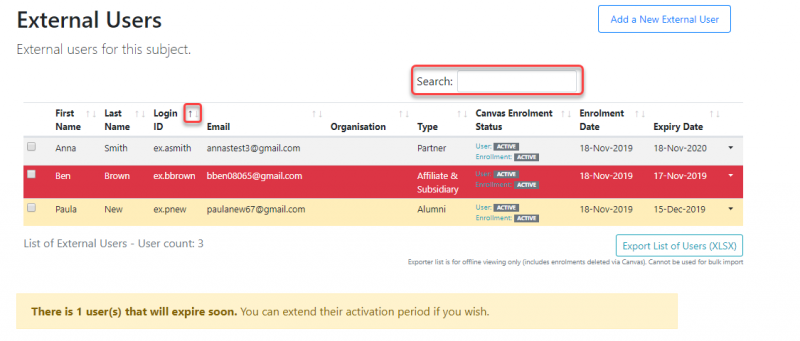
Search and sort external users
To find users quickly in an extensive list of external users, you may like to use the search functionality, or the arrows located on each column to sort.
Extend Activation Period
Extending the Activation Period, extends the access to the subject or community. User accounts do not expire, only enrolments.
- Go to External User Tool in your Subject navigation menu.
- Select the external user(s) you would like to extend their activation period.
- Click Extend Activation Email.

Extend Activation Period - A popup message appears to confirm the extended user activation. Click OK.
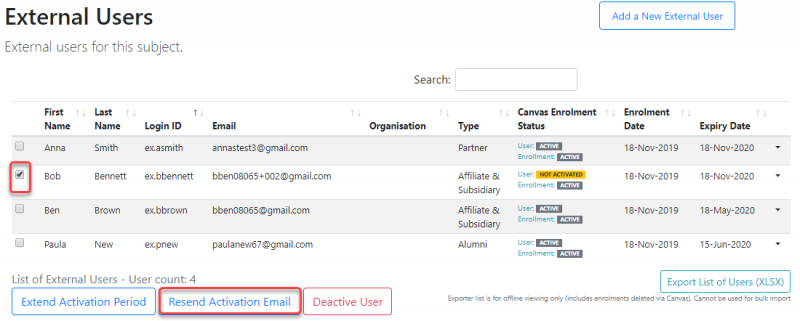
Resend Activation Email
Newly added users that appear as ‘not activated’ in the LMS enrolment status, might require a resend of the Activation email to create their LMS Account login. You may like to advise external users to also check their spam/junk folder.
- Go to External User Tool in your subject navigation menu.
- Select the external user(s) you would like to resend their activation email.
- Click Resend Activation Email.
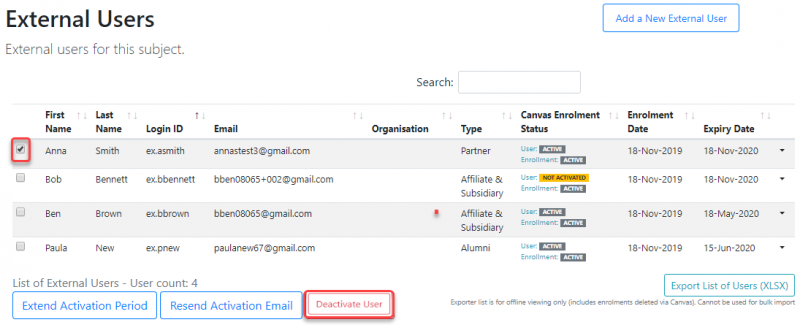
Deactivate User
Deactivating a user will remove the user only from that subject or community.
- Go to External User Tool in your subject navigation menu.
- Select the external user(s) you would like to deactivate.
- Click Deactivate User.
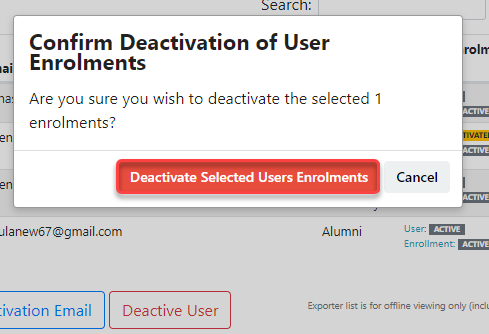
Deactivate User - A pop-up window asks you to confirm deactivation of user enrolments. If you are certain, click Deactivate Selected Users Enrolments, otherwise click Cancel to stop the process.
Confirm deactivation of user enrolments - A pop-up window confirms the user enrolments are now inactive. Click OK.
- The deactivated user now appears with the Enrolment Status: Inactive.
This guide was last updated 24 May 2022.
Please report any errors or omissions in this guide by submitting an LMS support request.