Record a video interview using Zoom and upload to Lecture Capture
Zoom can be used to record interactive sessions such as interviews or other activities with more than one participant. The recording can capture video of each/all participant/s on the screen at the same time.
Before beginning to record, you need to tick a setting to 'Record gallery view with shared screen' to ensure that all participants will appear on the screen in the recording. To access this setting:
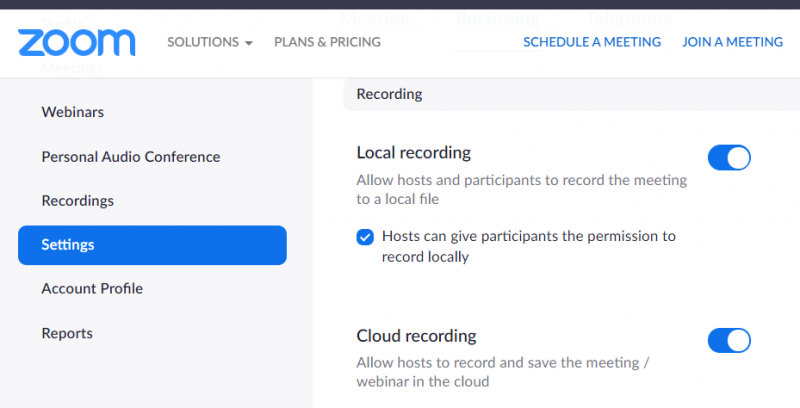
- Go to the University of Melbourne Zoom conferencing portal and log in.
- Click Settings in the left hand menu.
- Click Recording in the menu at the top of the screen.
- Tick the box with the setting Record gallery view with shared screen.
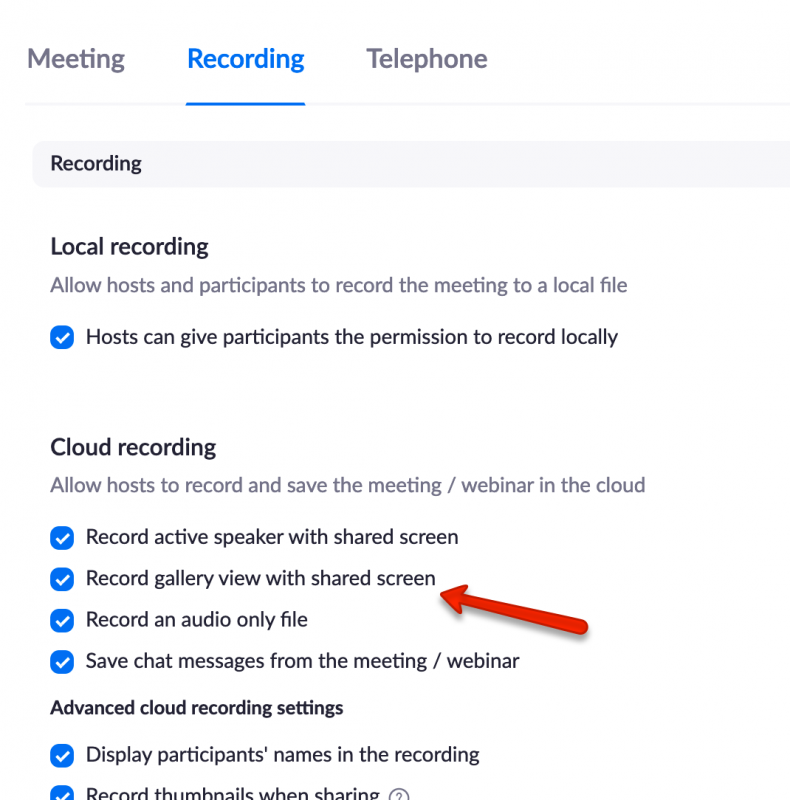
All participants will now be shown on the screen when you record your Zoom session.
Recording your session to the Cloud
You can either set up your webinar to record automatically, or you can press record when you are in session.
We recommend you record to the Cloud.
You need to pre-tick this option in your Zoom account settings (you only need to do this once).
You can access your Zoom account at Zoom.us/signin.
You can check your Settings > Recording tab to make sure Cloud Recordings is enabled. See the the for your own use section of the Cloud Recordings page.
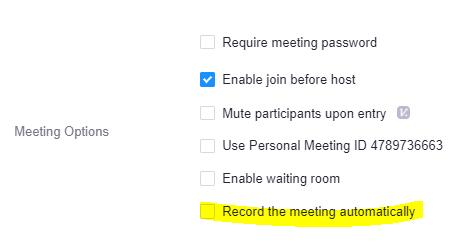
Option 1: Recording automatically
When you are scheduling your meeting, tick Record the meeting automatically.
Option 2: Recording during session
Once you open your Zoom meeting you can press Record. We recommend recording to the Cloud.
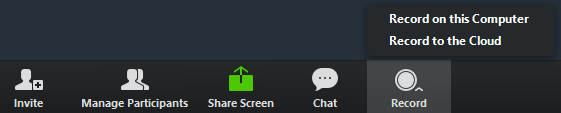
You can also pause and stop recording during the session.
Making the recording available to students in Lecture Capture to download and watch
If you have chosen to record your session to the cloud, you will be emailed a link to your recording (video file, audio file, and Chat stream text file) within a few minutes. To share the video file with students:
- Download the file you were emailed.
- Log in to Lecture Capture.
- Upload your video.
- Go to My Content where you will see your video.
- Open the video and use the Share icon to add the video to your Class (subject).

The video will now appear in the Lecture Capture link of your subject where students can download it and watch. The benefit of this method as opposed to embedding the video in a page is that students will be able to download the file in full and watch it afterwards, and thereby avoid any viewing issues caused by low or interrupted bandwidth.
If you need assistance with making the video file available to students for download, please submit a support request.
Supporting resources
For recommended hardware and software, see video and audio - recording, editing and uploading.
See the Learning Environments web page on advice for online and flexible learning for detailed information and supporting resources.
- Lecture recordings and videos
- Difficulties with YouTube and Vimeo
- Self-recording videos and podcasts
- Transferring content from third-party tools to the LMS.
This guide was last updated 12 Mar 2024.
Please report any errors or omissions in this guide by submitting an LMS support request.